Installation
There are 2 ways to install the plugin:
Install via Marketplace
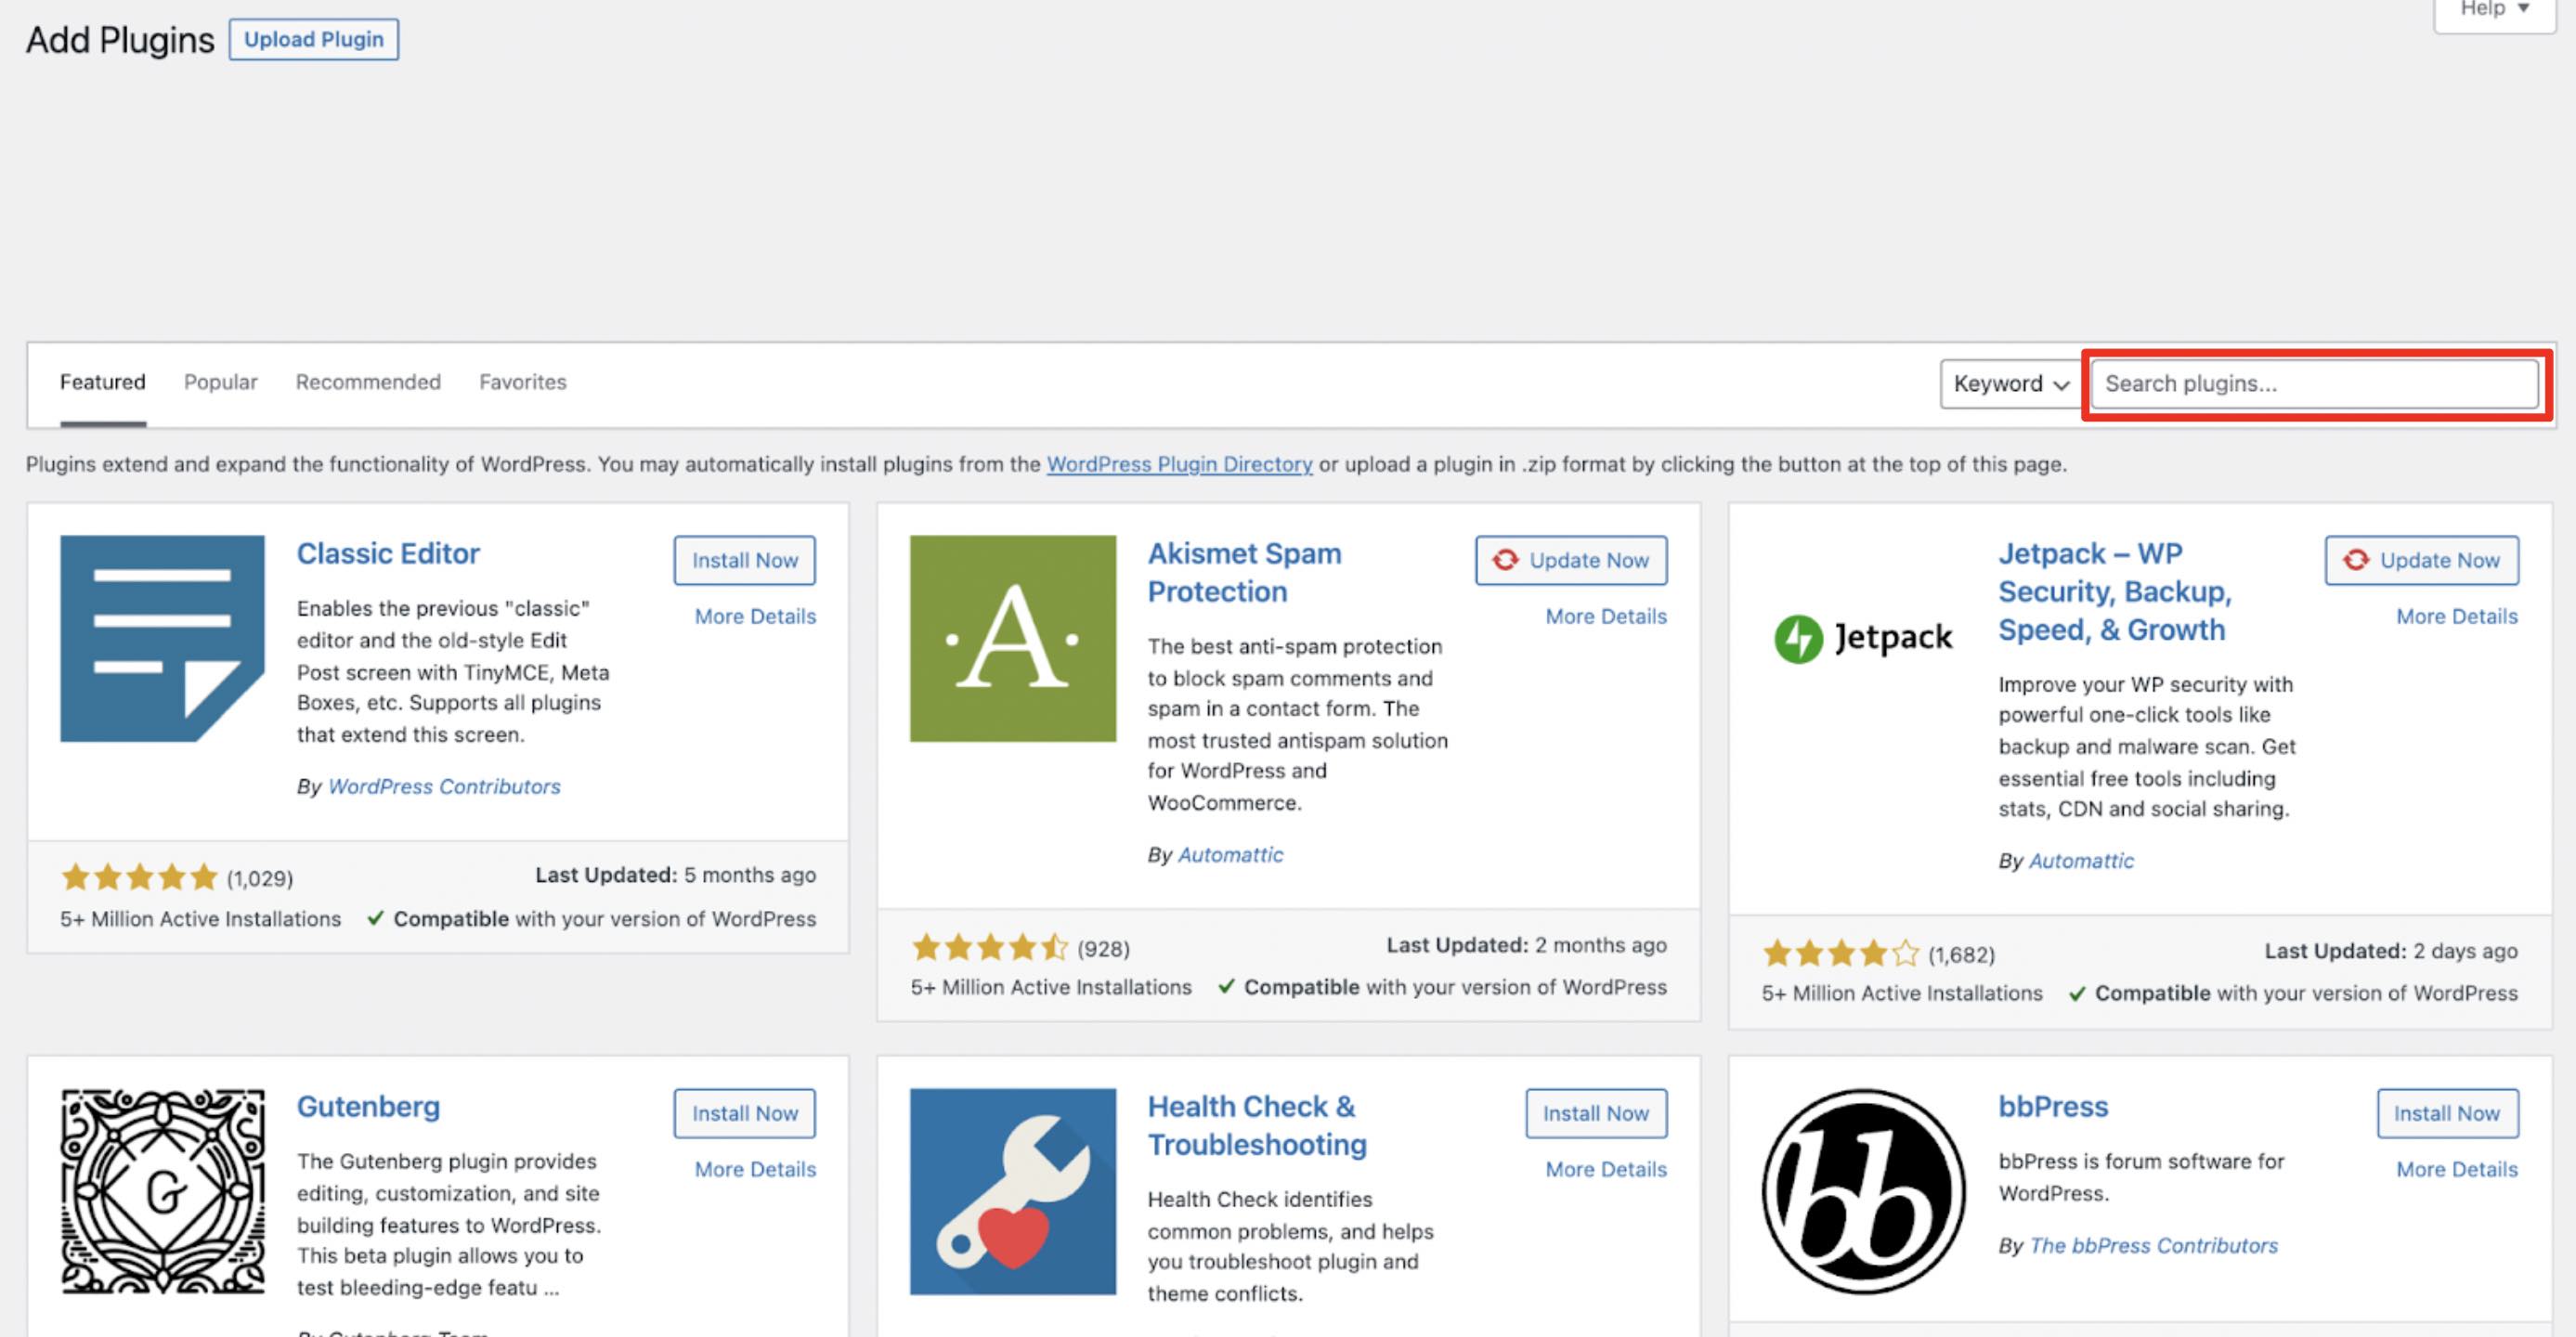
- Navigate to Add plugins and search for "two - bnpl"
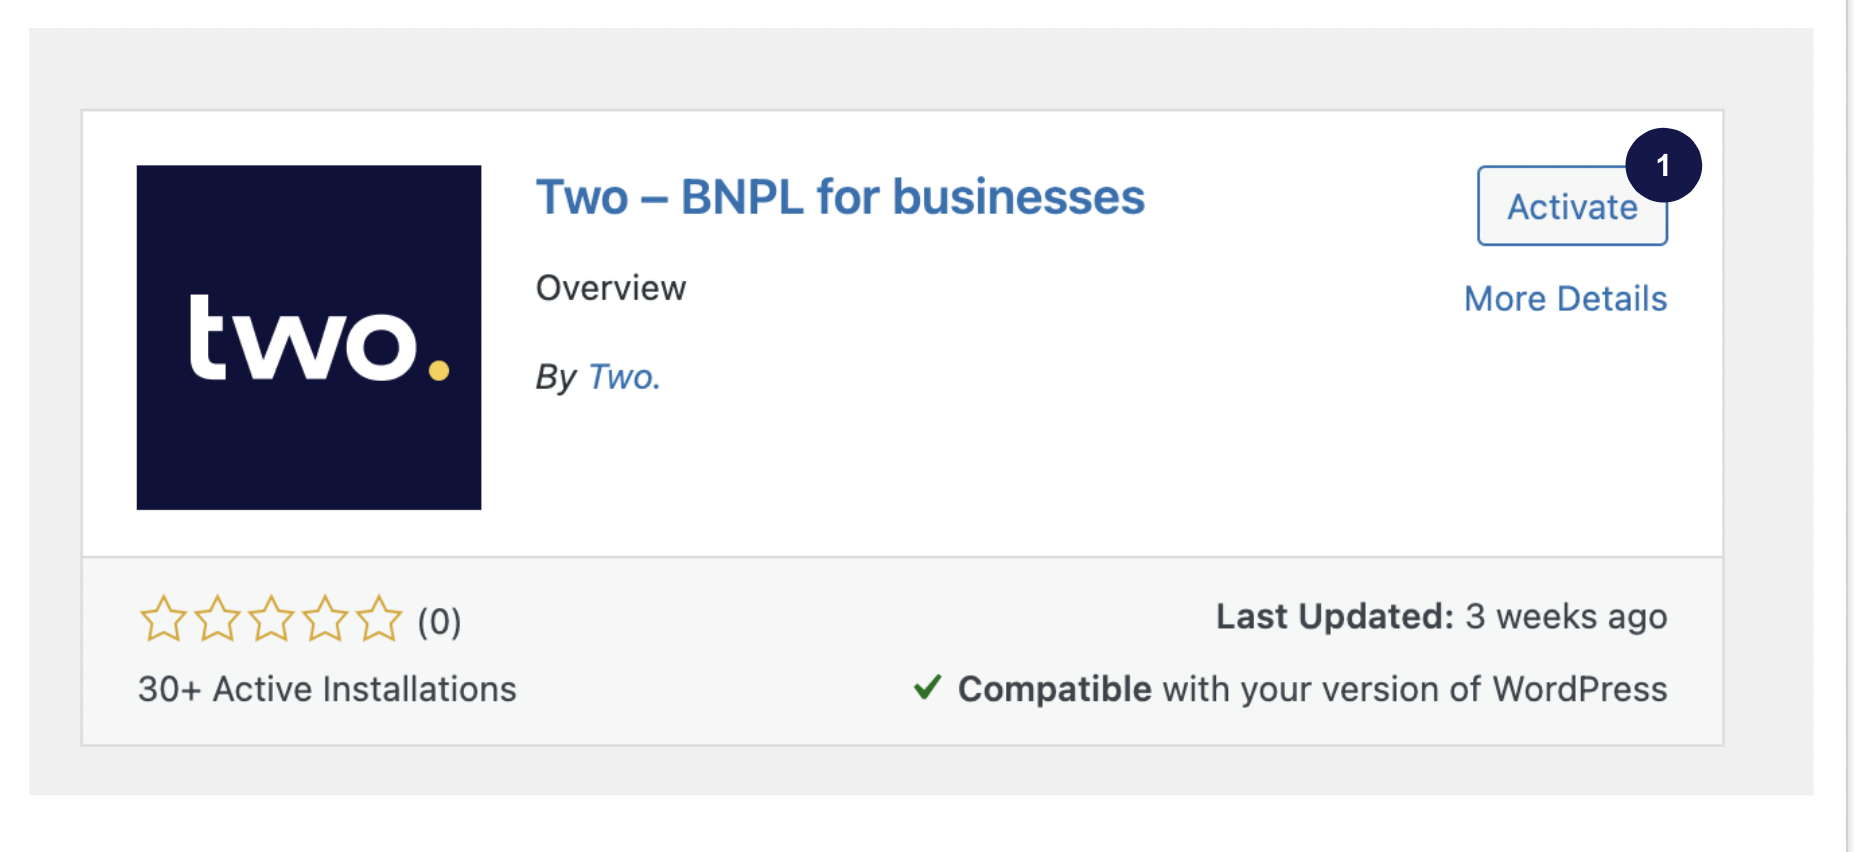
- Press install now

- Press "Activate"
Install using ZIP File
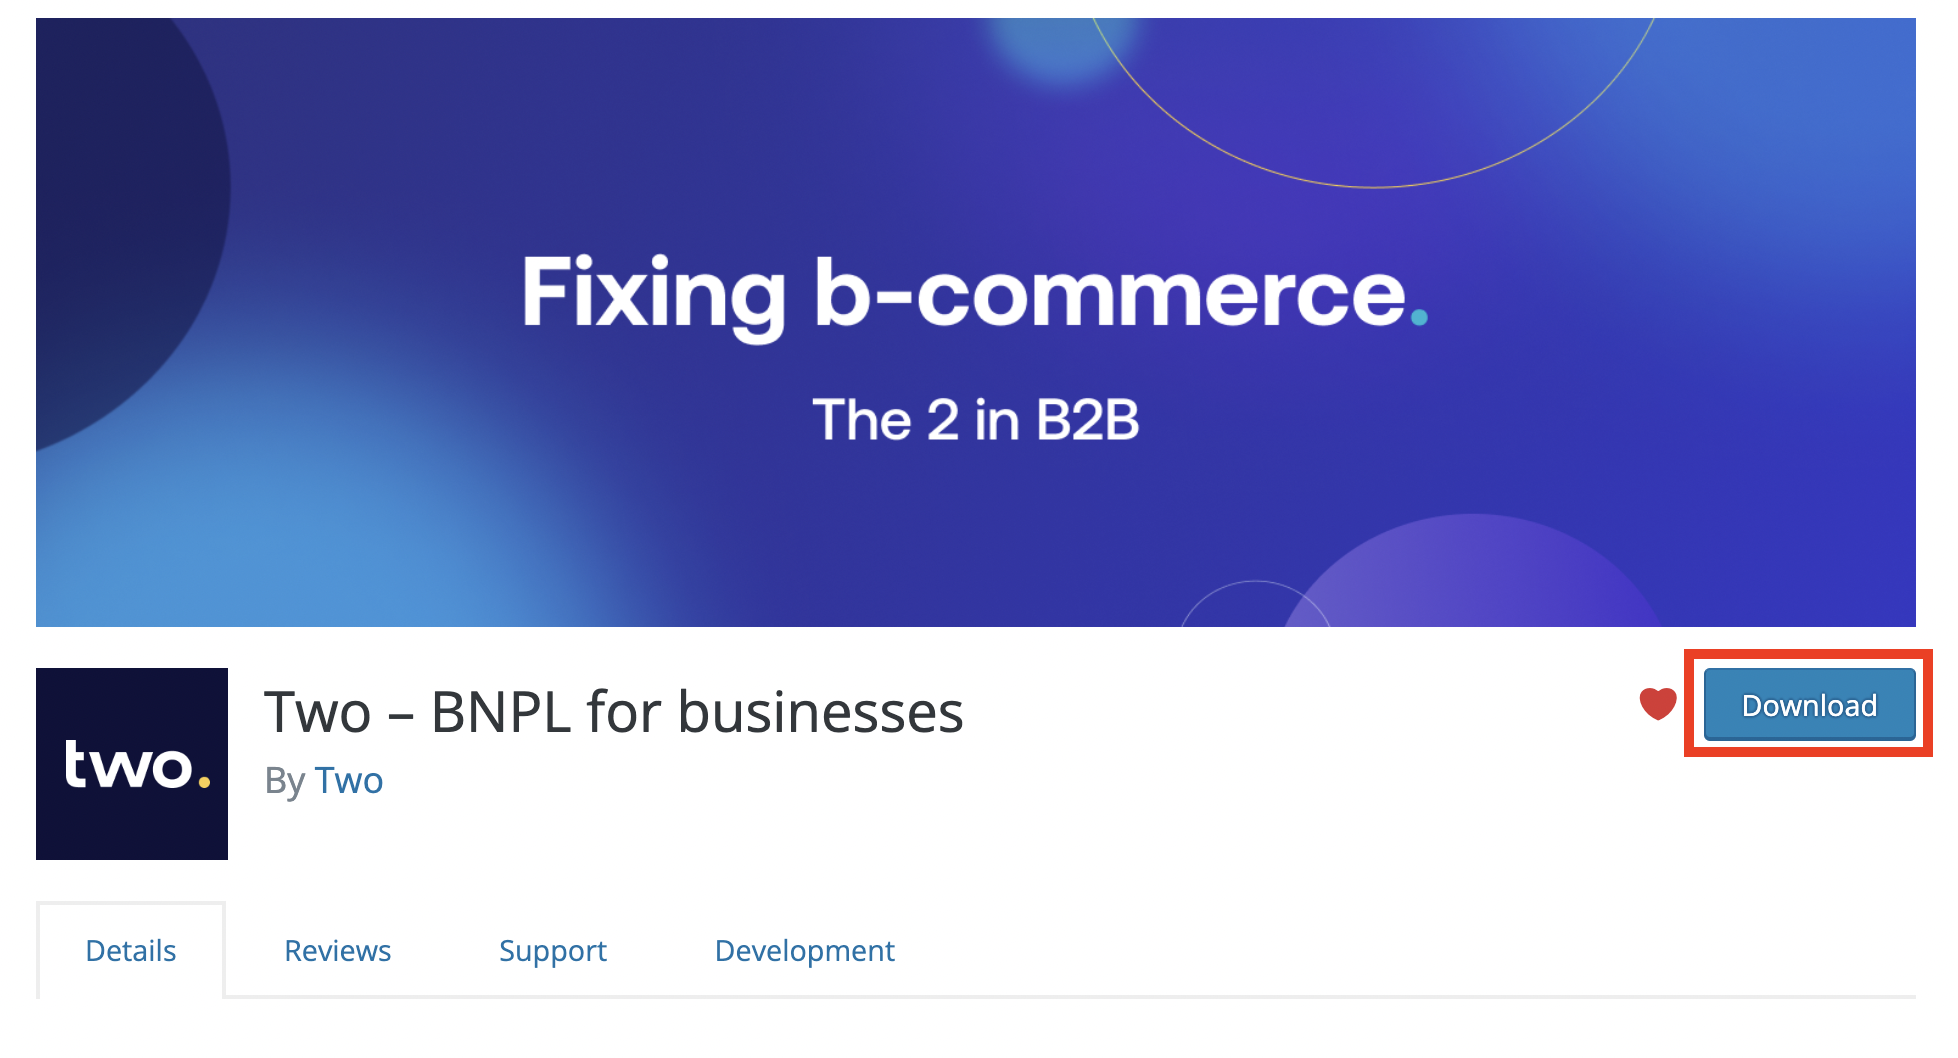
- Download a ZIP file of our plugin from Wordpress plugin directory.
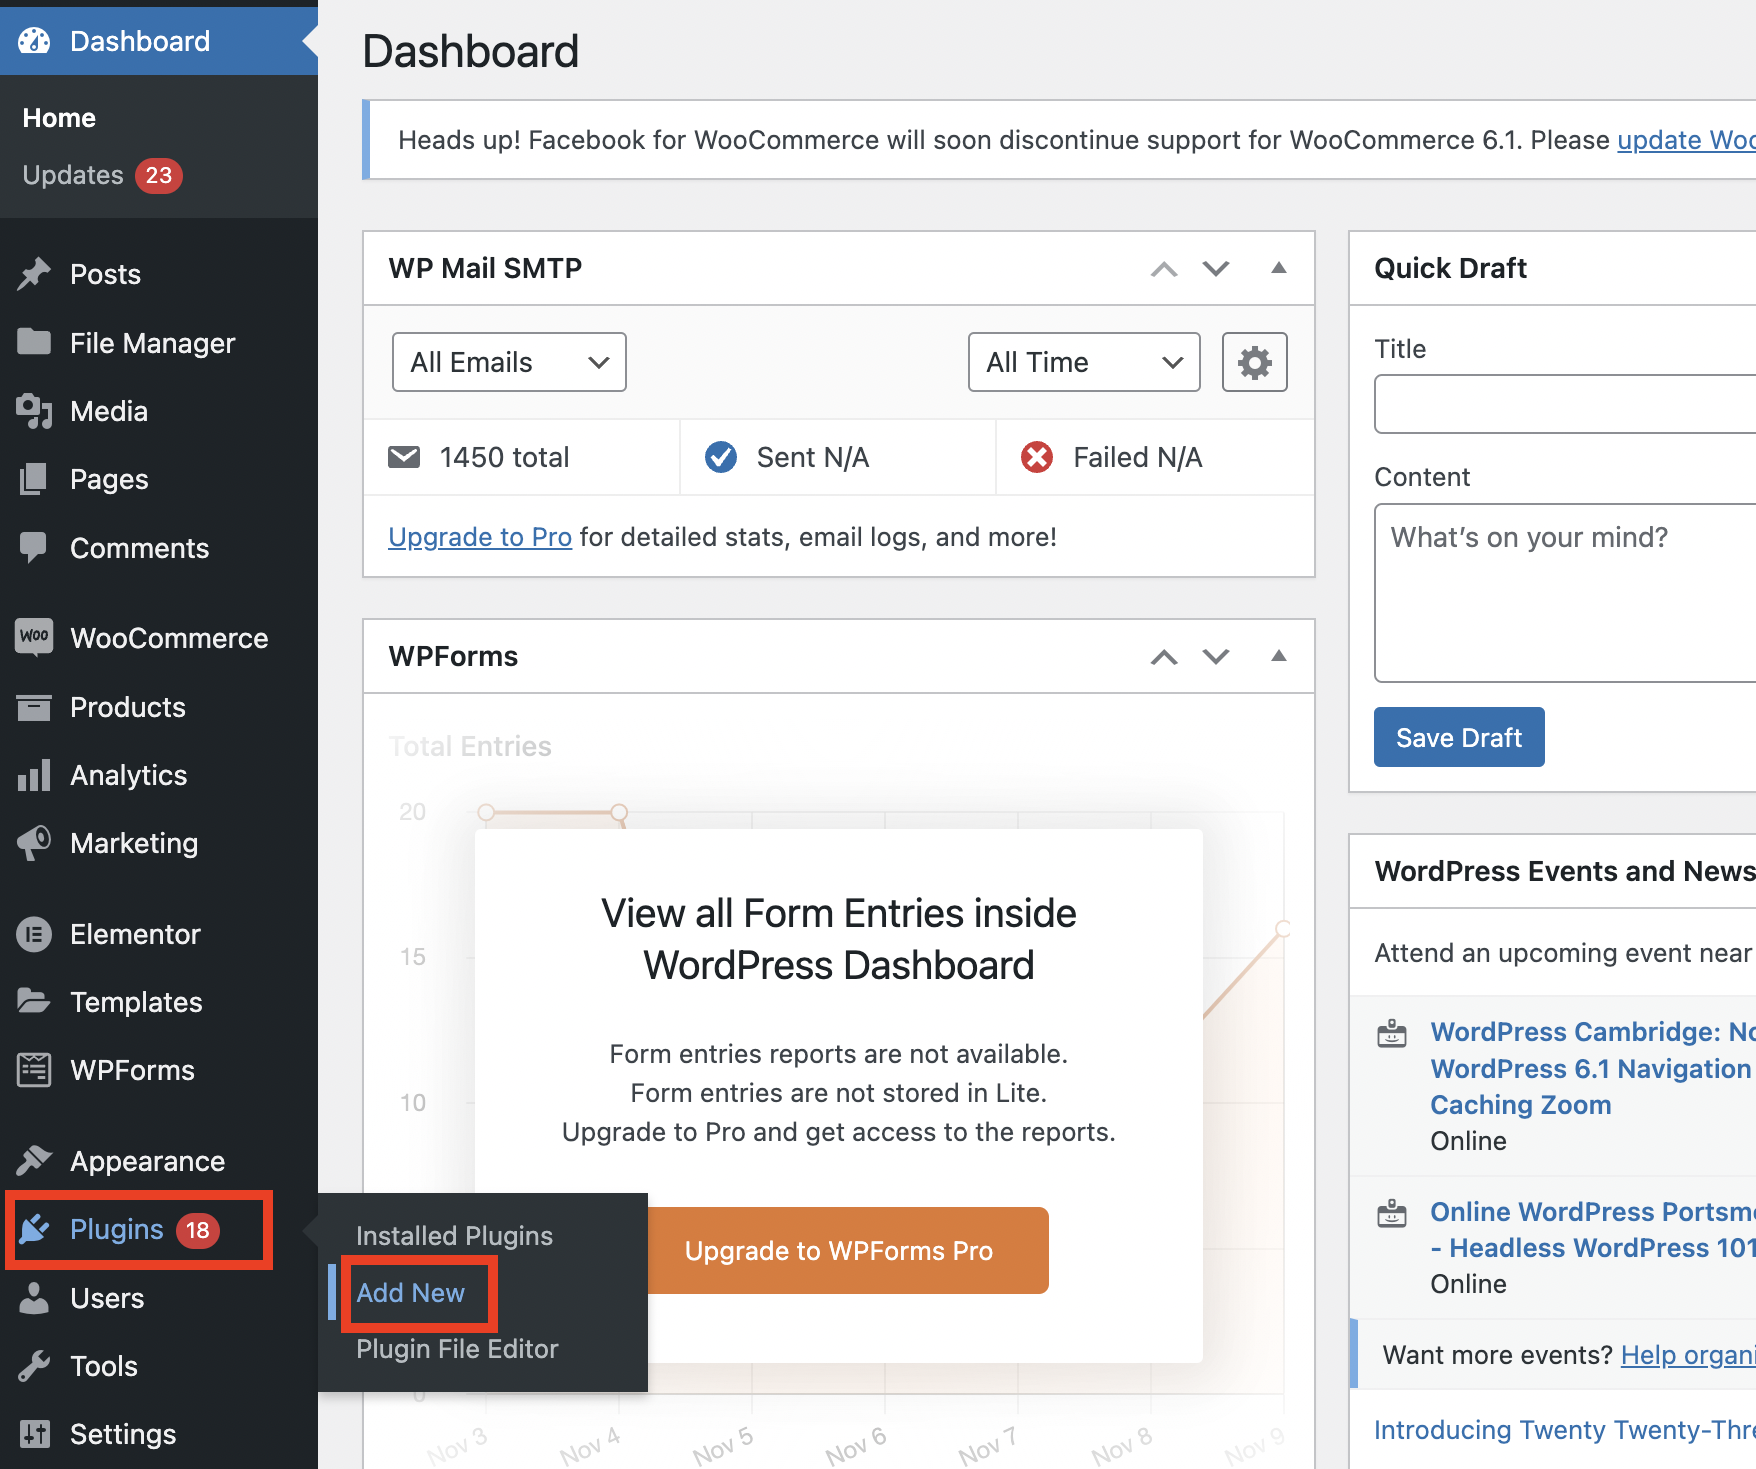
- Navigate to the Plugins section of your Wordpress admin console and click Add New.
- Click Upload Plugin to display the upload interface.
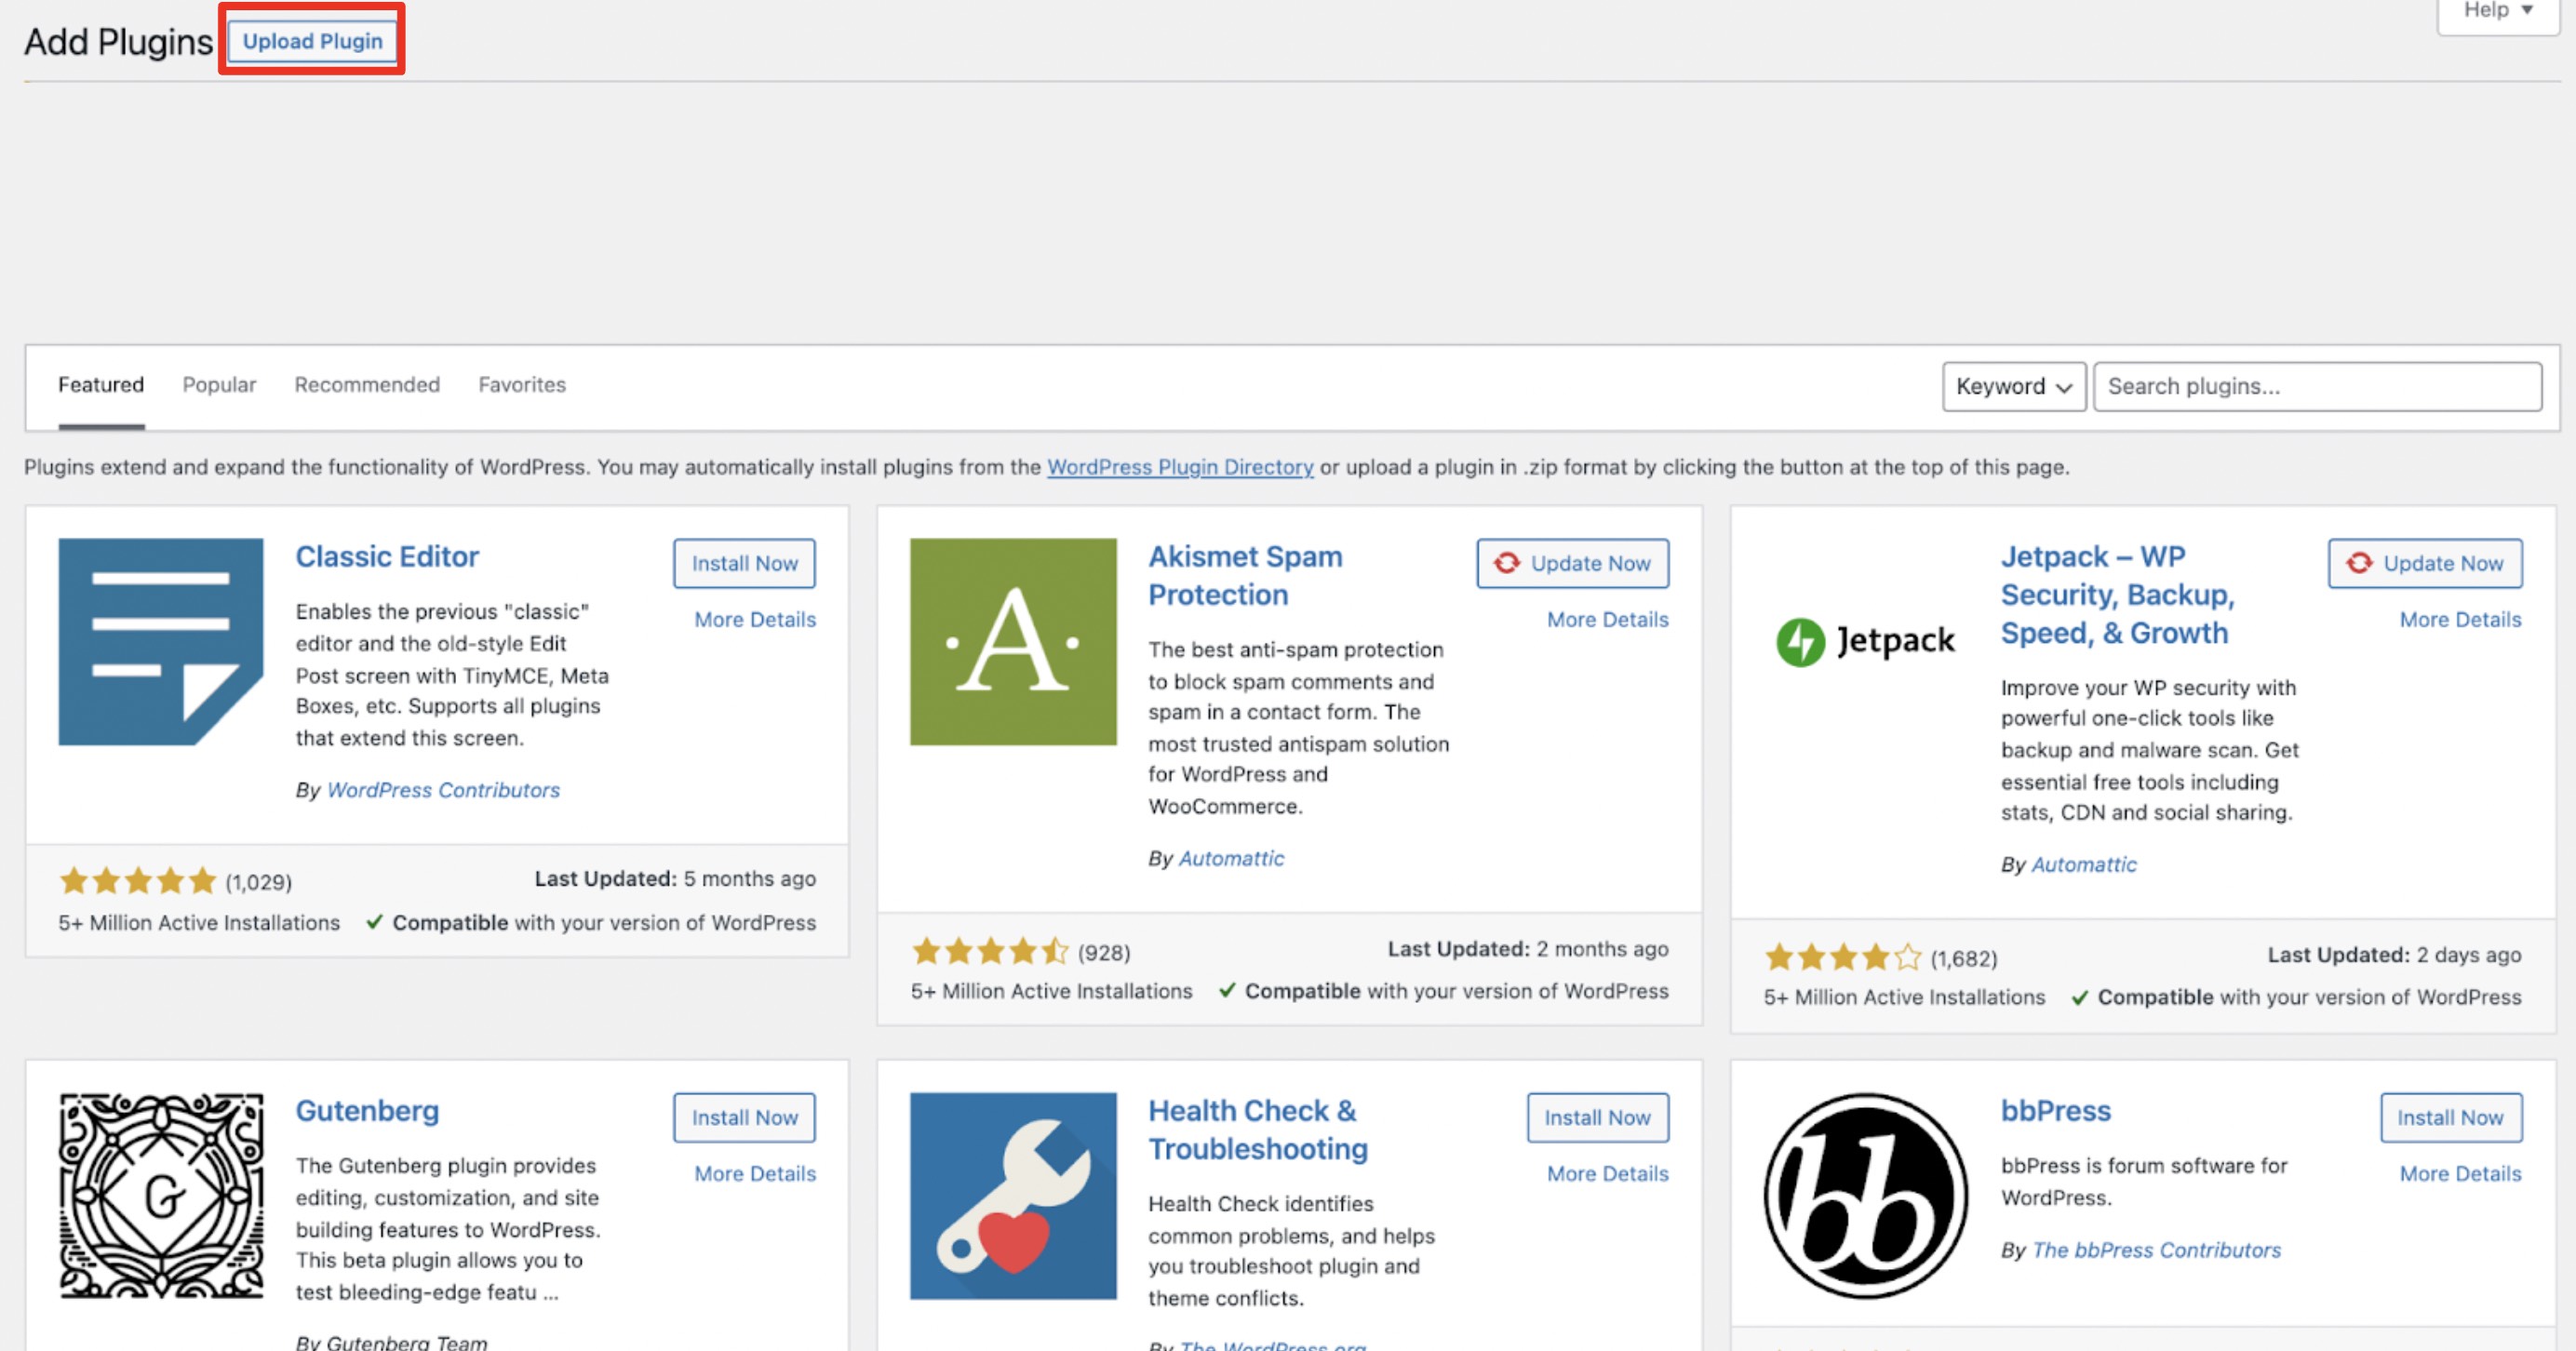
- Click Choose file and select the downloaded ZIP file from Step 1 then click Install Now.

Configuration
Plugin
After activation, you need to enable the payment method. From the dashboard, go toWooCommerce → Settings → Payments.- Under payment methods, click the toggle next to Two to enable it.
- Then, click
Manage.

Fill in the form to complete the integration
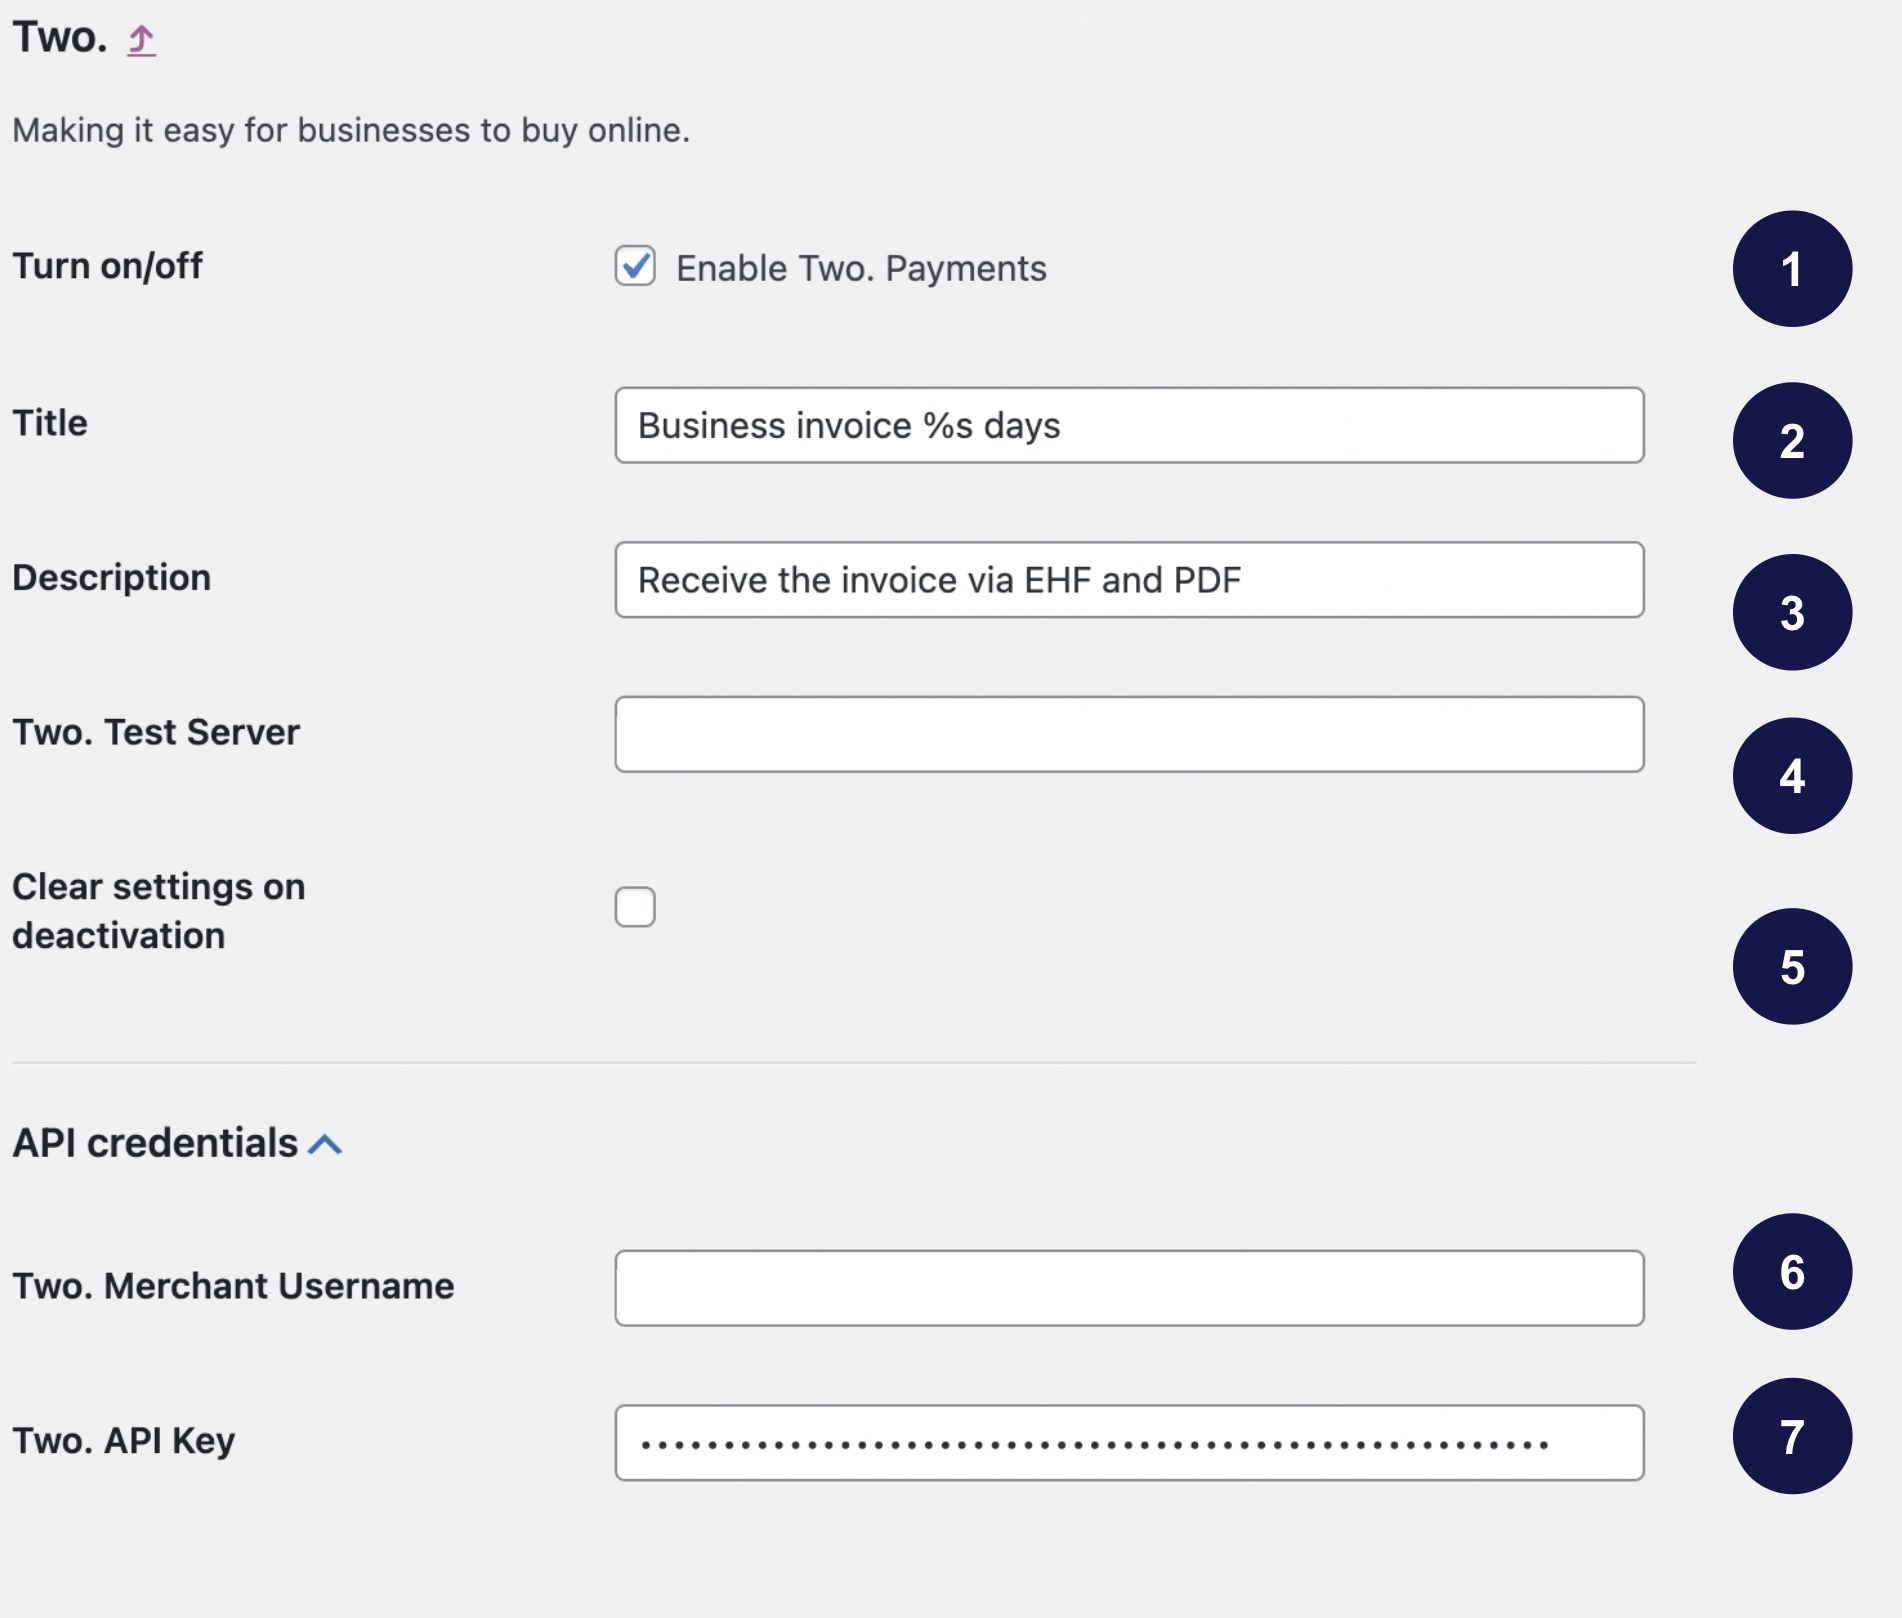
General settings and API credentials
- Setting to activate Two as payment option.
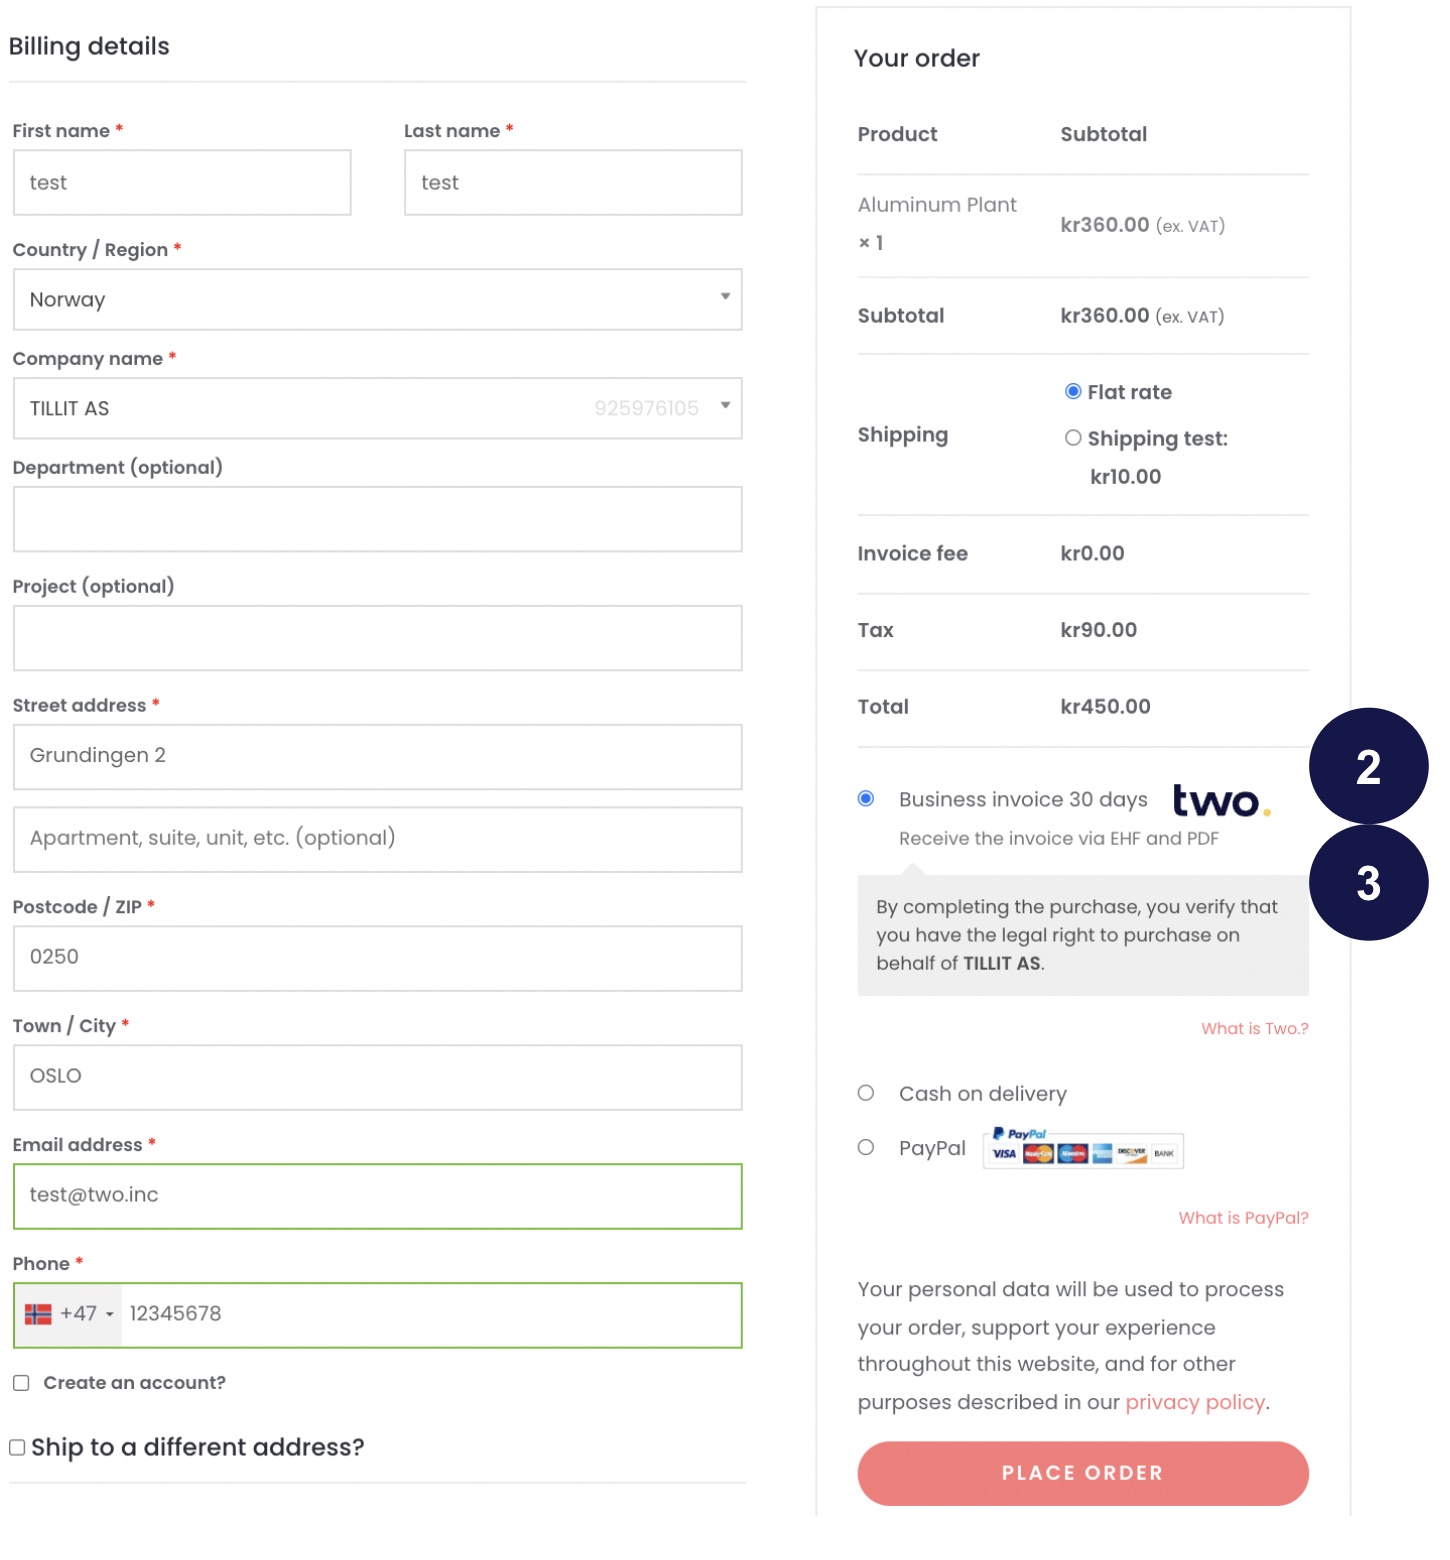
- This is the text that appears in field
2of the checkout page pictured below. - This is the text that appears in field
3of the checkout page pictured below. - URL to the API environment. Production environment:
api.two.inc/v1. - Clear all of these settings when deactivating the plugin.
- Username is provided by Two.
- API key is provided by Two.
Checkout Page
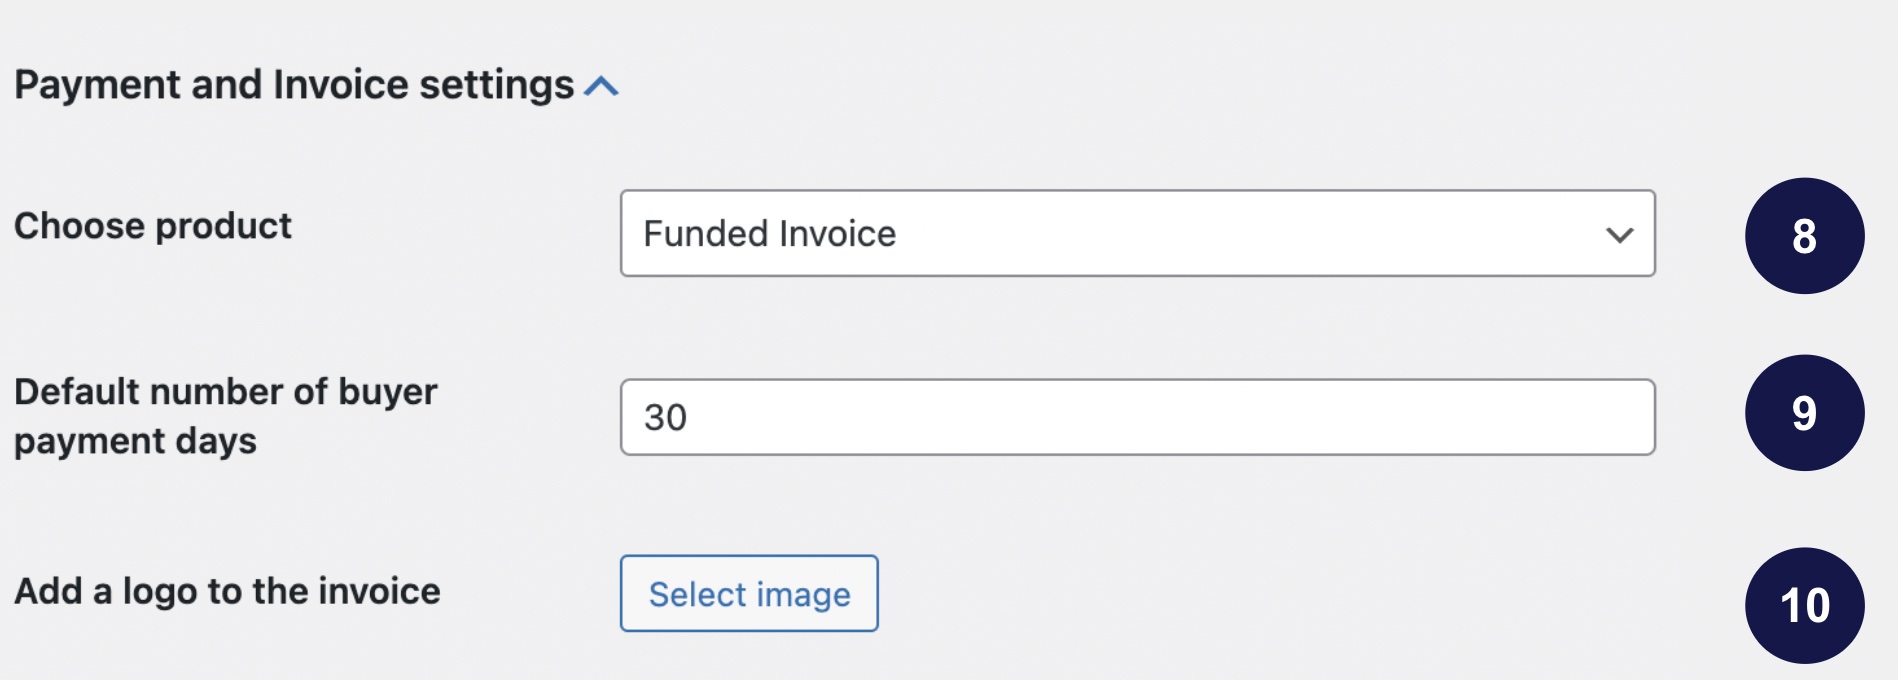
Payment and invoice settings
- Select the type of invoice that is agreed with Two.
- Select the number of payment days agreed with Two.
- Upload your company logo.
Checkout options
- Enables credit check before Two is available as a payment option. It is recommended that this is checked.
- Let customer select option for private customers.
- Let customer select option for sole trader or other types of customers.
- Let customer select business customer option.
- Set all input fields related to Two to be required.
- Adds a new input field to specify the department of the company.
- Adds a new input field to specify the project.
- Replace radio buttons with buttons for the different account types (Sole trader, private, business).
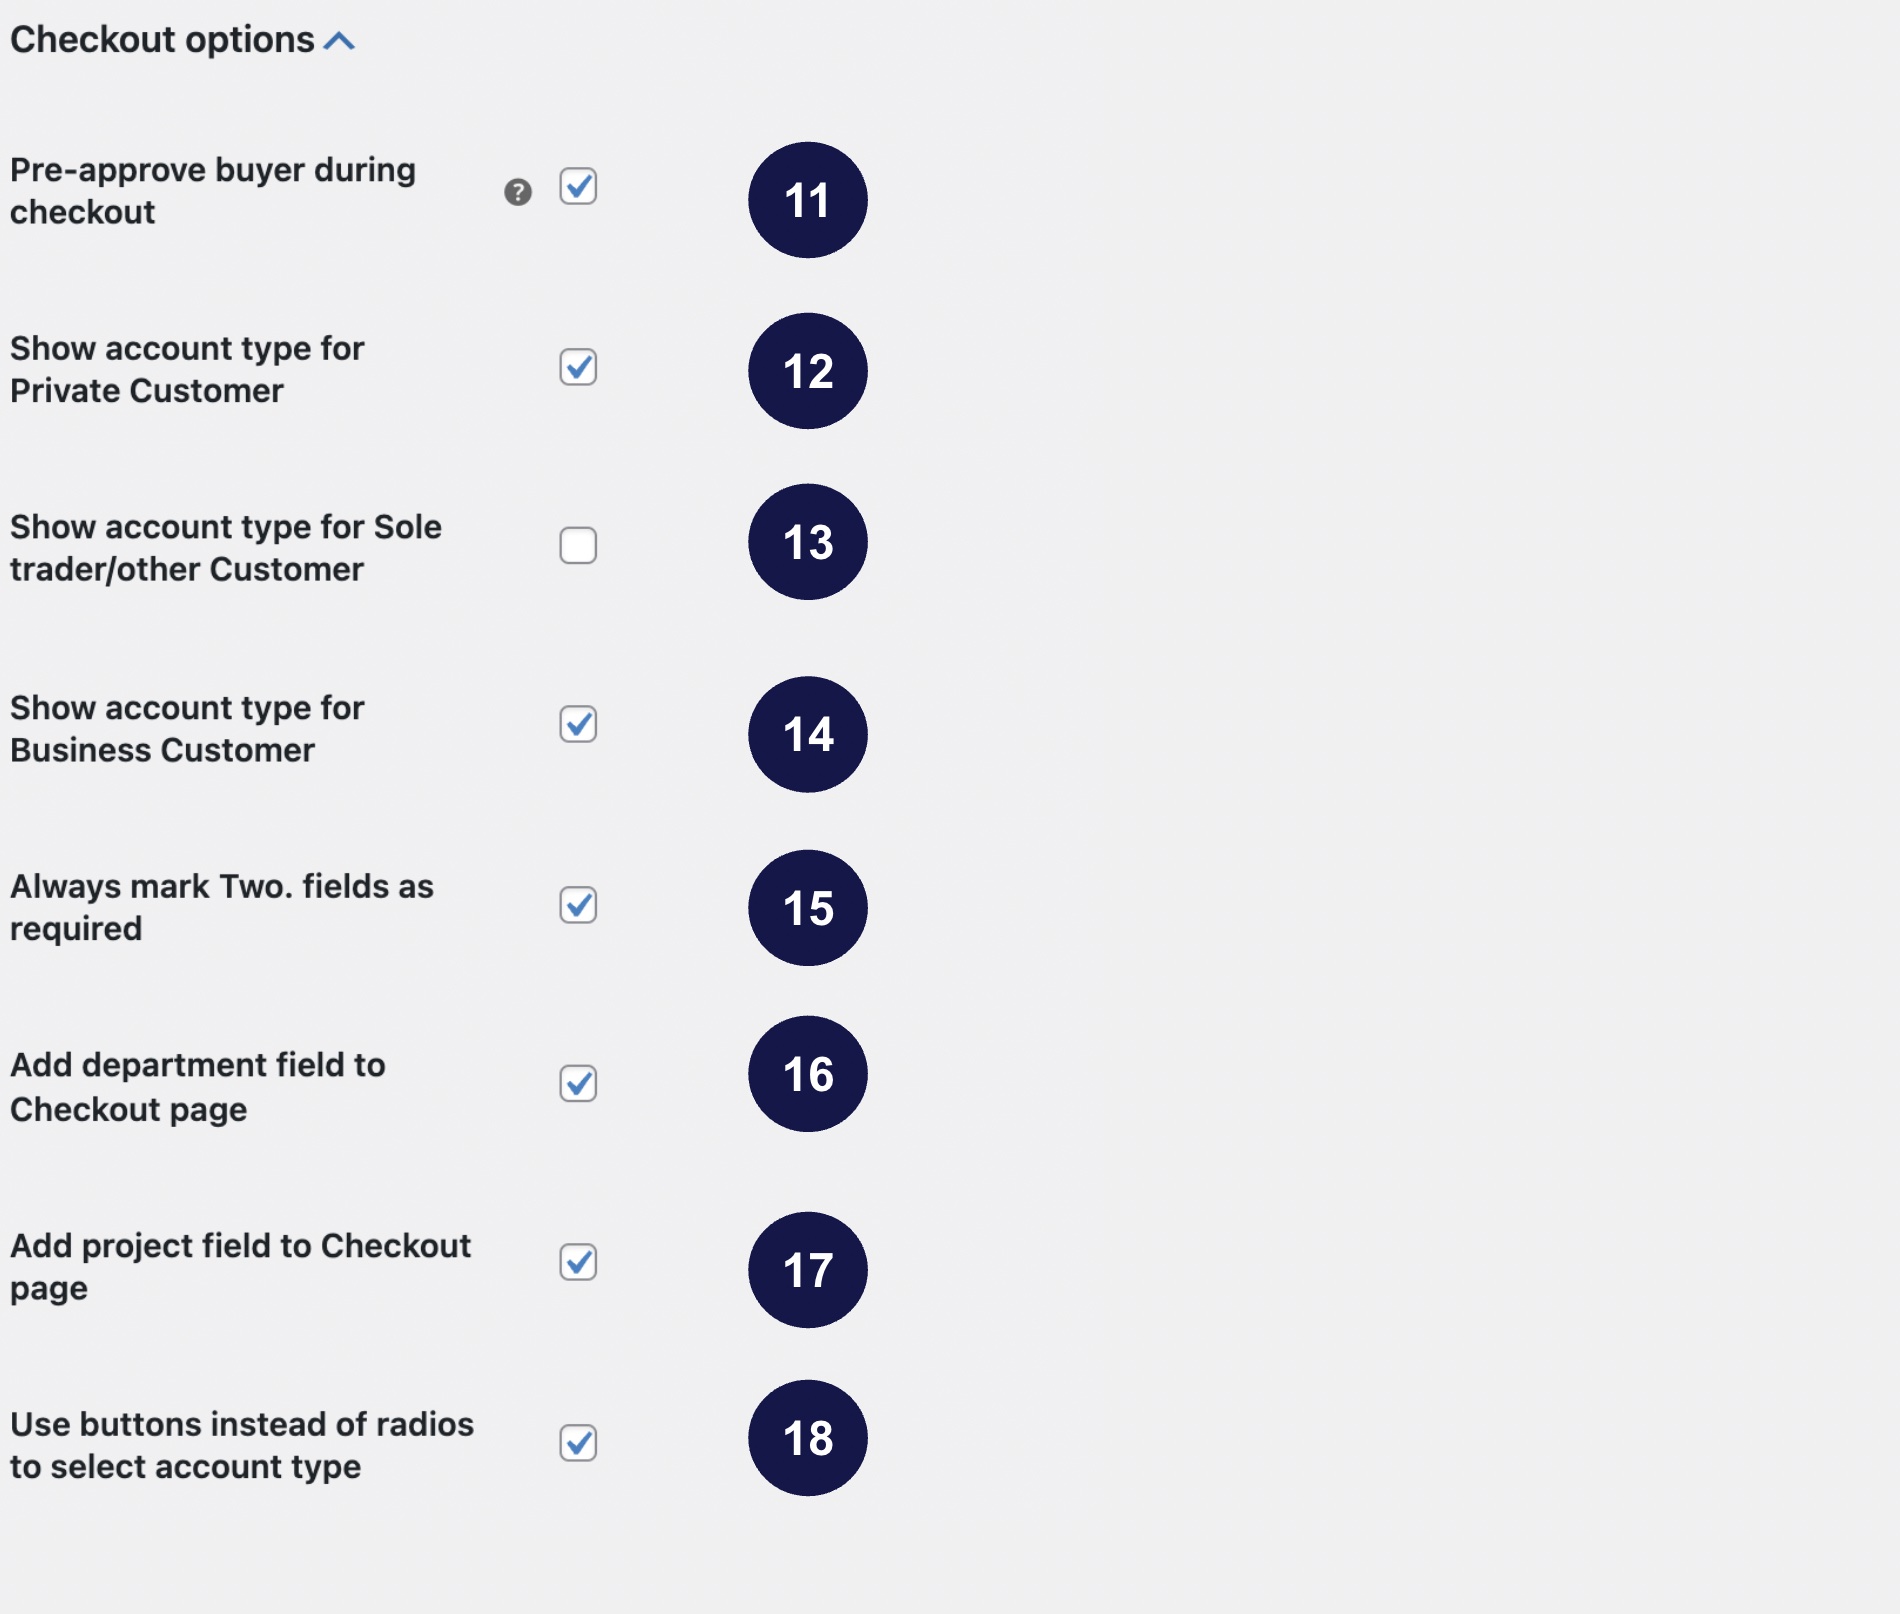
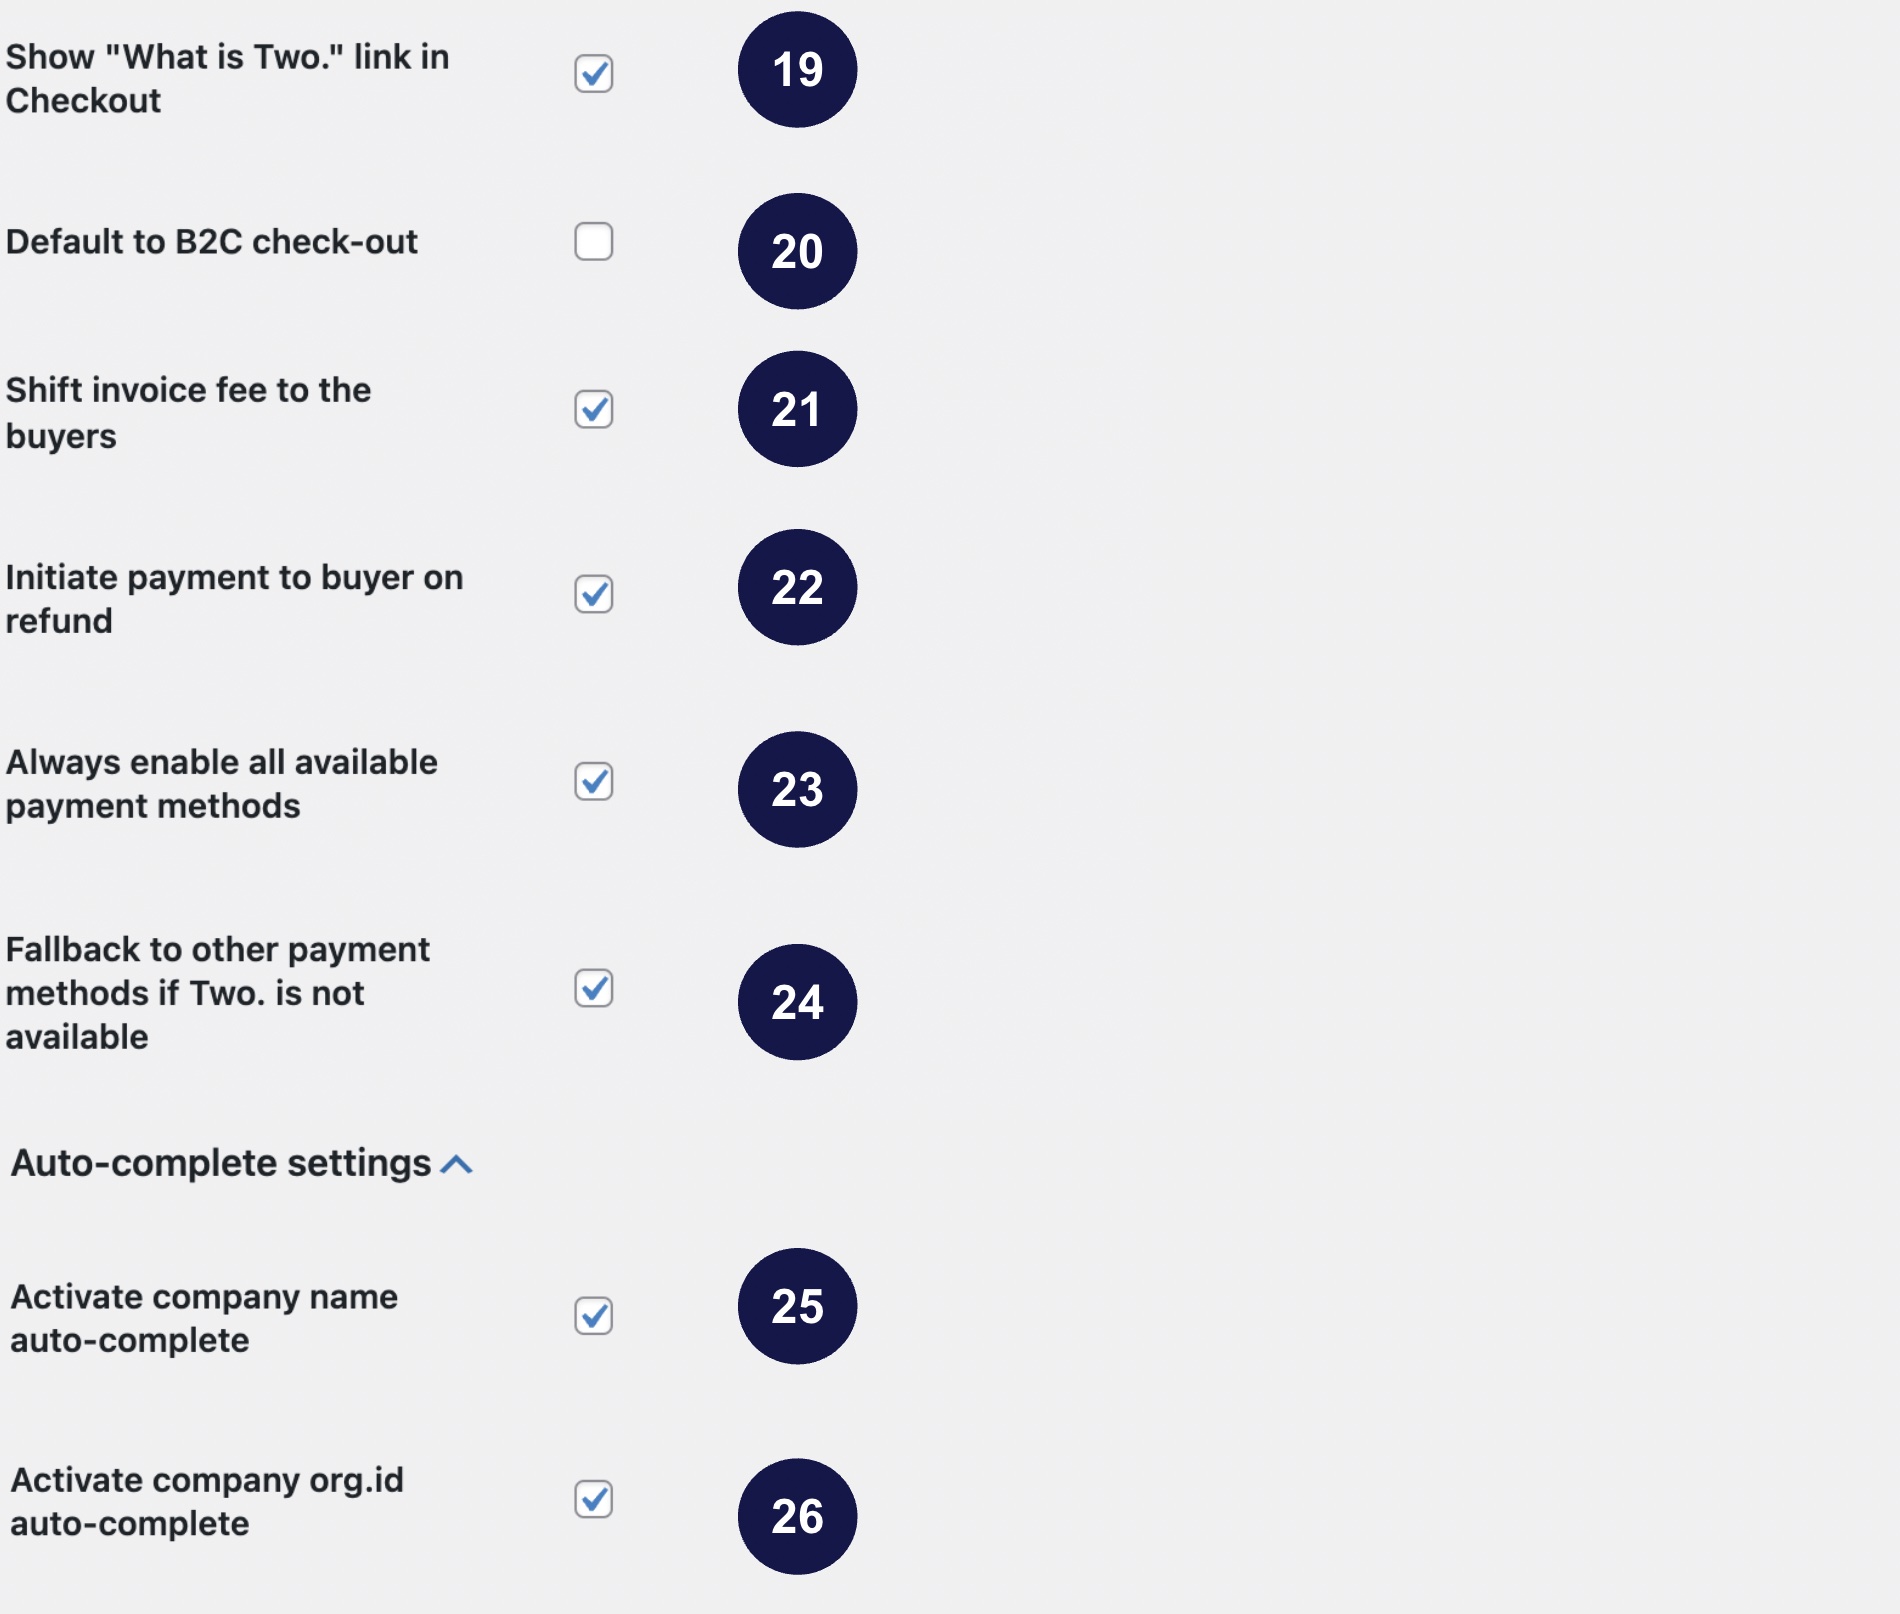
Checkout options and auto-complete
- Link to a page which describes the Two payment solution in detail.
- Changes the default view to business checkout.
- Makes the buyer pay a flat fee on the purchase.
- Starts a process to refund the money to the buyer if the purchase is refunded.
- Enables all other available payment methods.
- Enables fallback to other payment method if Two is not available.
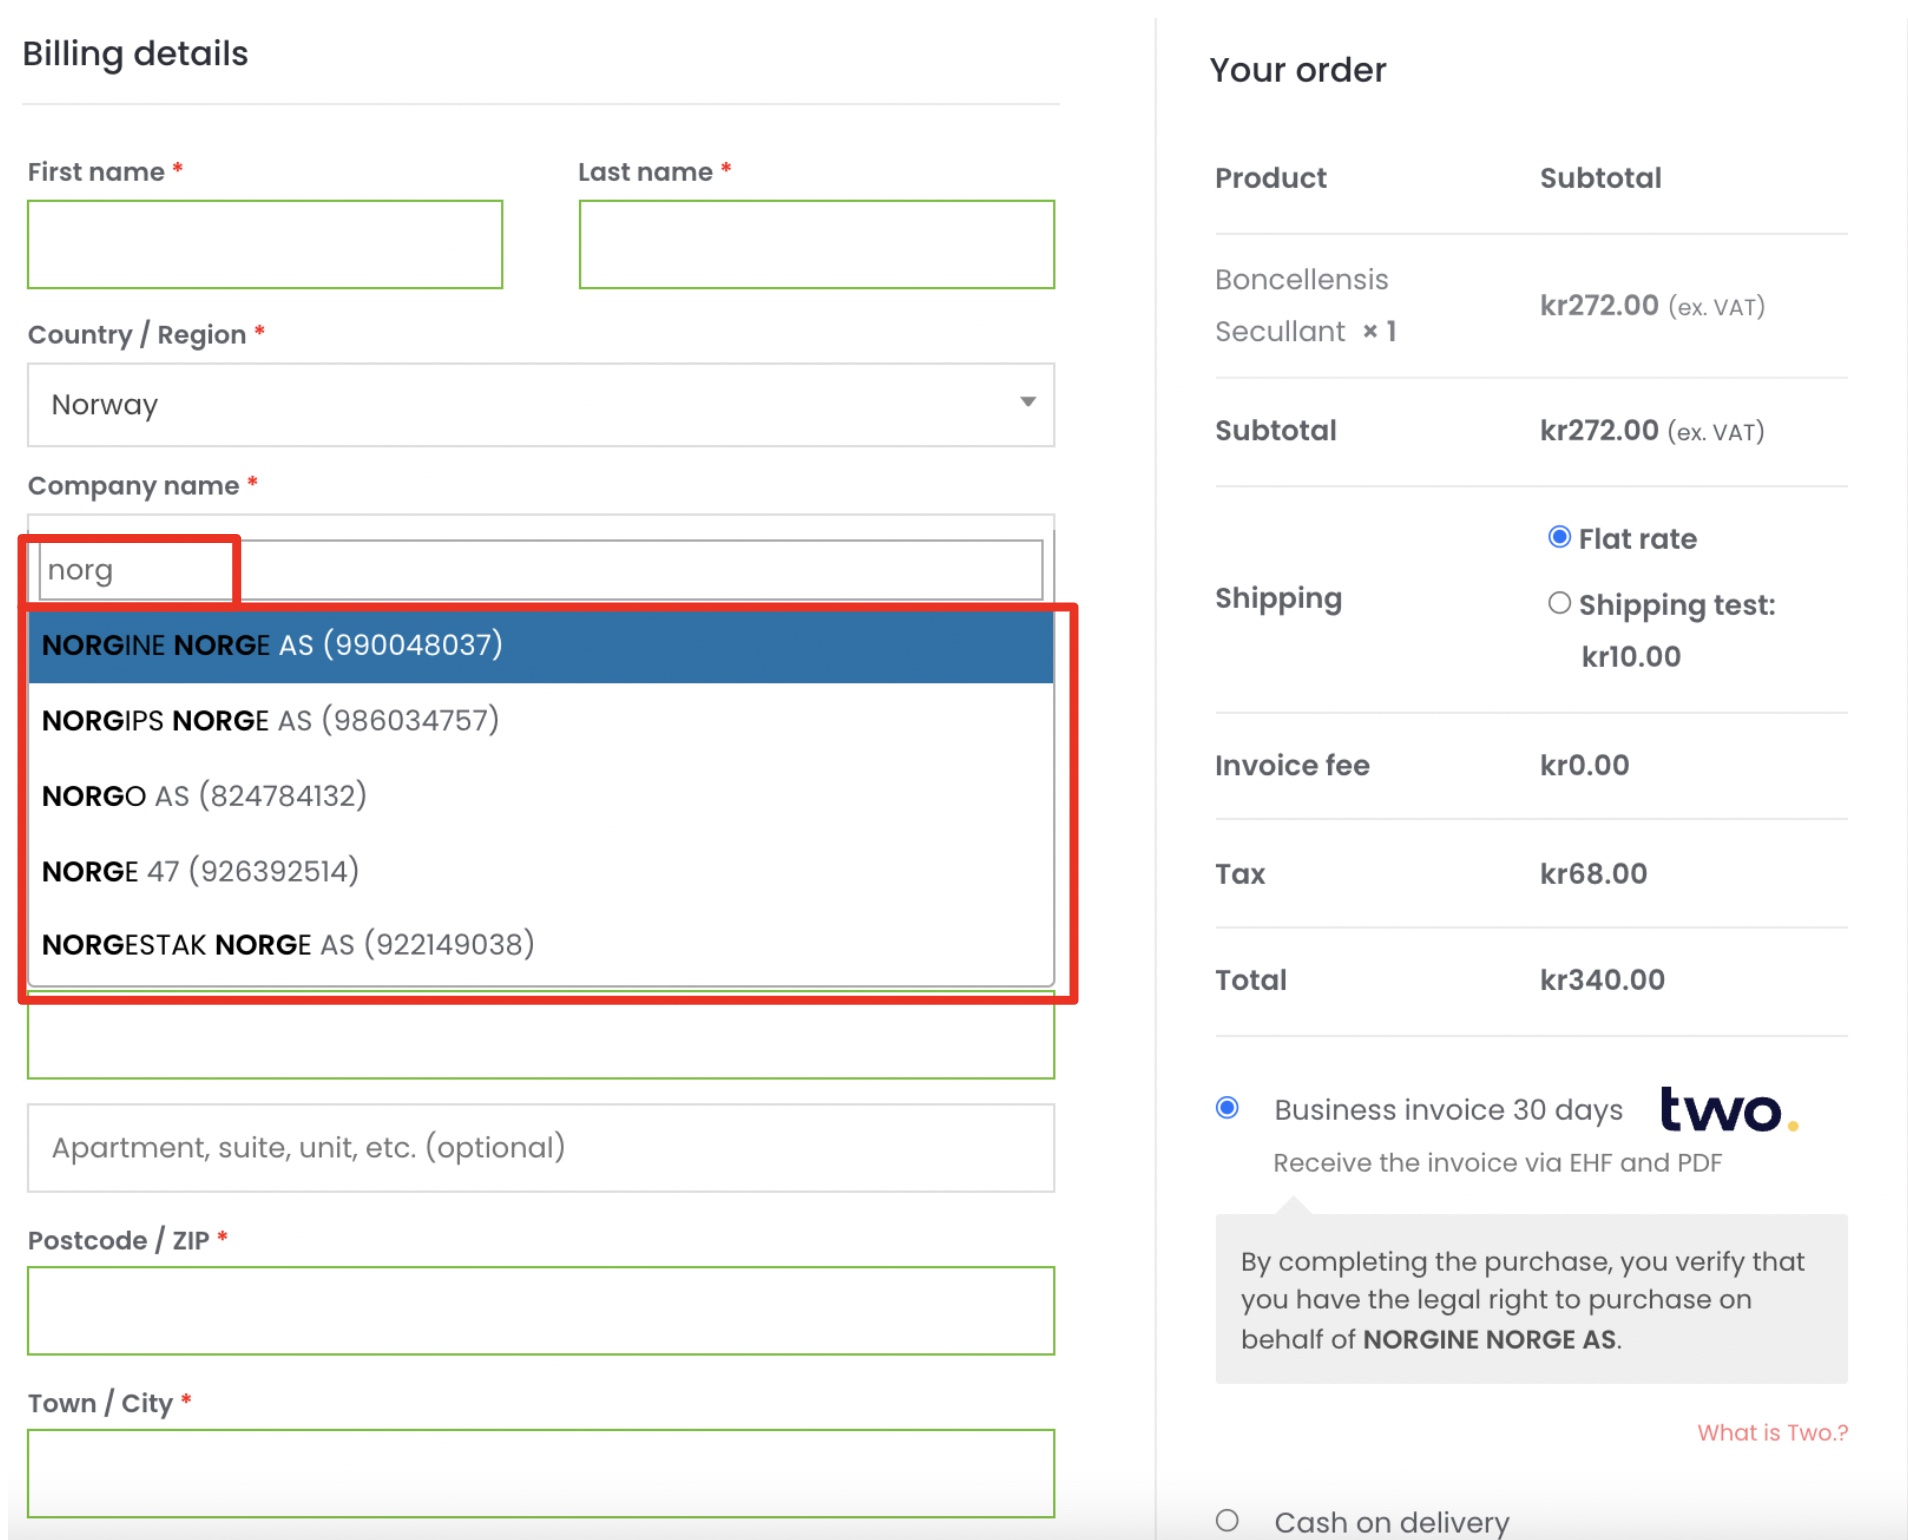
- Enables company search which auto-completes company name and address.
- Enables company search which auto-completes org.id.
Save Changes. Two will now be enabled and live in your check-out.Taxes
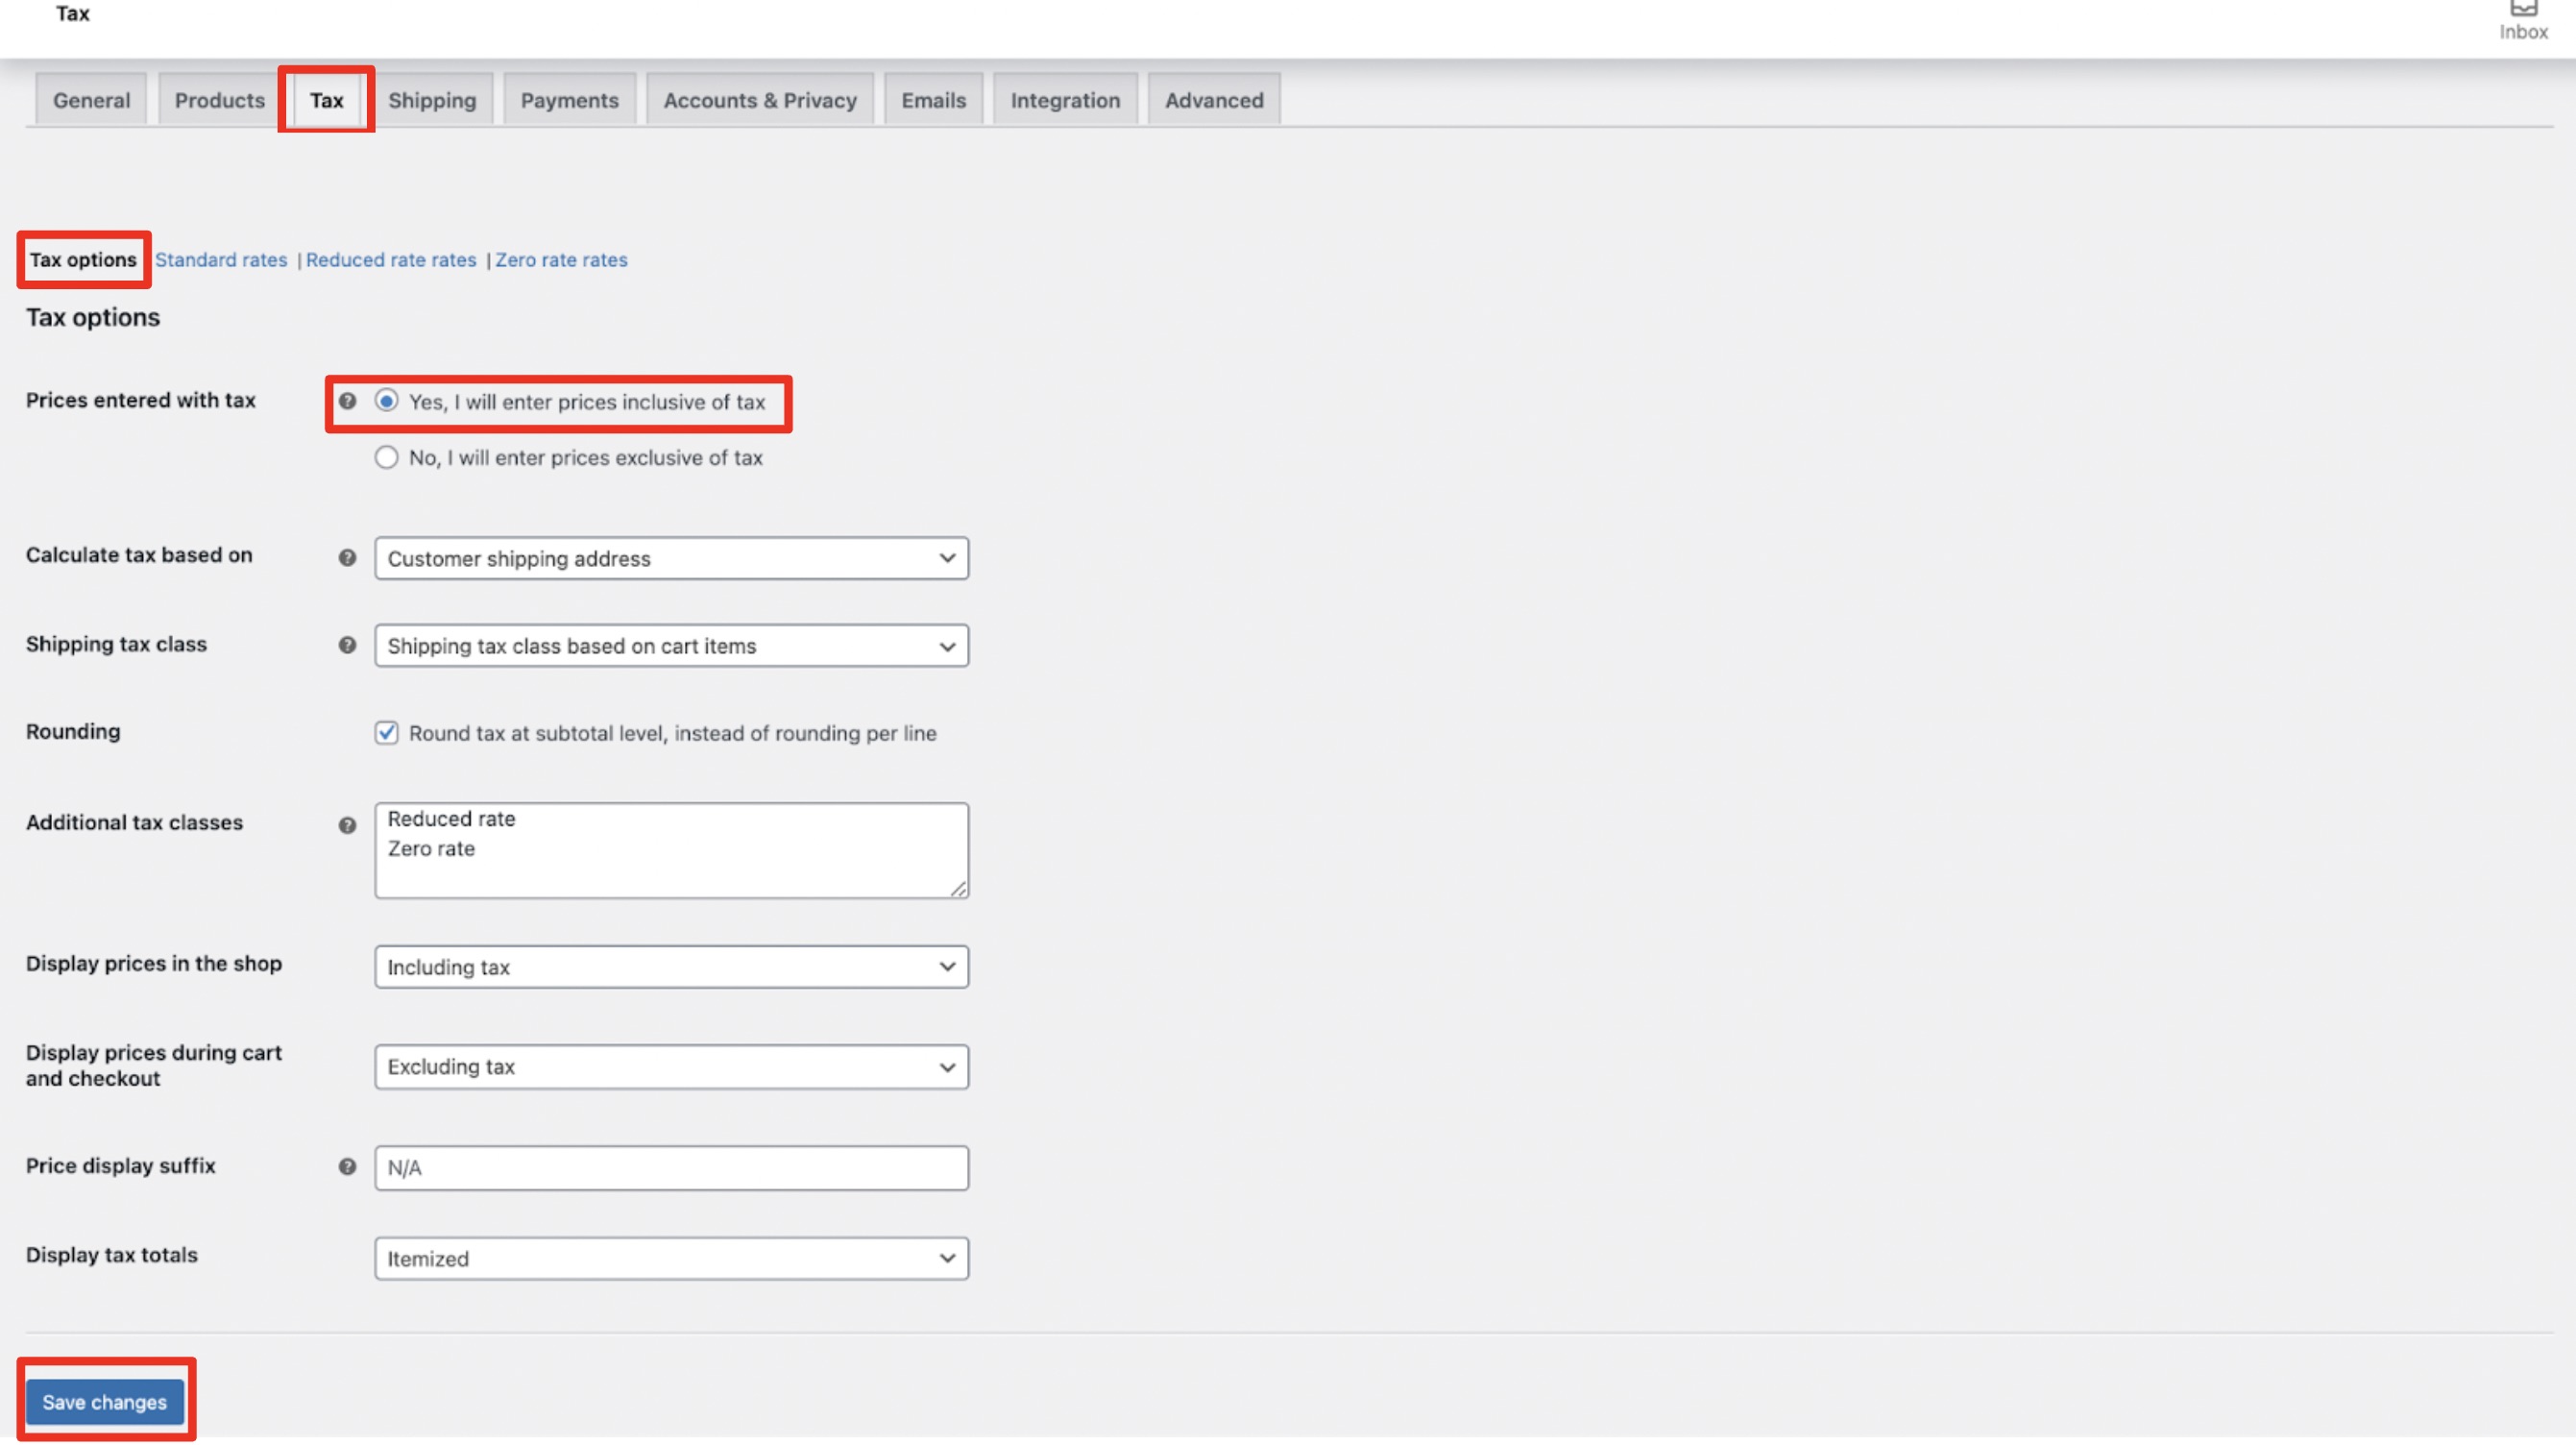
Most merchants already have configured taxes as part of normal operation. However, if you have not enabled taxes, you will have to enable it before offering Two as payment method.
Two requires at least one tax to be enabled. Most likely this will be VAT for your shop. Find it underWooCommerce → Settings → Tax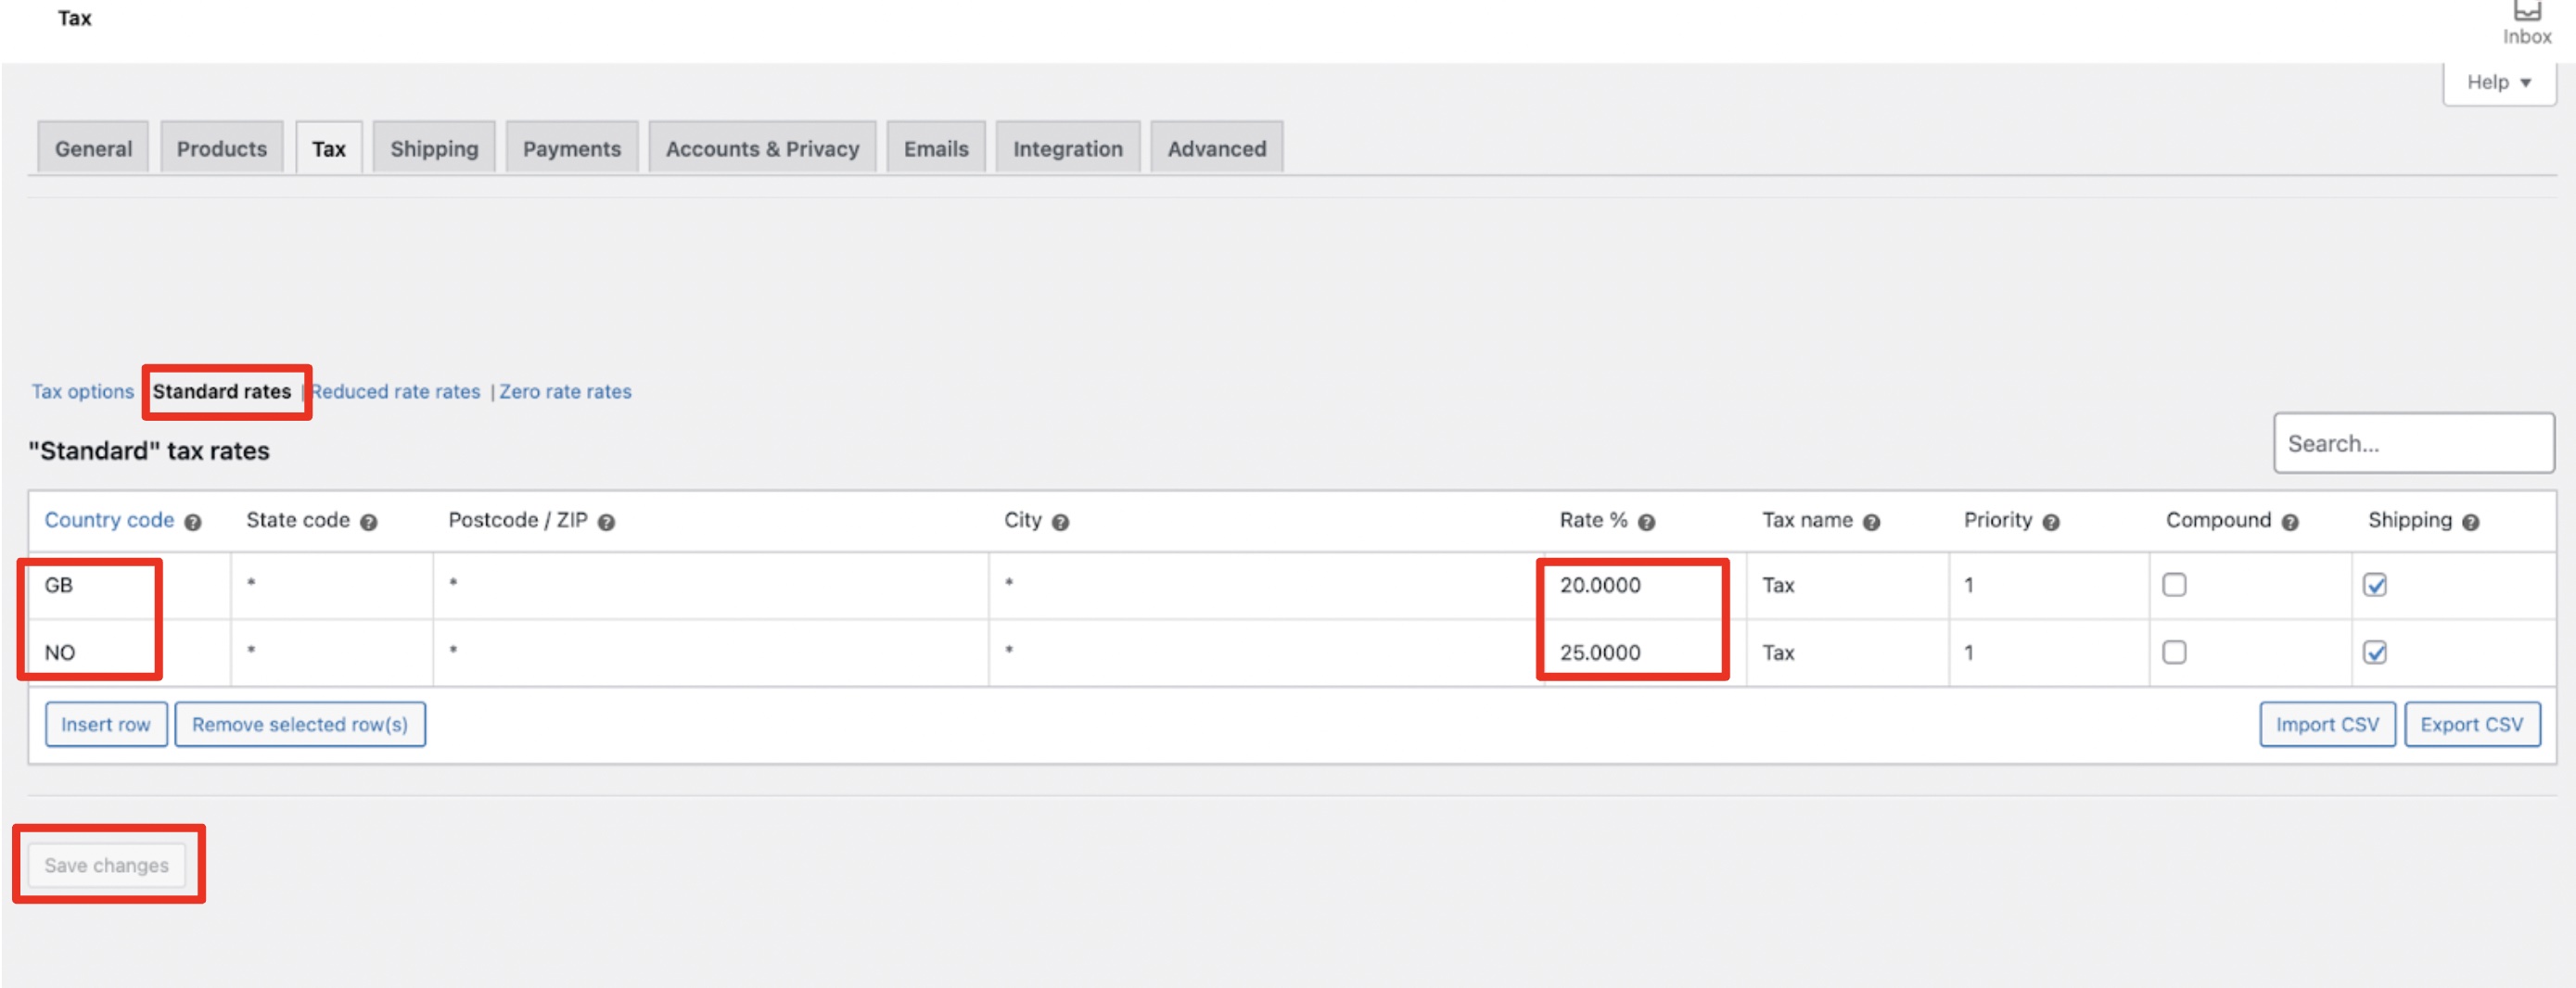
Search API
The Two Search API in action
WooCommerce Refunds
In order to refund an order, you must navigate to your WooCommerce orders from WooCommerce > Orders.
Select an order that has aCompleted state in order to issue a refund. In this example we are selecting the top most order to edit.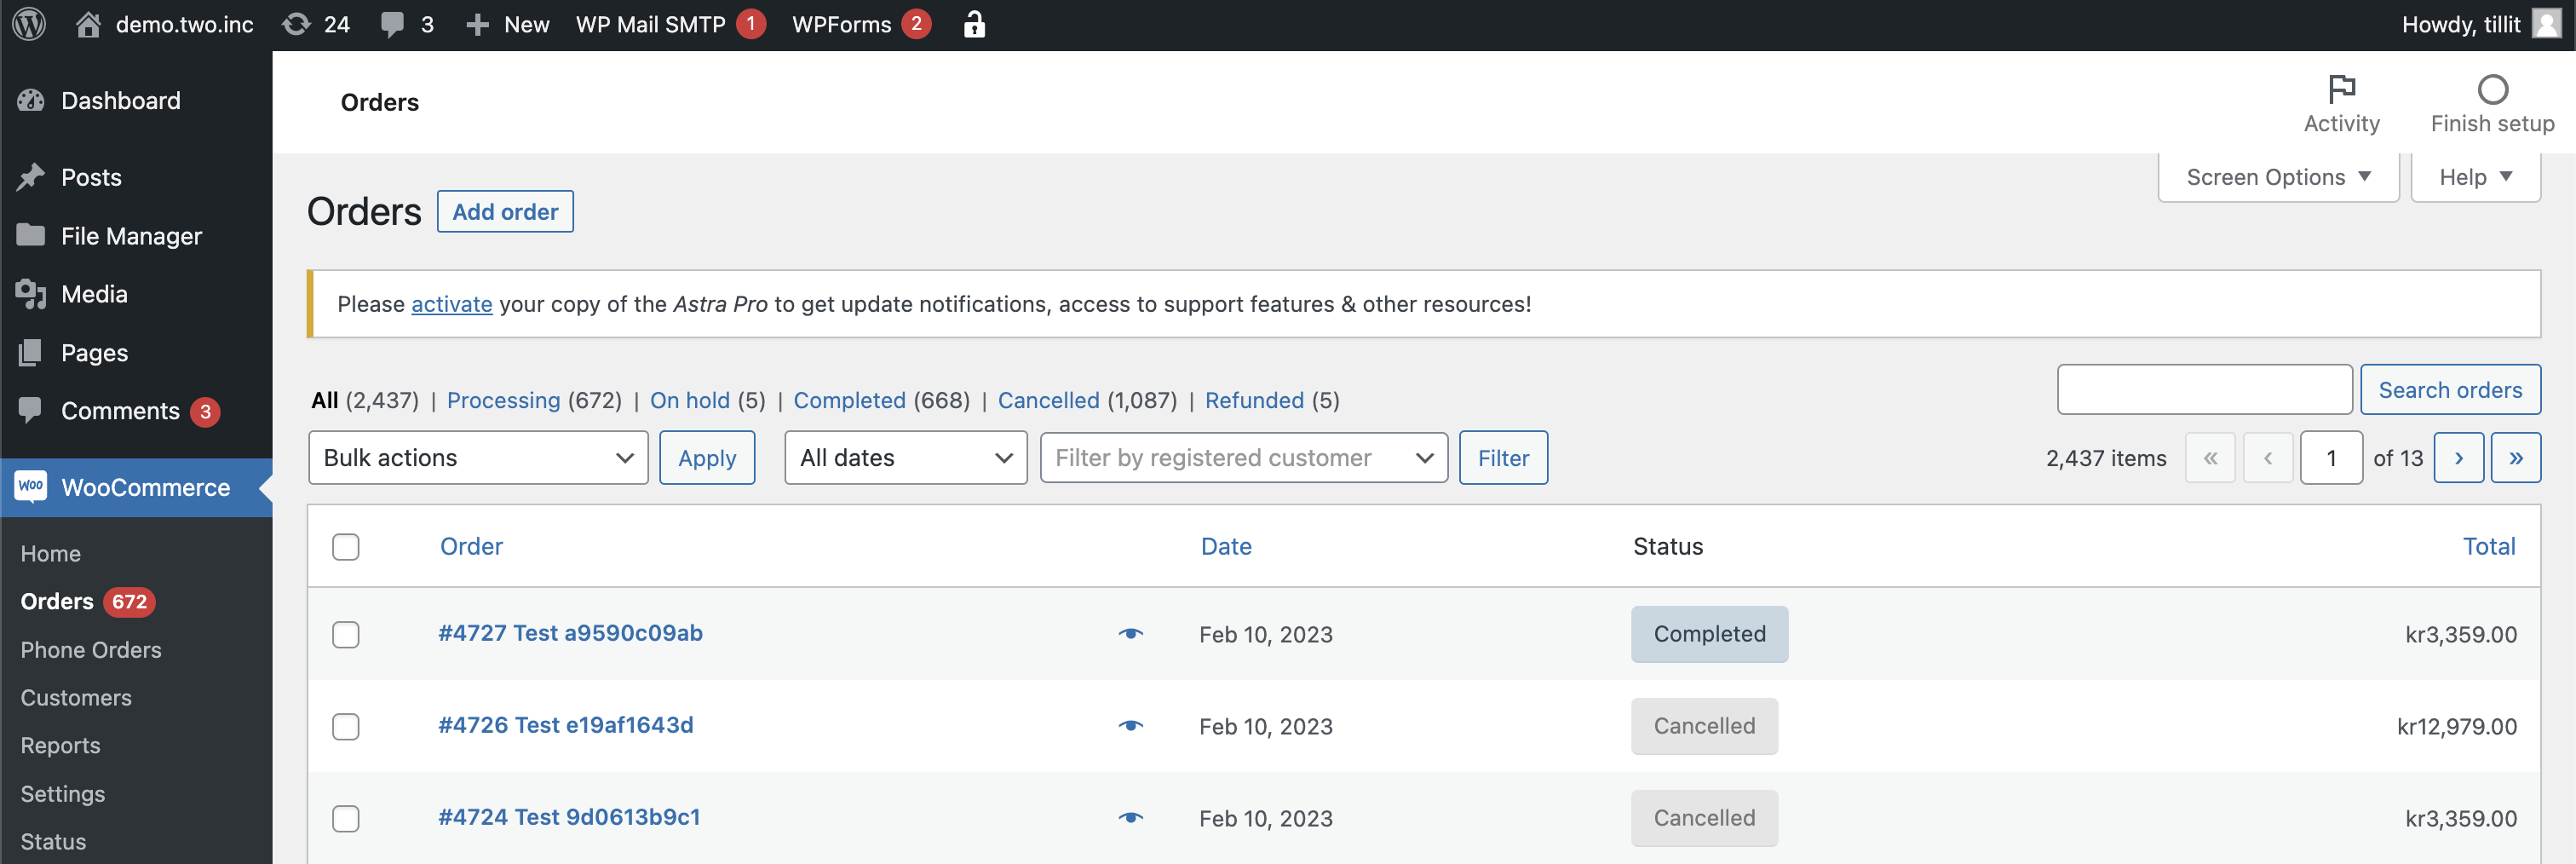
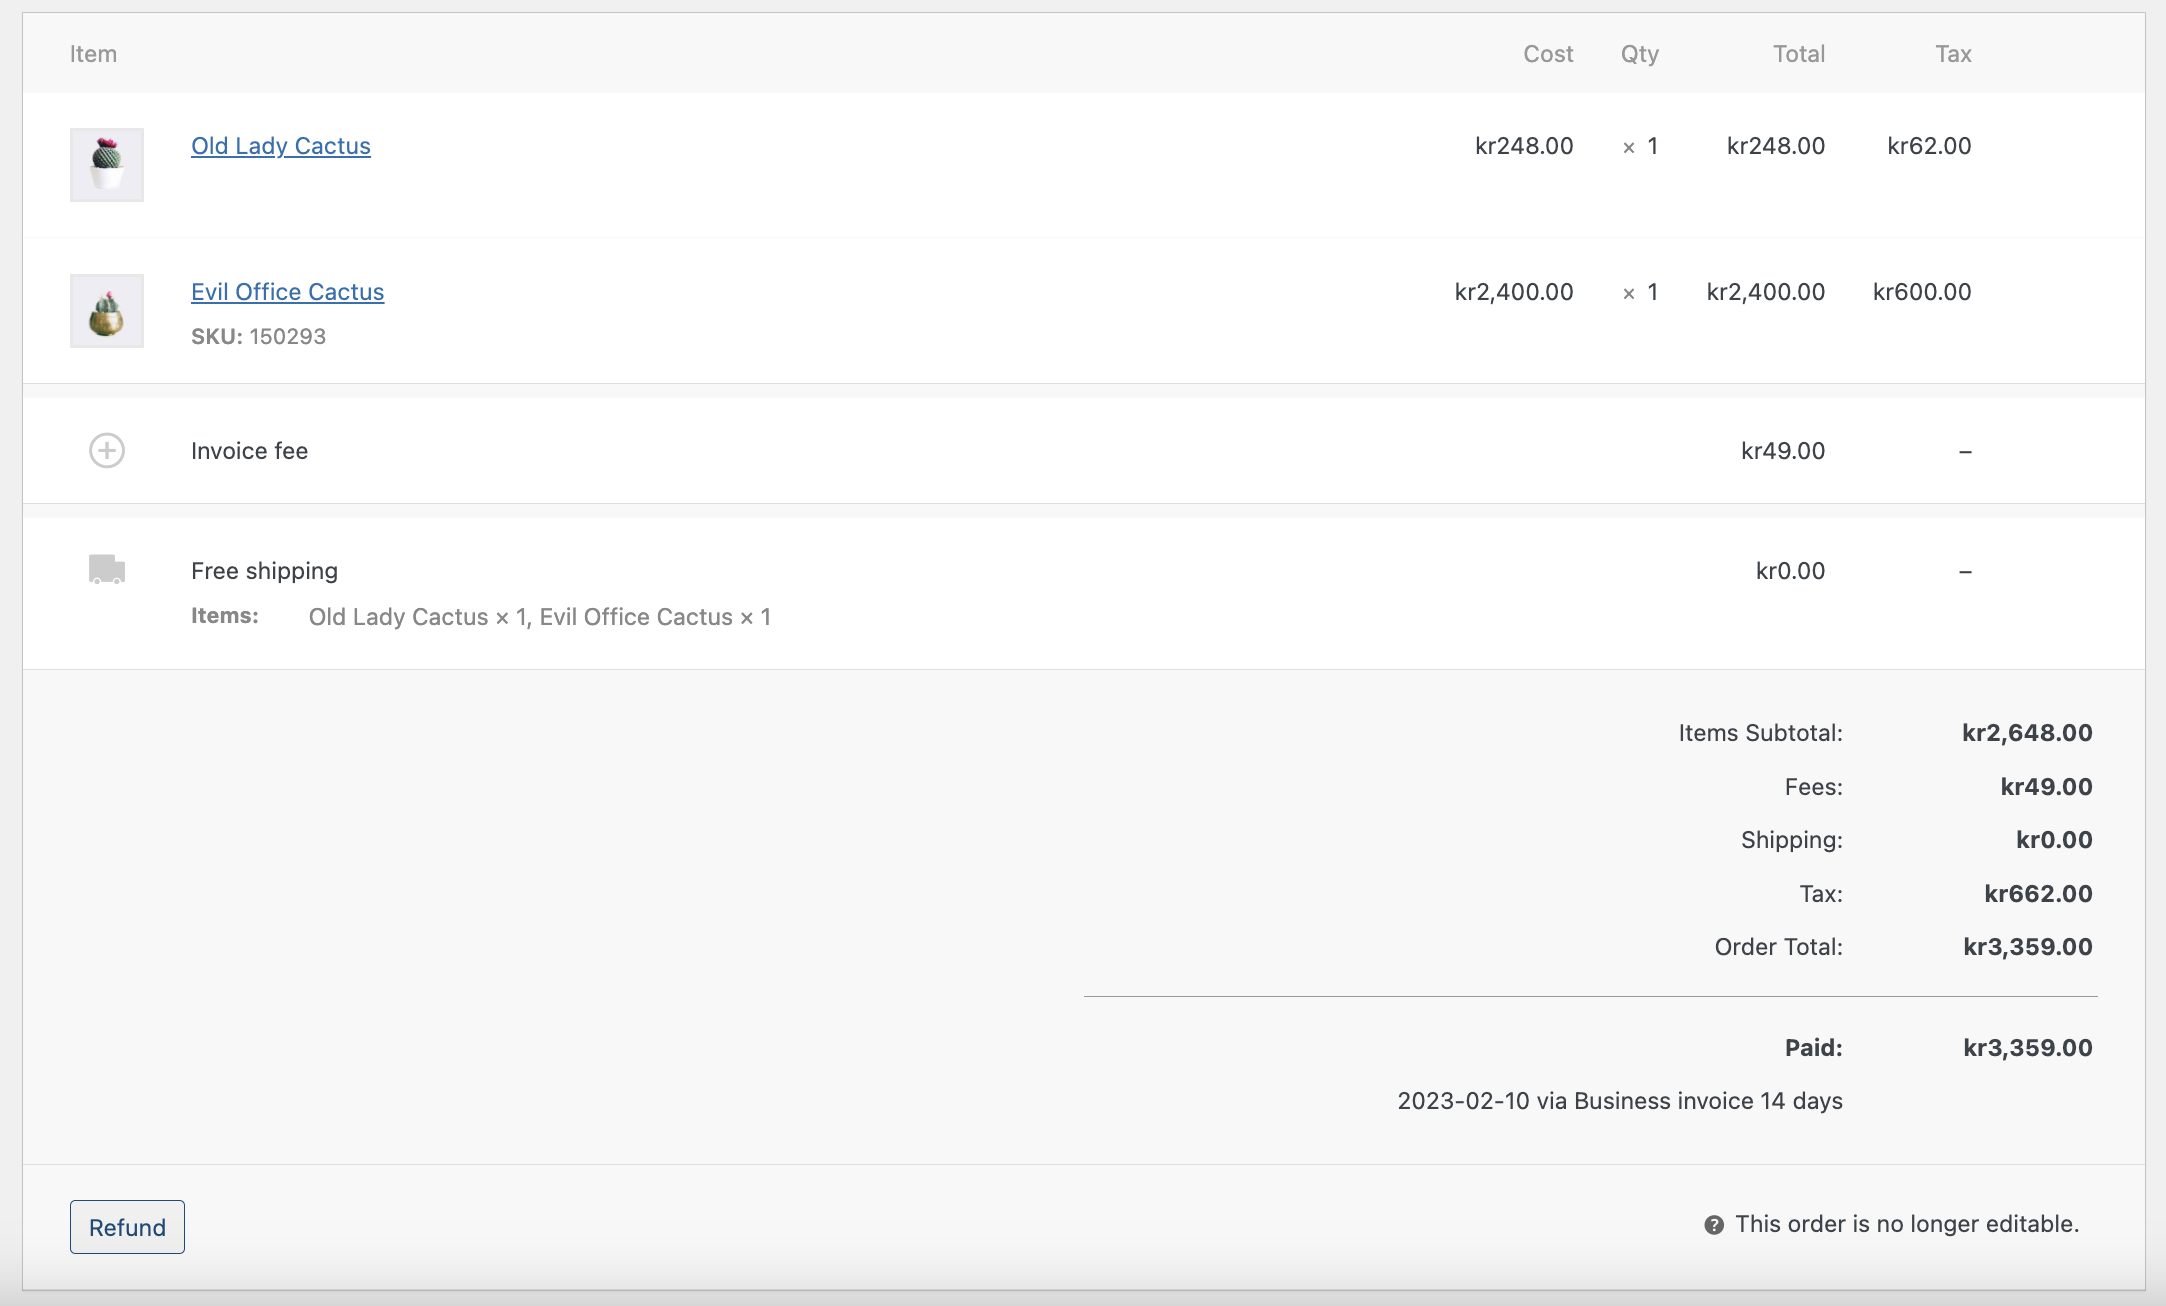
Selecting an order will show the edit order page. Scrolling down will then display a item breakdown for the order. In this instance our order is made up of 2 items. In order to issue a refund, click the button labelled 'Refund'.
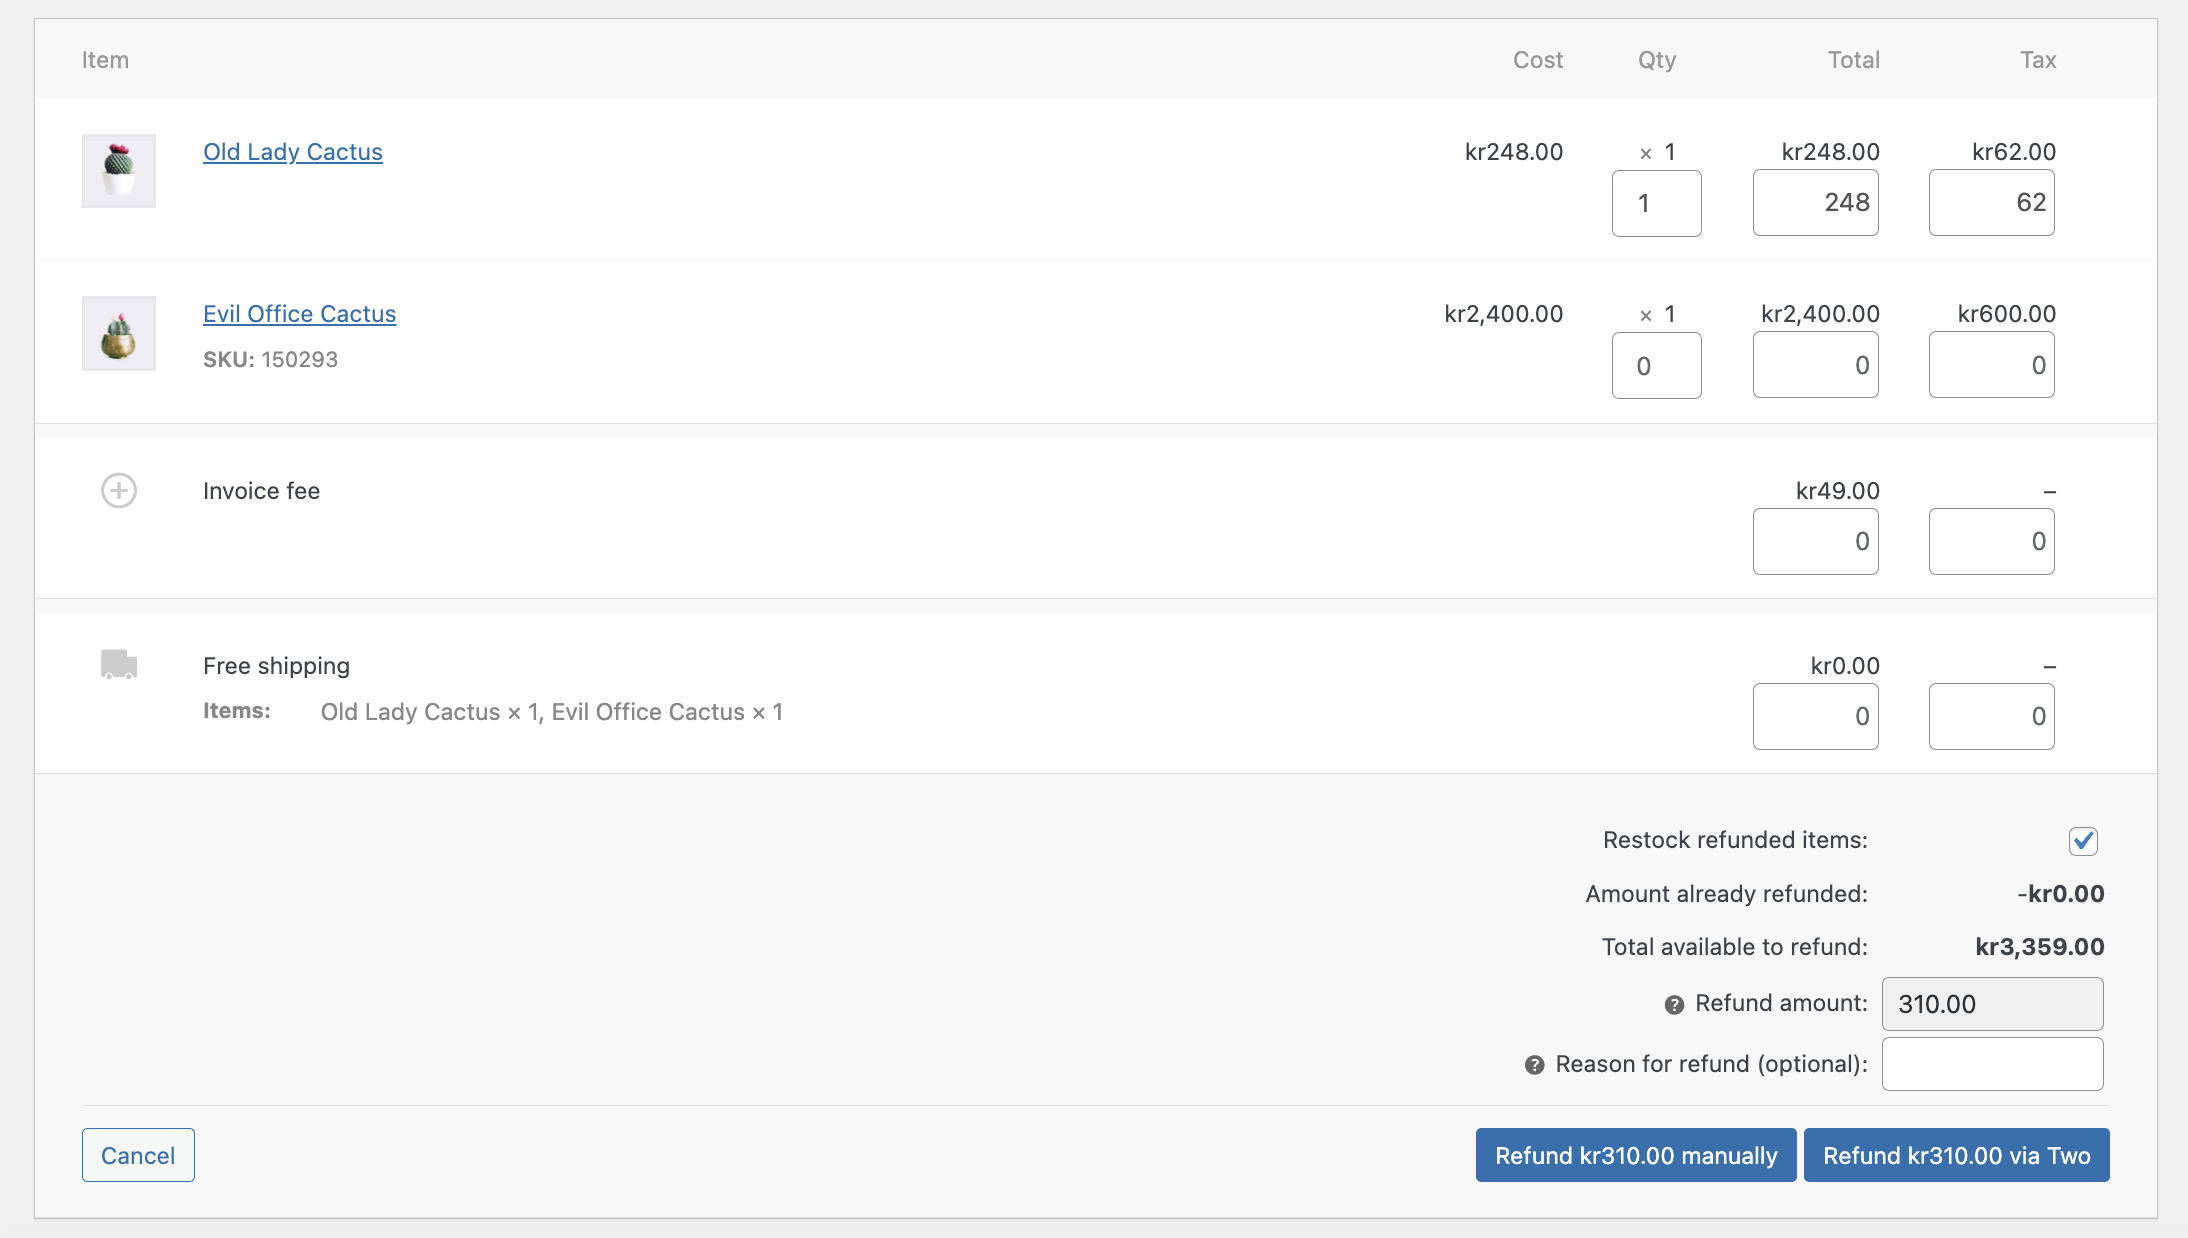
This has now made the order line items editable. In order to refund a particular item simply set the quantity for the amount of items you want to issue a refund for. In this example we are refunding a single 'Old Lady Cactus'. The 'Total' and 'Tax' feilds are automatically populated by selecting the quantity. Finally to refund simply click 'Refund via Two'
After clicking 'Refund via Two' you will get a window alert with the message 'Are you sure you wish to process this refund? This action cannot be undone.' which you can accept or decline. Accepting the alert will trigger the refund. Note that this action cannot be undone.