
Magento Plugin
Integrate Two's B2B payment solution into your Adobe Commerce or Magento 2 store, allowing business customers to pay on invoice with flexible payment terms.
Prerequisites
Before you begin, ensure you have:
- Magento 2.x or Adobe Commerce installed
- SSH access to your server
- Composer installed on your server
- Your Two API credentials
- Sign up at portal.two.inc
- You'll receive an email with your test API keys
- Once ready for production, you'll receive your live API keys
Installation
Step 1: Install via Composer
Connect to your Magento server via SSH and navigate to your Magento 2 project root:
composer require two-inc/magento2
If Composer isn't installed, follow the official installation guide.
Step 2: Enable the Module
php bin/magento module:enable Two_Gateway
Step 3: Run Setup and Clear Cache
php bin/magento setup:upgrade
php bin/magento cache:flush
Step 4: Deploy Static Content (Production Mode Only)
If your Magento installation runs in production mode:
php bin/magento setup:static-content:deploy
Step 5: Verify Installation
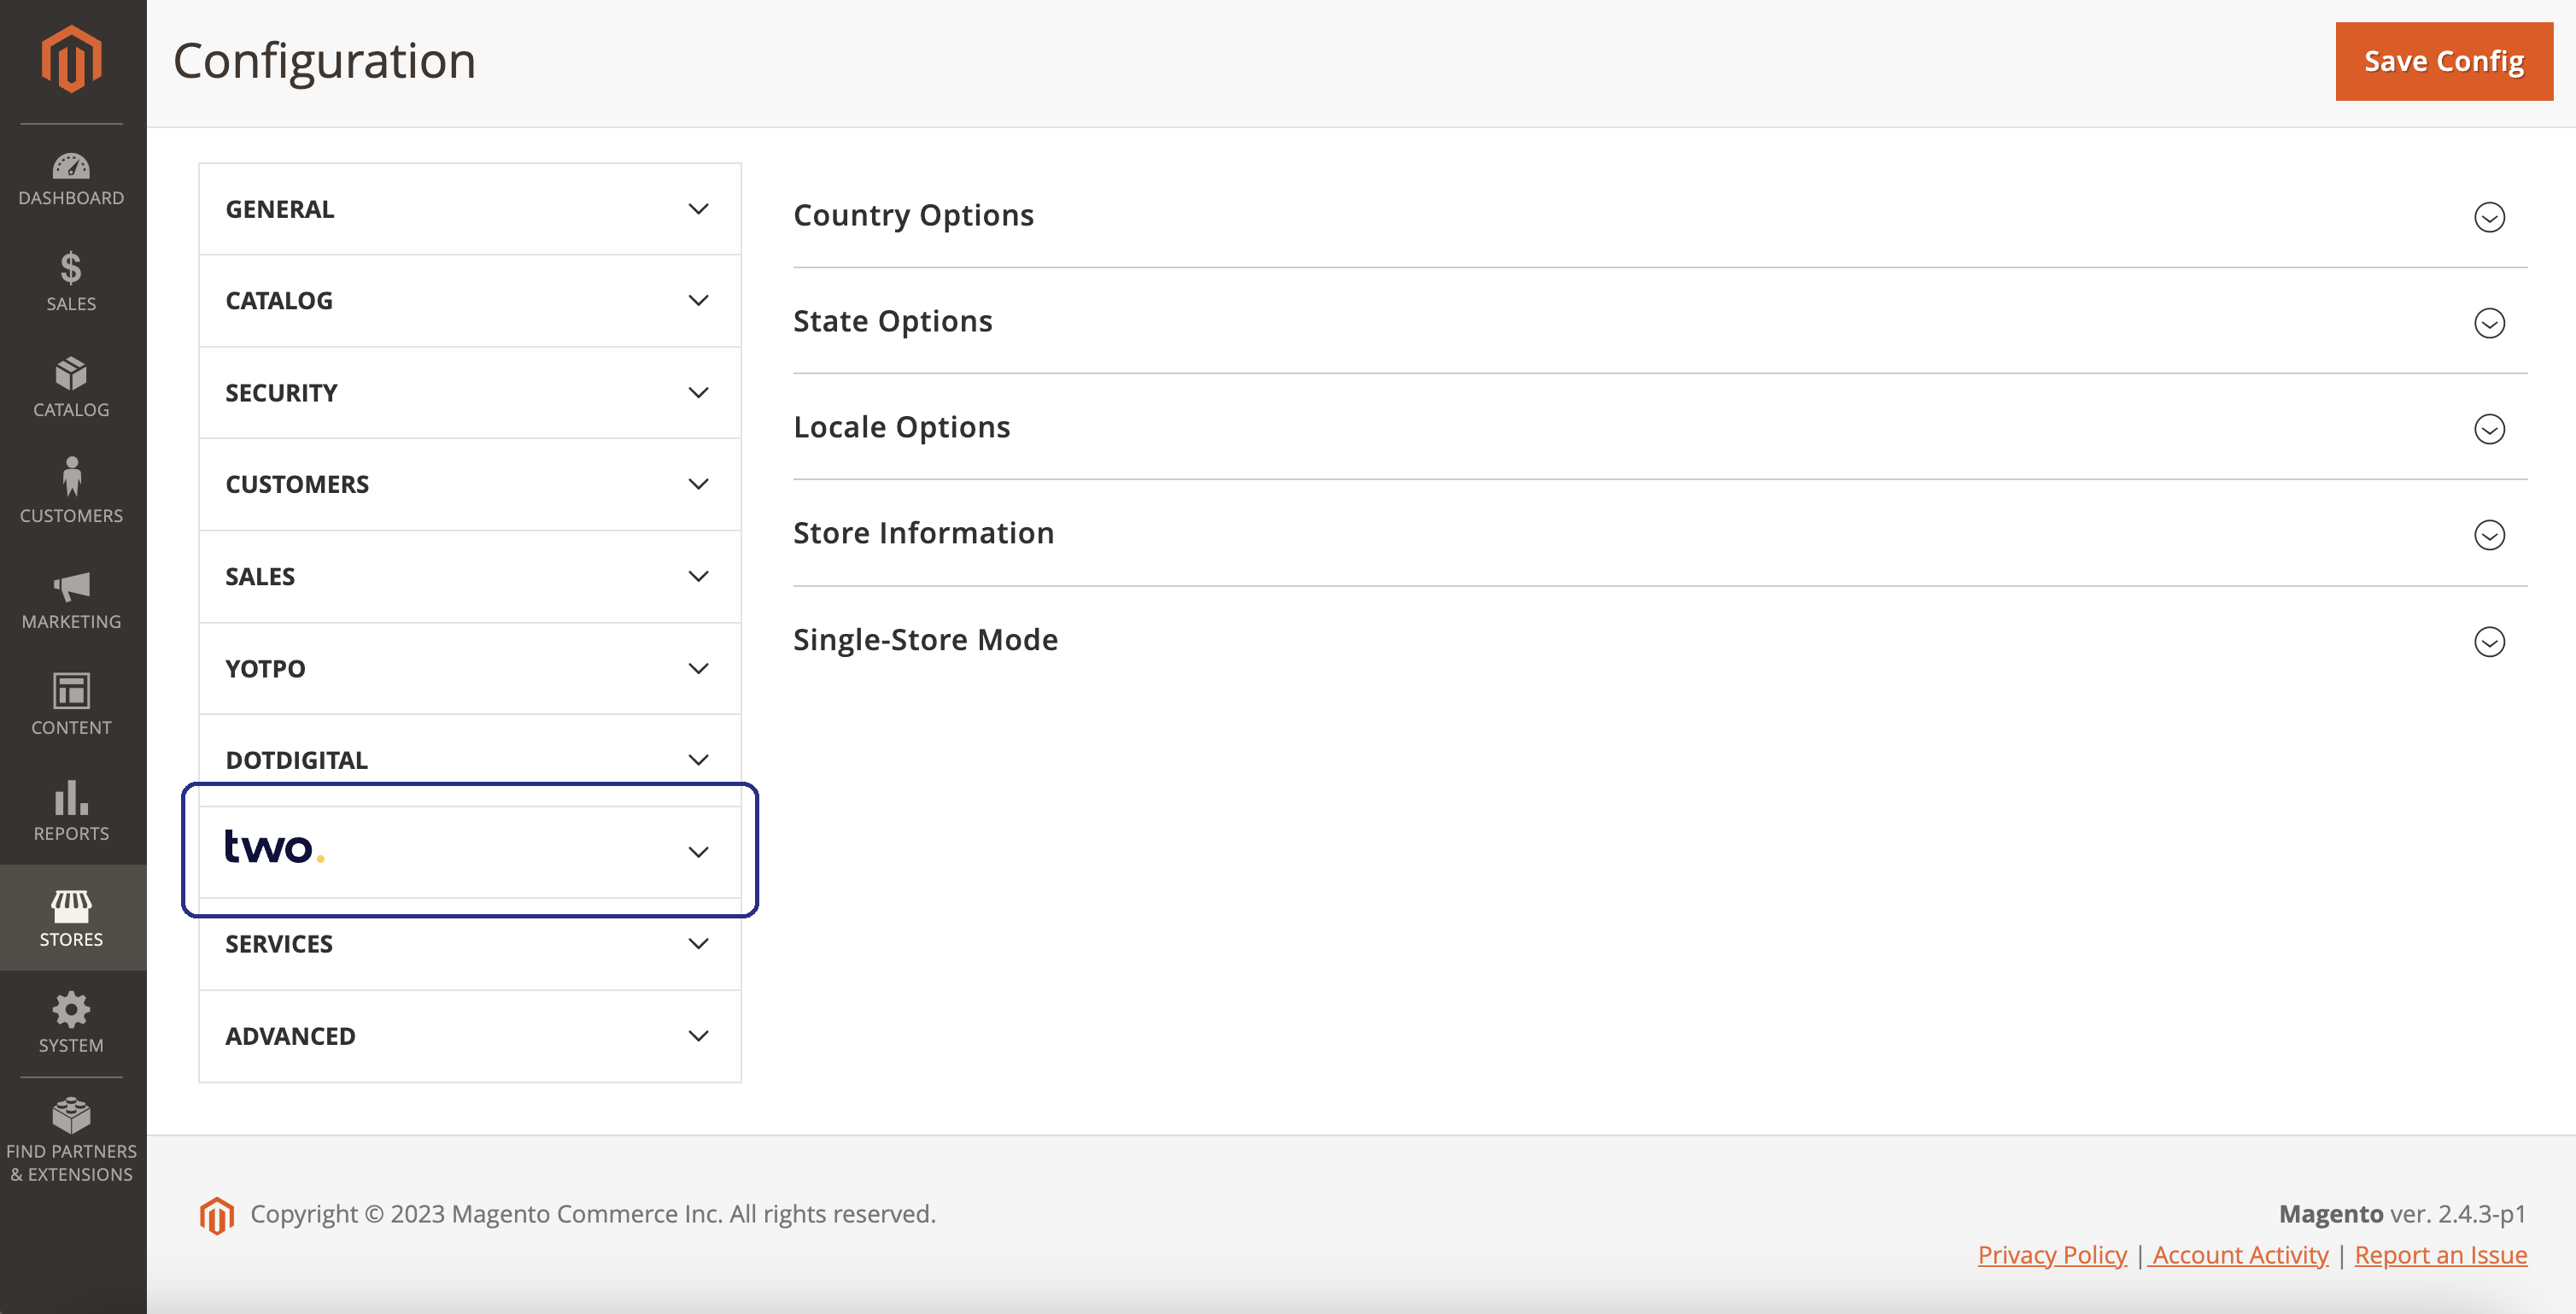
Navigate to Stores → Configuration → TWO in your Magento admin panel. The Two configuration section should now be visible.
Hyvä Checkout (optional)
The steps above enable the Two payment method on the standard (Luma) checkout. If your storefront runs a Hyvä theme, also install the Two Hyvä extension and rebuild your theme's Tailwind CSS — otherwise the Hyvä checkout will not be styled correctly.
The Hyvä extension depends on the private hyva-themes/* package. Make sure your existing Hyvä Composer credentials are configured in your auth.json — the same ones any Hyvä extension needs.
Step 1: Install via Composer
composer require two-inc/magento2-hyva-checkout
Step 2: Enable the Module and Register with Hyvä
php bin/magento module:enable Two_GatewayHyva
php bin/magento hyva:config:generate
Step 3: Rebuild your Hyvä Theme's Tailwind CSS
Replace the path with your active theme's web/tailwind directory:
npm --prefix app/design/frontend/<Vendor>/<theme>/web/tailwind ci
npm --prefix app/design/frontend/<Vendor>/<theme>/web/tailwind run build-prod
hyva:config:generate or the Tailwind rebuildhyva:config:generate adds the module to app/etc/hyva-themes.json, which is what tells the Hyvä theme's Tailwind build to scan its templates. Skip it and the utility classes used only by the Two checkout are purged from the compiled CSS, so the checkout renders incorrectly.
Step 4: Run Setup and Clear Cache
php bin/magento setup:upgrade
php bin/magento cache:flush
If your Magento installation runs in production mode, also redeploy the static content:
php bin/magento setup:static-content:deploy
Configuration
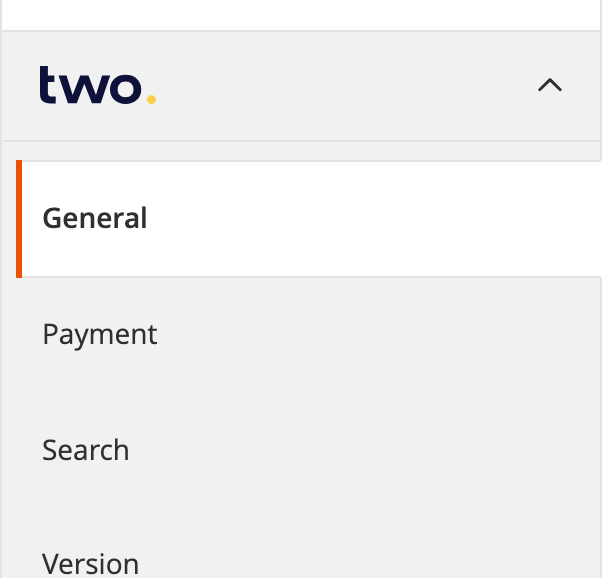
The configuration is split into three sections:
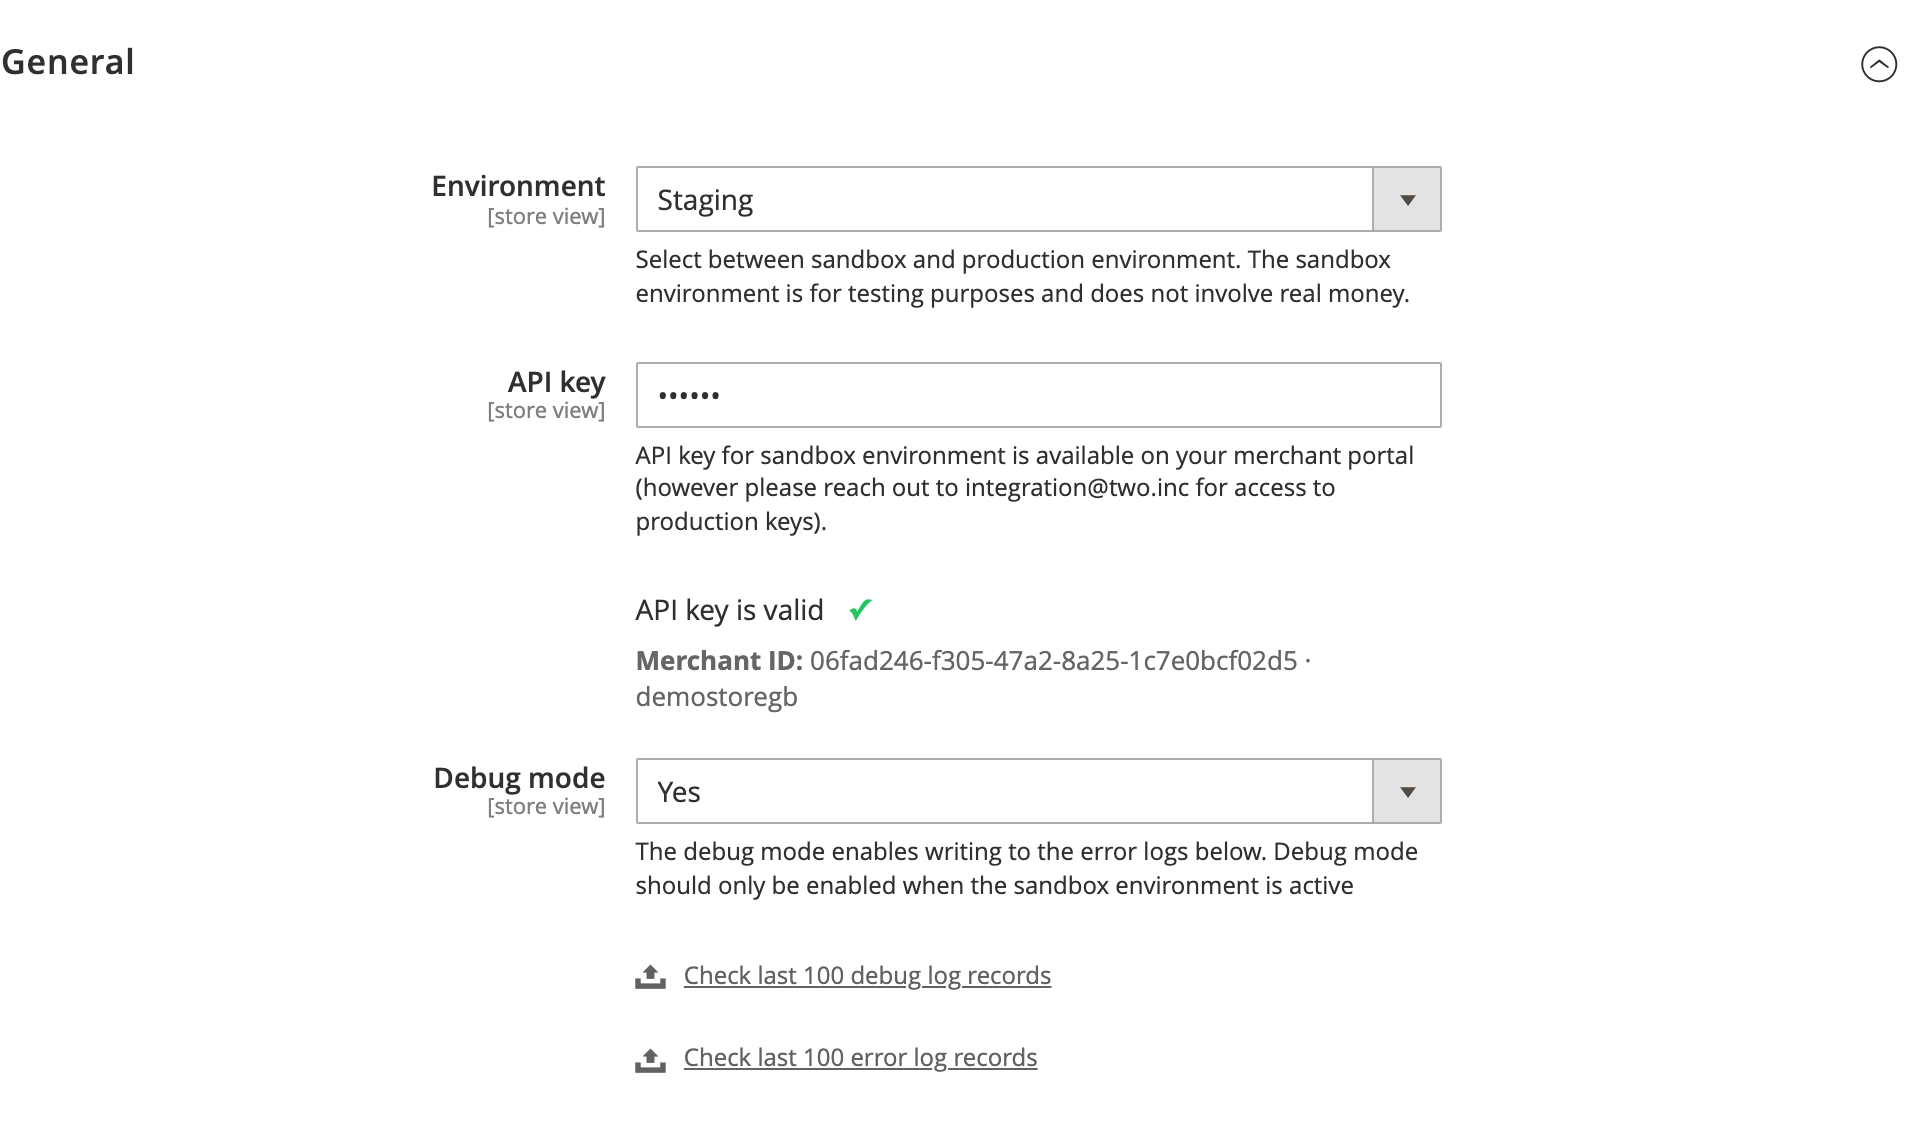
General Settings
| Field | Description |
|---|---|
| Environment | Select staging for testing or production for live transactions |
| API Key | Your Two API key |
| Merchant Short Name | Your merchant identifier provided by Two |
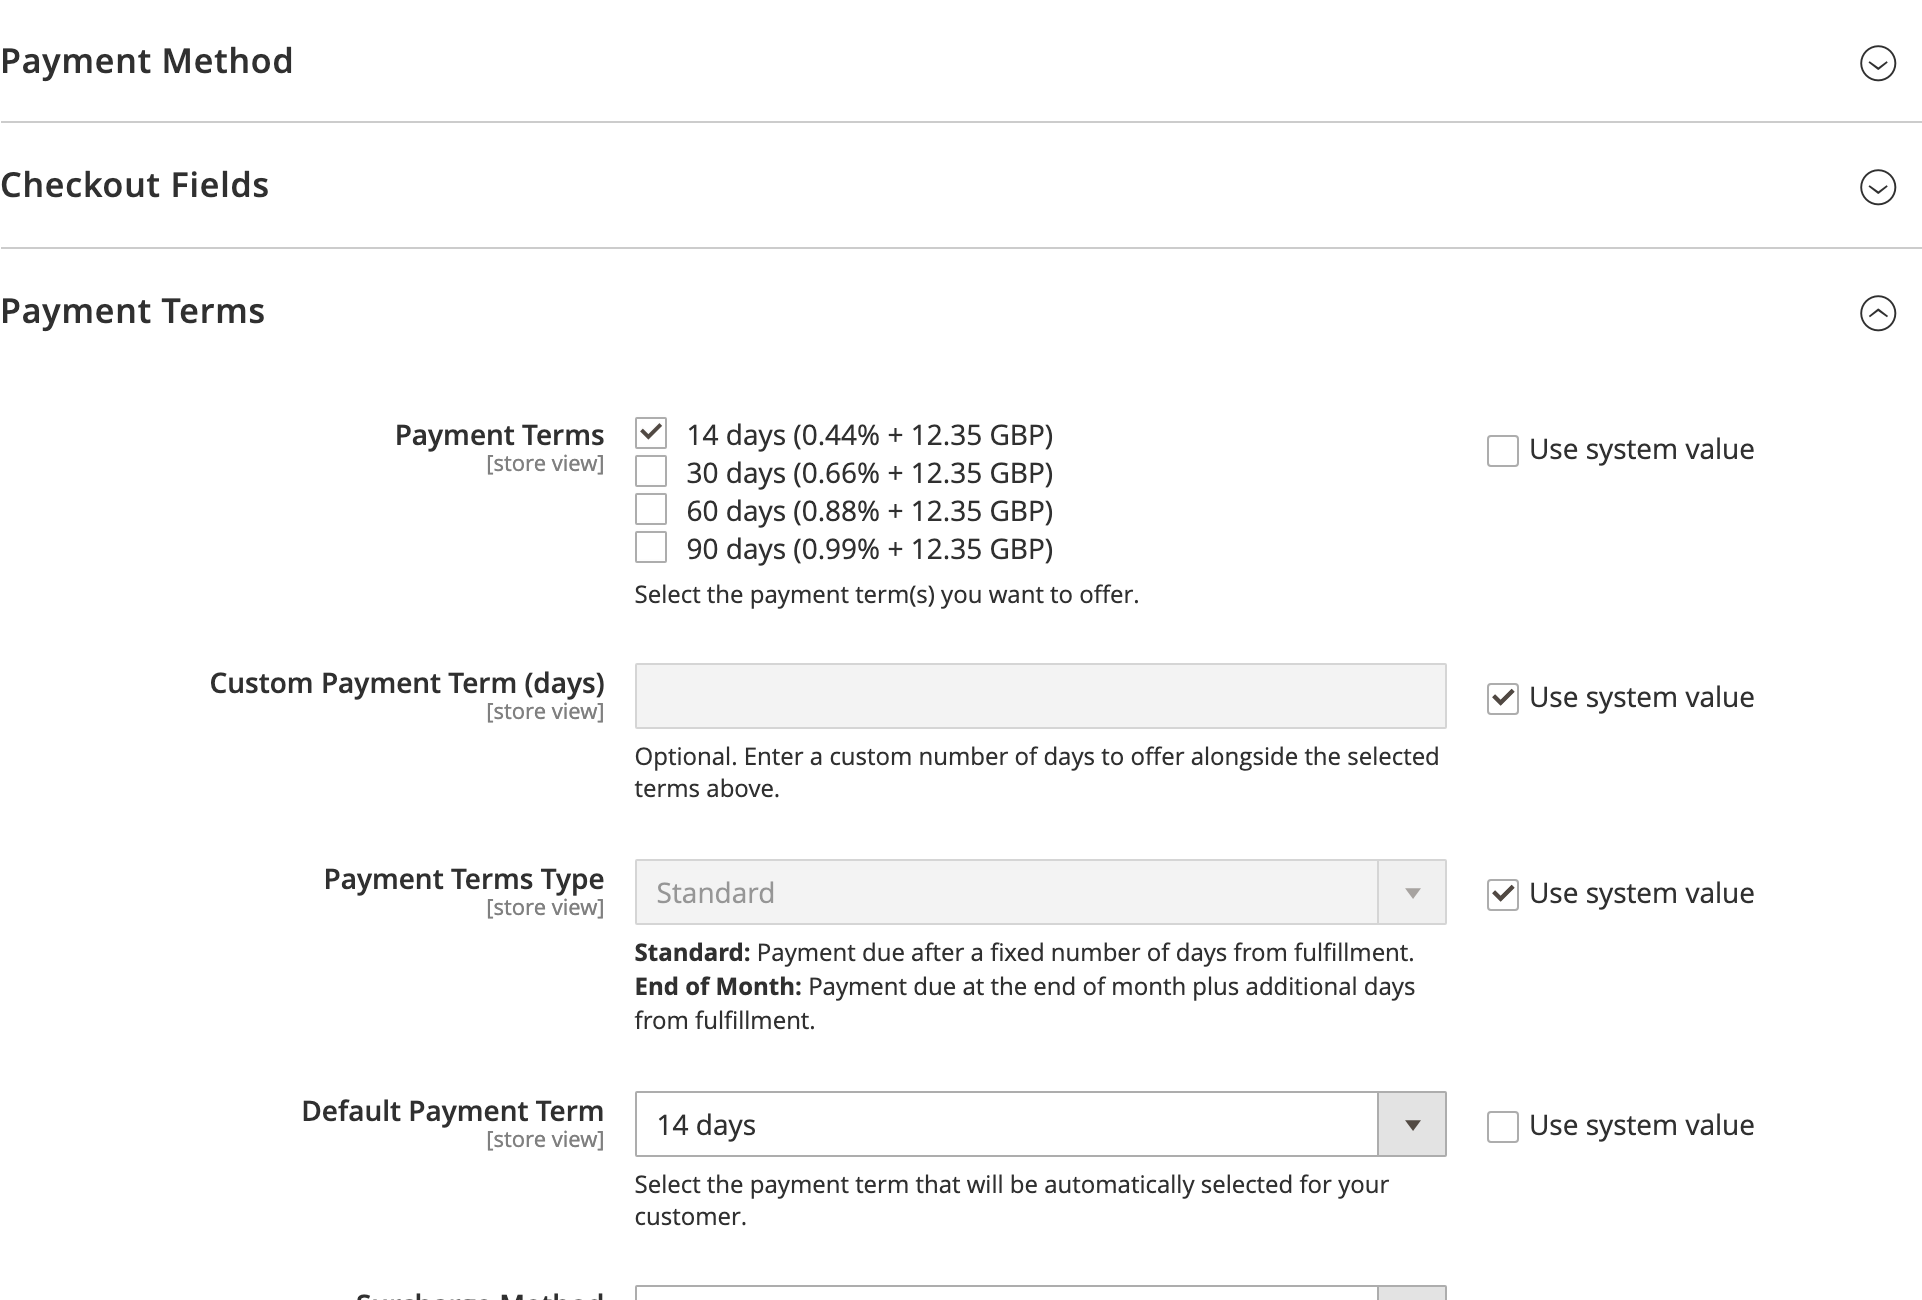
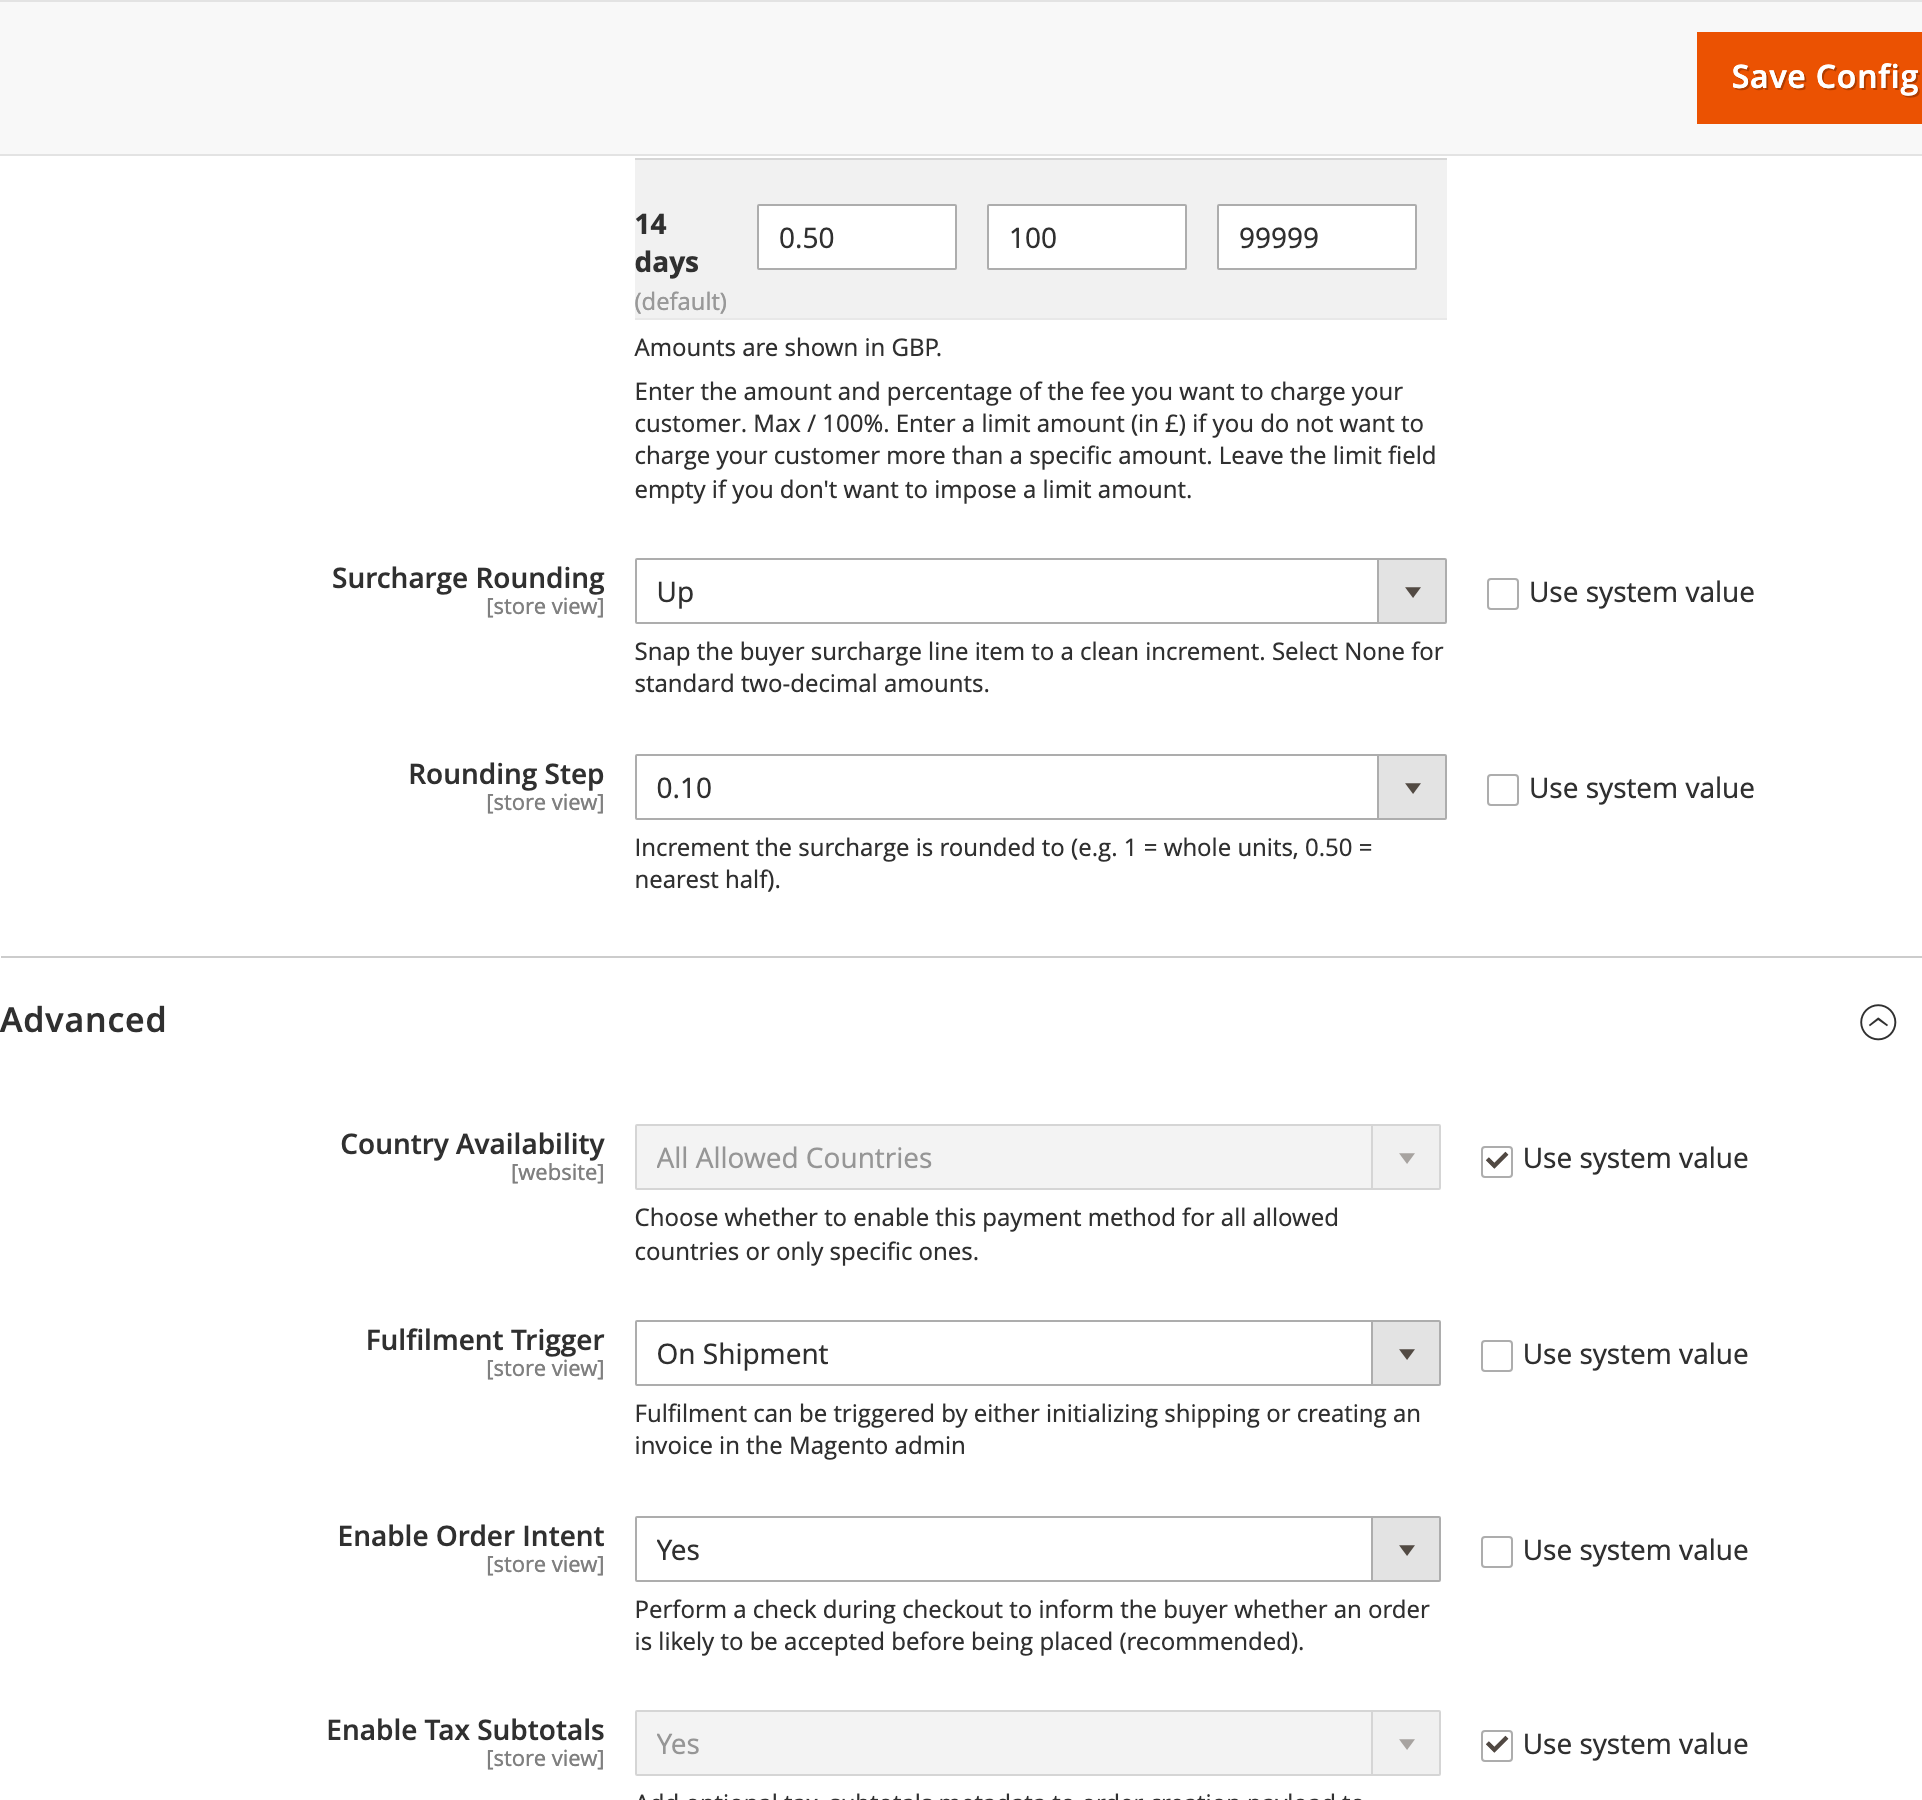
Payment Settings
| Field | Description |
|---|---|
| Enable Two payments | Toggle Two as a payment option on/off |
| Title | Payment method name displayed at checkout |
| Enable intent check | Pre-approve buyers during checkout for better UX |
| Invoice type | Select funded, merchant, or administered invoice |
| Due in days | Number of days for payment (e.g., 14, 30, 45) |
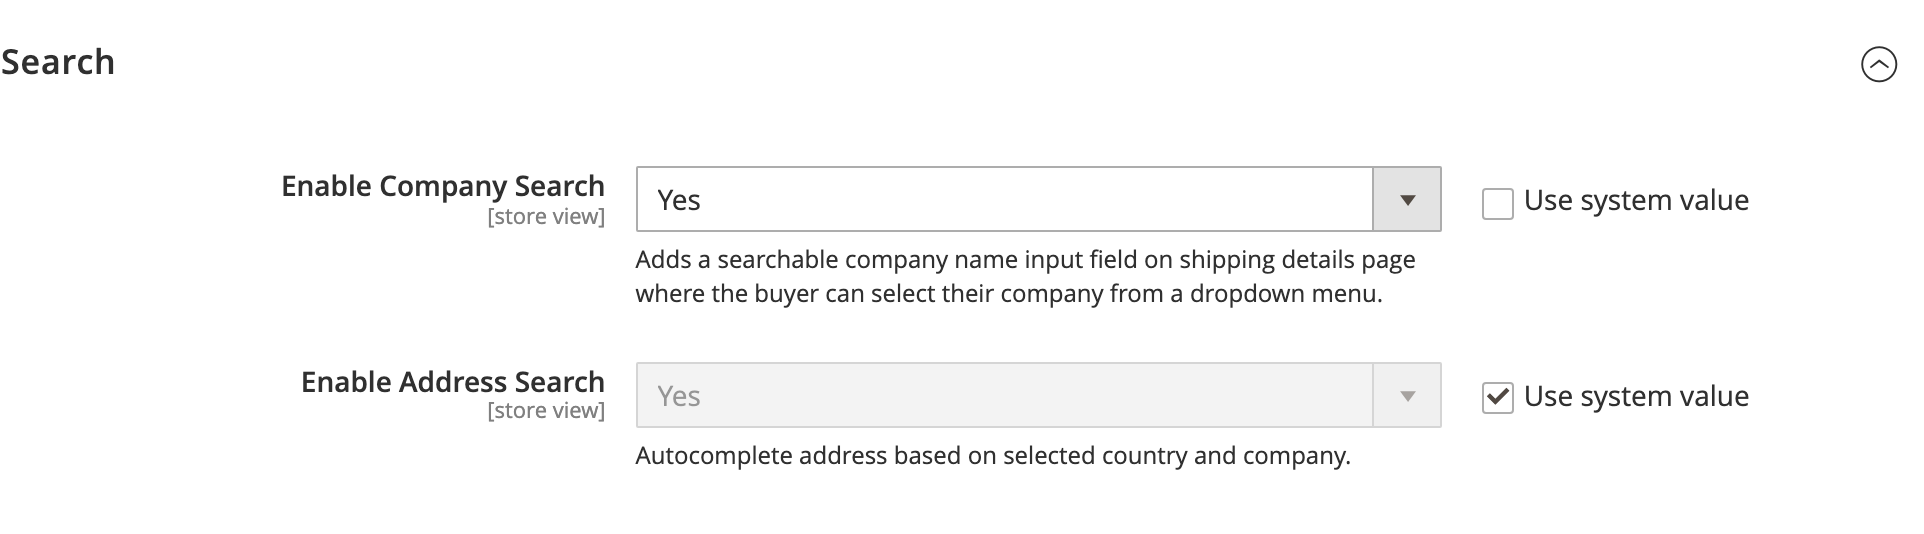
Search Settings
| Field | Description |
|---|---|
| Enable company name search | Auto-complete company names at checkout |
| Enable organisation number search | Auto-complete organisation numbers at checkout |
Product Page Settings
Available from plugin version 2.4.0. Both are off by default and independent, so you can run either, both or neither.
| Field | Description |
|---|---|
| Show message on product pages | Adds a short line telling the buyer they can pay on invoice with Two |
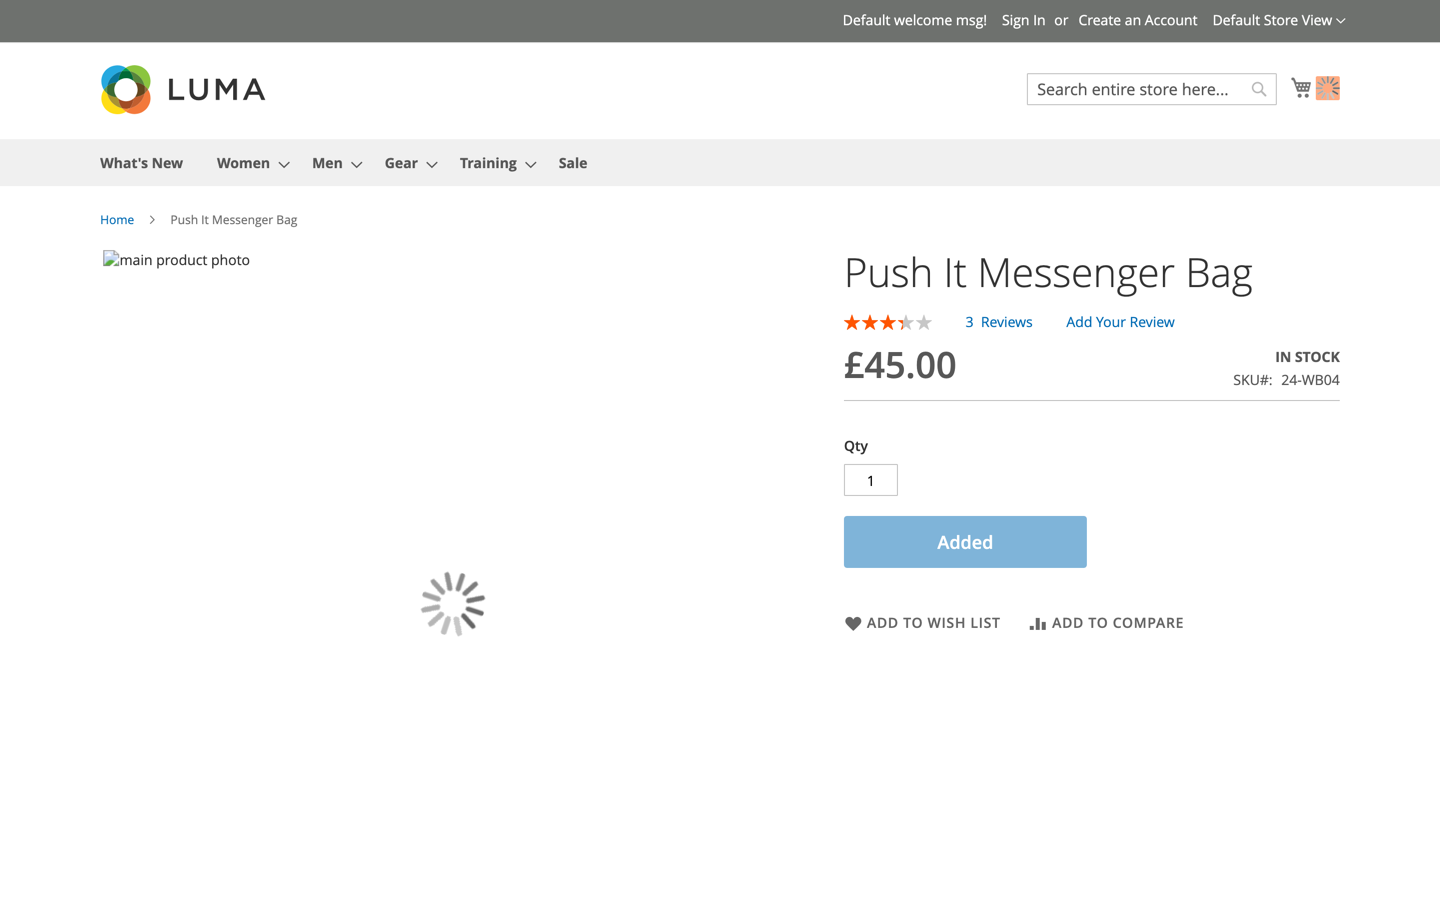
| Show buy button on product pages | Adds a button under Add to Cart that puts the item in the basket and opens checkout with Two preselected where it is available |
It takes the buyer to checkout, where they confirm as usual. It sits alongside your theme's Add to Cart rather than replacing it, and respects the quantity and any variant the buyer has chosen.
A product page has no cart, so the button cannot know in advance whether your minimum order value, the buyer's country or the currency will allow Two. When the completed basket does not qualify, checkout opens with nothing selected and the buyer chooses as they normally would.
Both settings apply per store view, so you can trial them on one storefront before rolling them out more widely.
Apply Changes
After saving your configuration, flush the cache:
Via Admin: Navigate to System → Tools → Cache Management → Flush Cache
Via CLI:
php bin/magento cache:flush
Your Two payment gateway is now ready to use!
Checkout journey
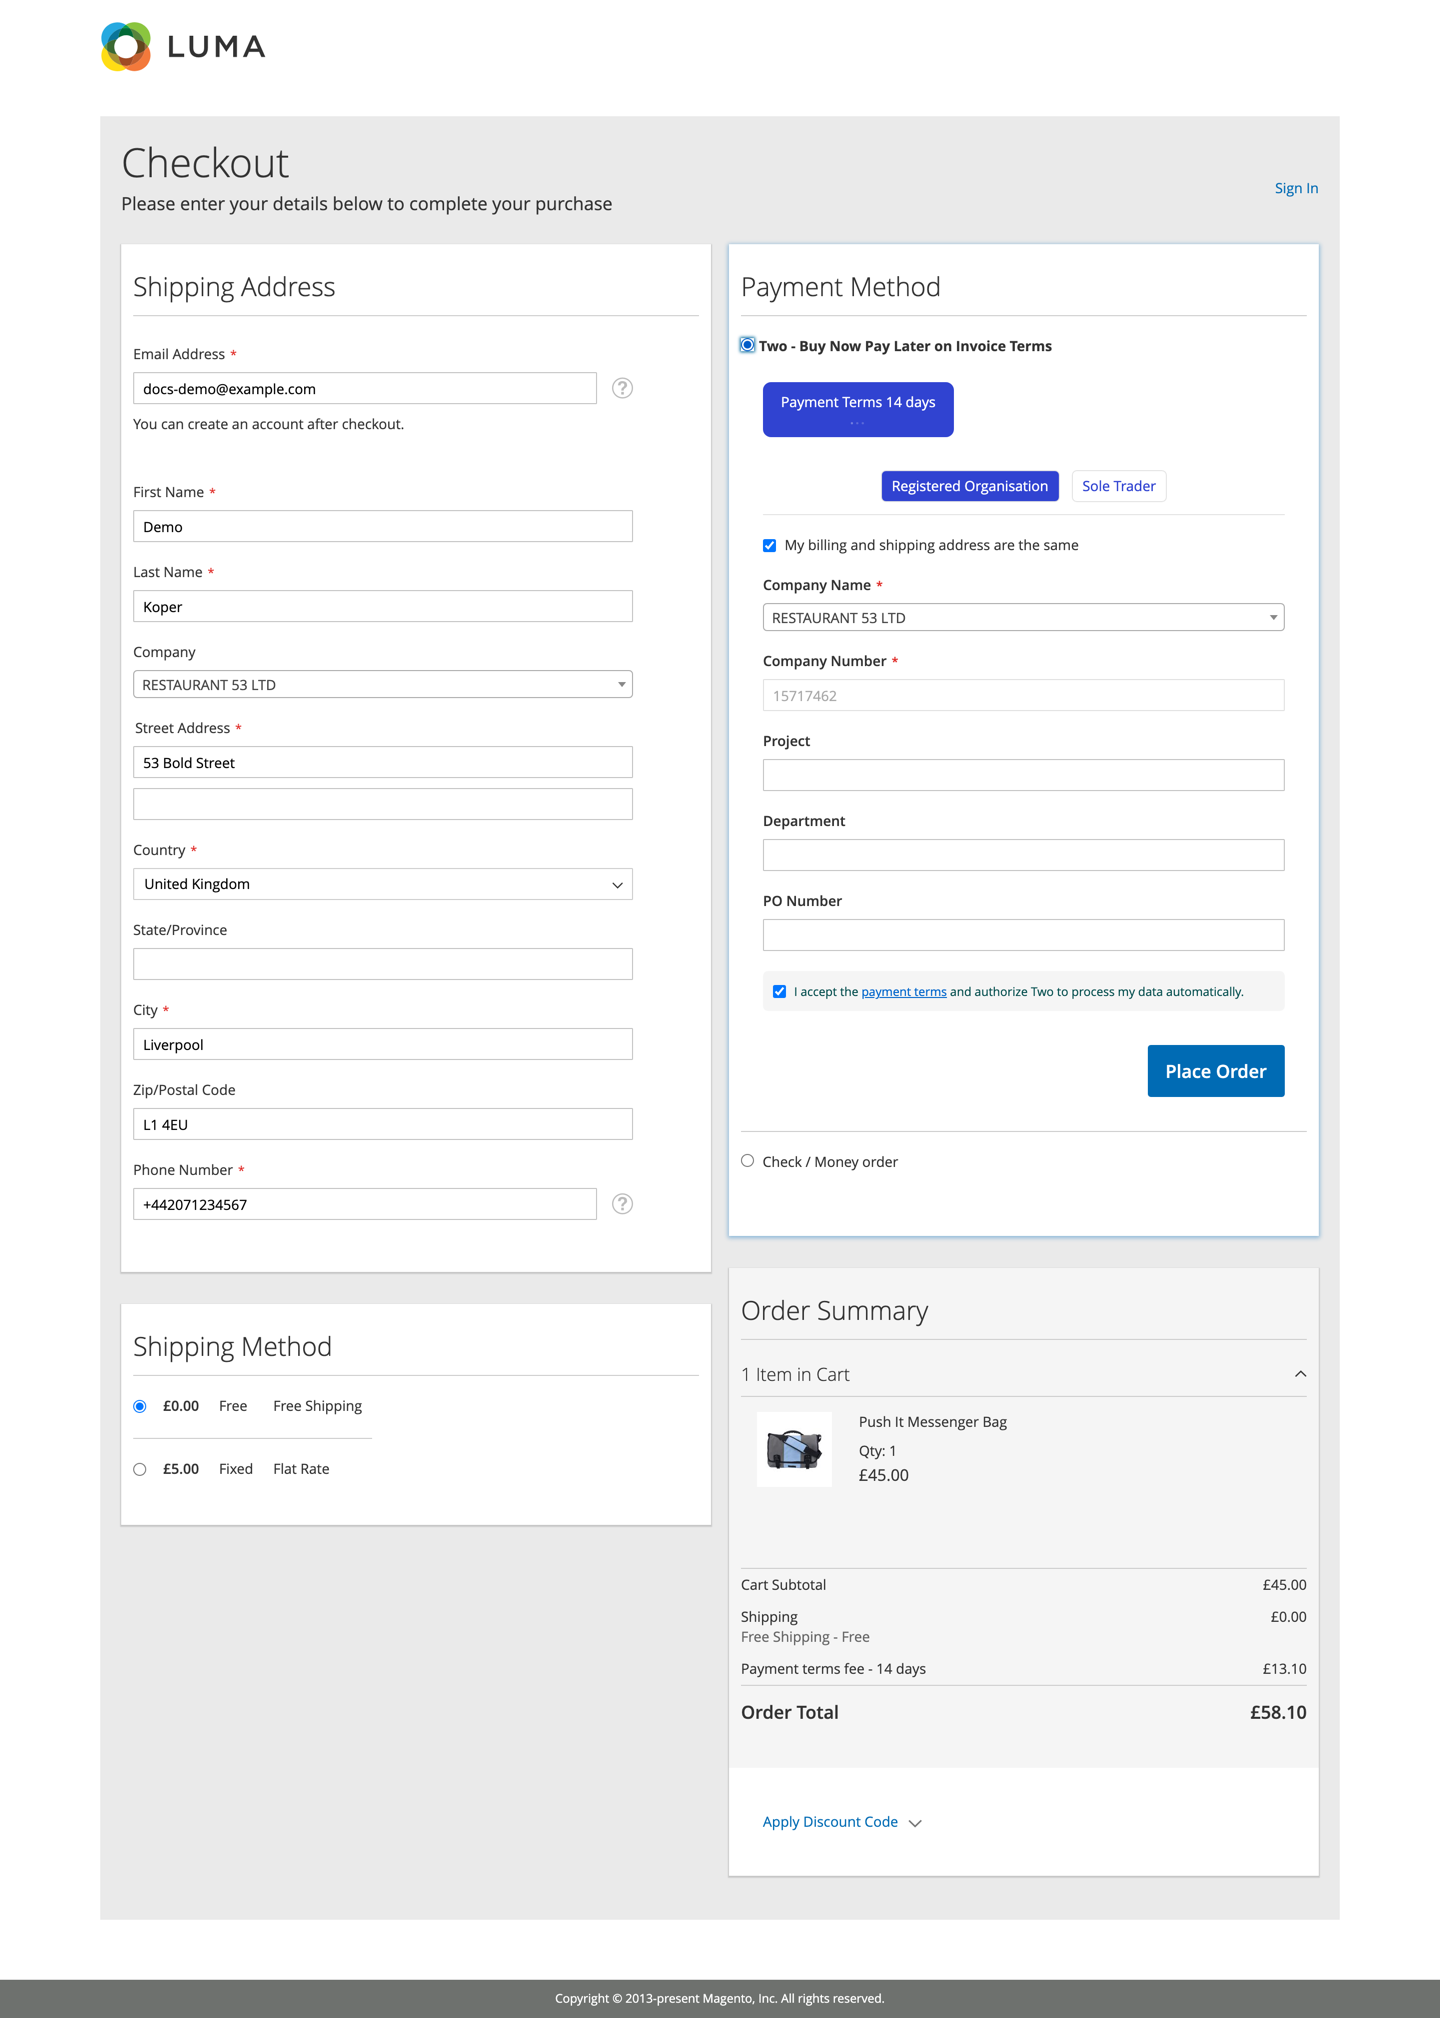
Once the plugin is enabled, buyers can pay with Buy Now Pay Later on Invoice Terms at checkout. The steps below show a typical business purchase.
-
The buyer adds a product to their cart and proceeds to checkout.
-
At checkout they select Two - Buy Now Pay Later on Invoice Terms, search for their company, choose a payment term and accept the payment terms.
-
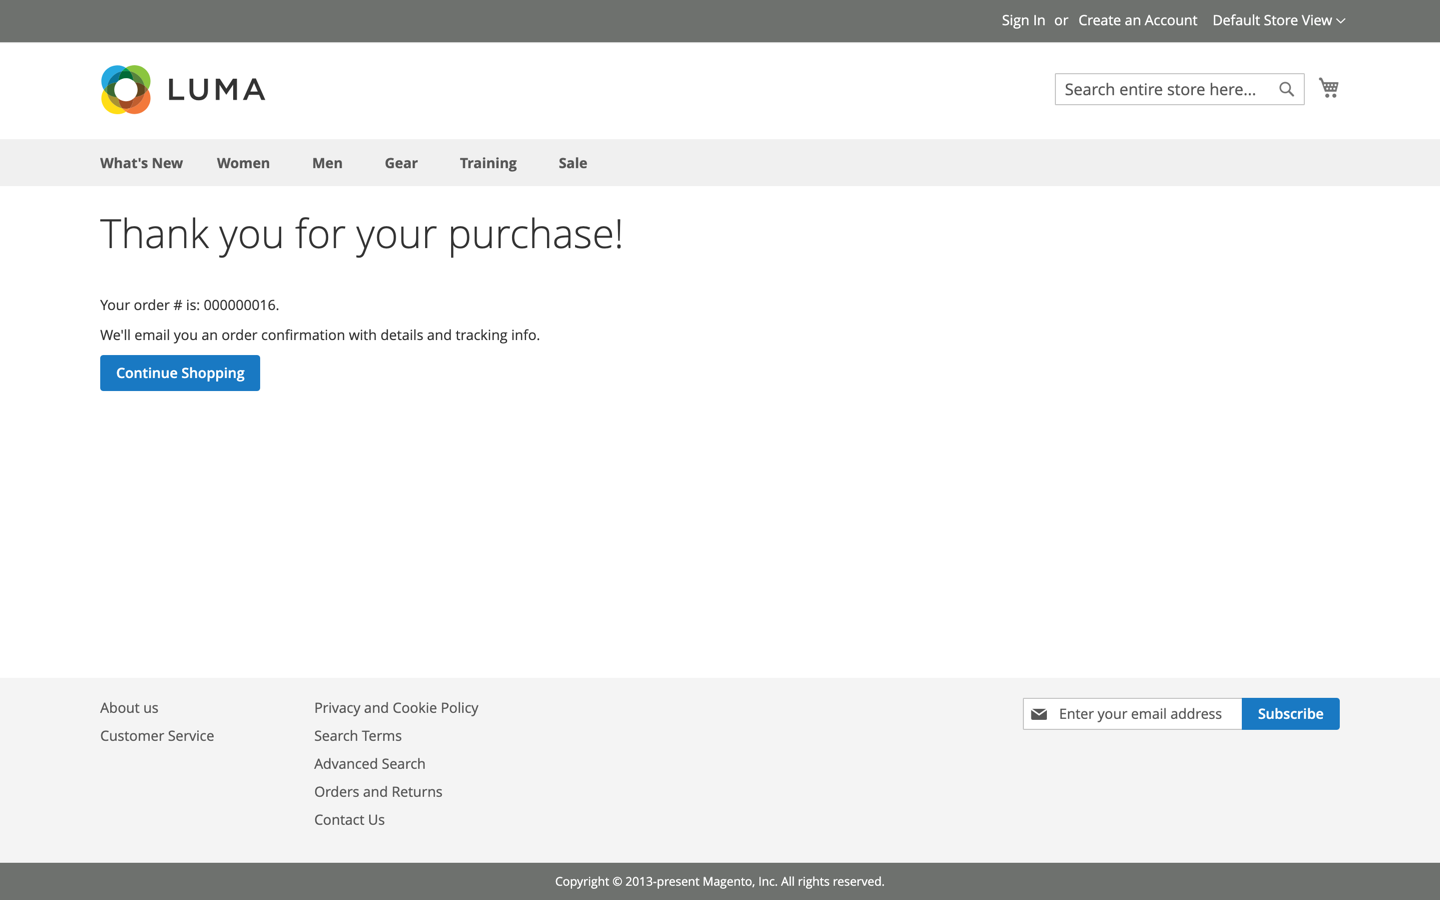
After placing the order, the buyer sees the order confirmation.
Disabling the Plugin
Option 1: Disable via Admin
Navigate to Store → Configuration → Two → Payment and set Enable Two payments to No.

Option 2: Disable via Command Line
php bin/magento module:disable Two_Gateway
php bin/magento setup:upgrade
php bin/magento setup:static-content:deploy
php bin/magento cache:flush
Uninstallation
Option 1: Uninstall via Magento CLI
php bin/magento module:uninstall Two_Gateway
php bin/magento setup:upgrade
php bin/magento setup:static-content:deploy
php bin/magento cache:flush
Option 2: Remove via Composer
php bin/magento module:disable Two_Gateway
composer remove two-inc/magento2
php bin/magento setup:upgrade
php bin/magento setup:static-content:deploy
php bin/magento cache:flush
Processing Refunds
To refund an order in Magento:
- Navigate to Admin → Sales → Orders
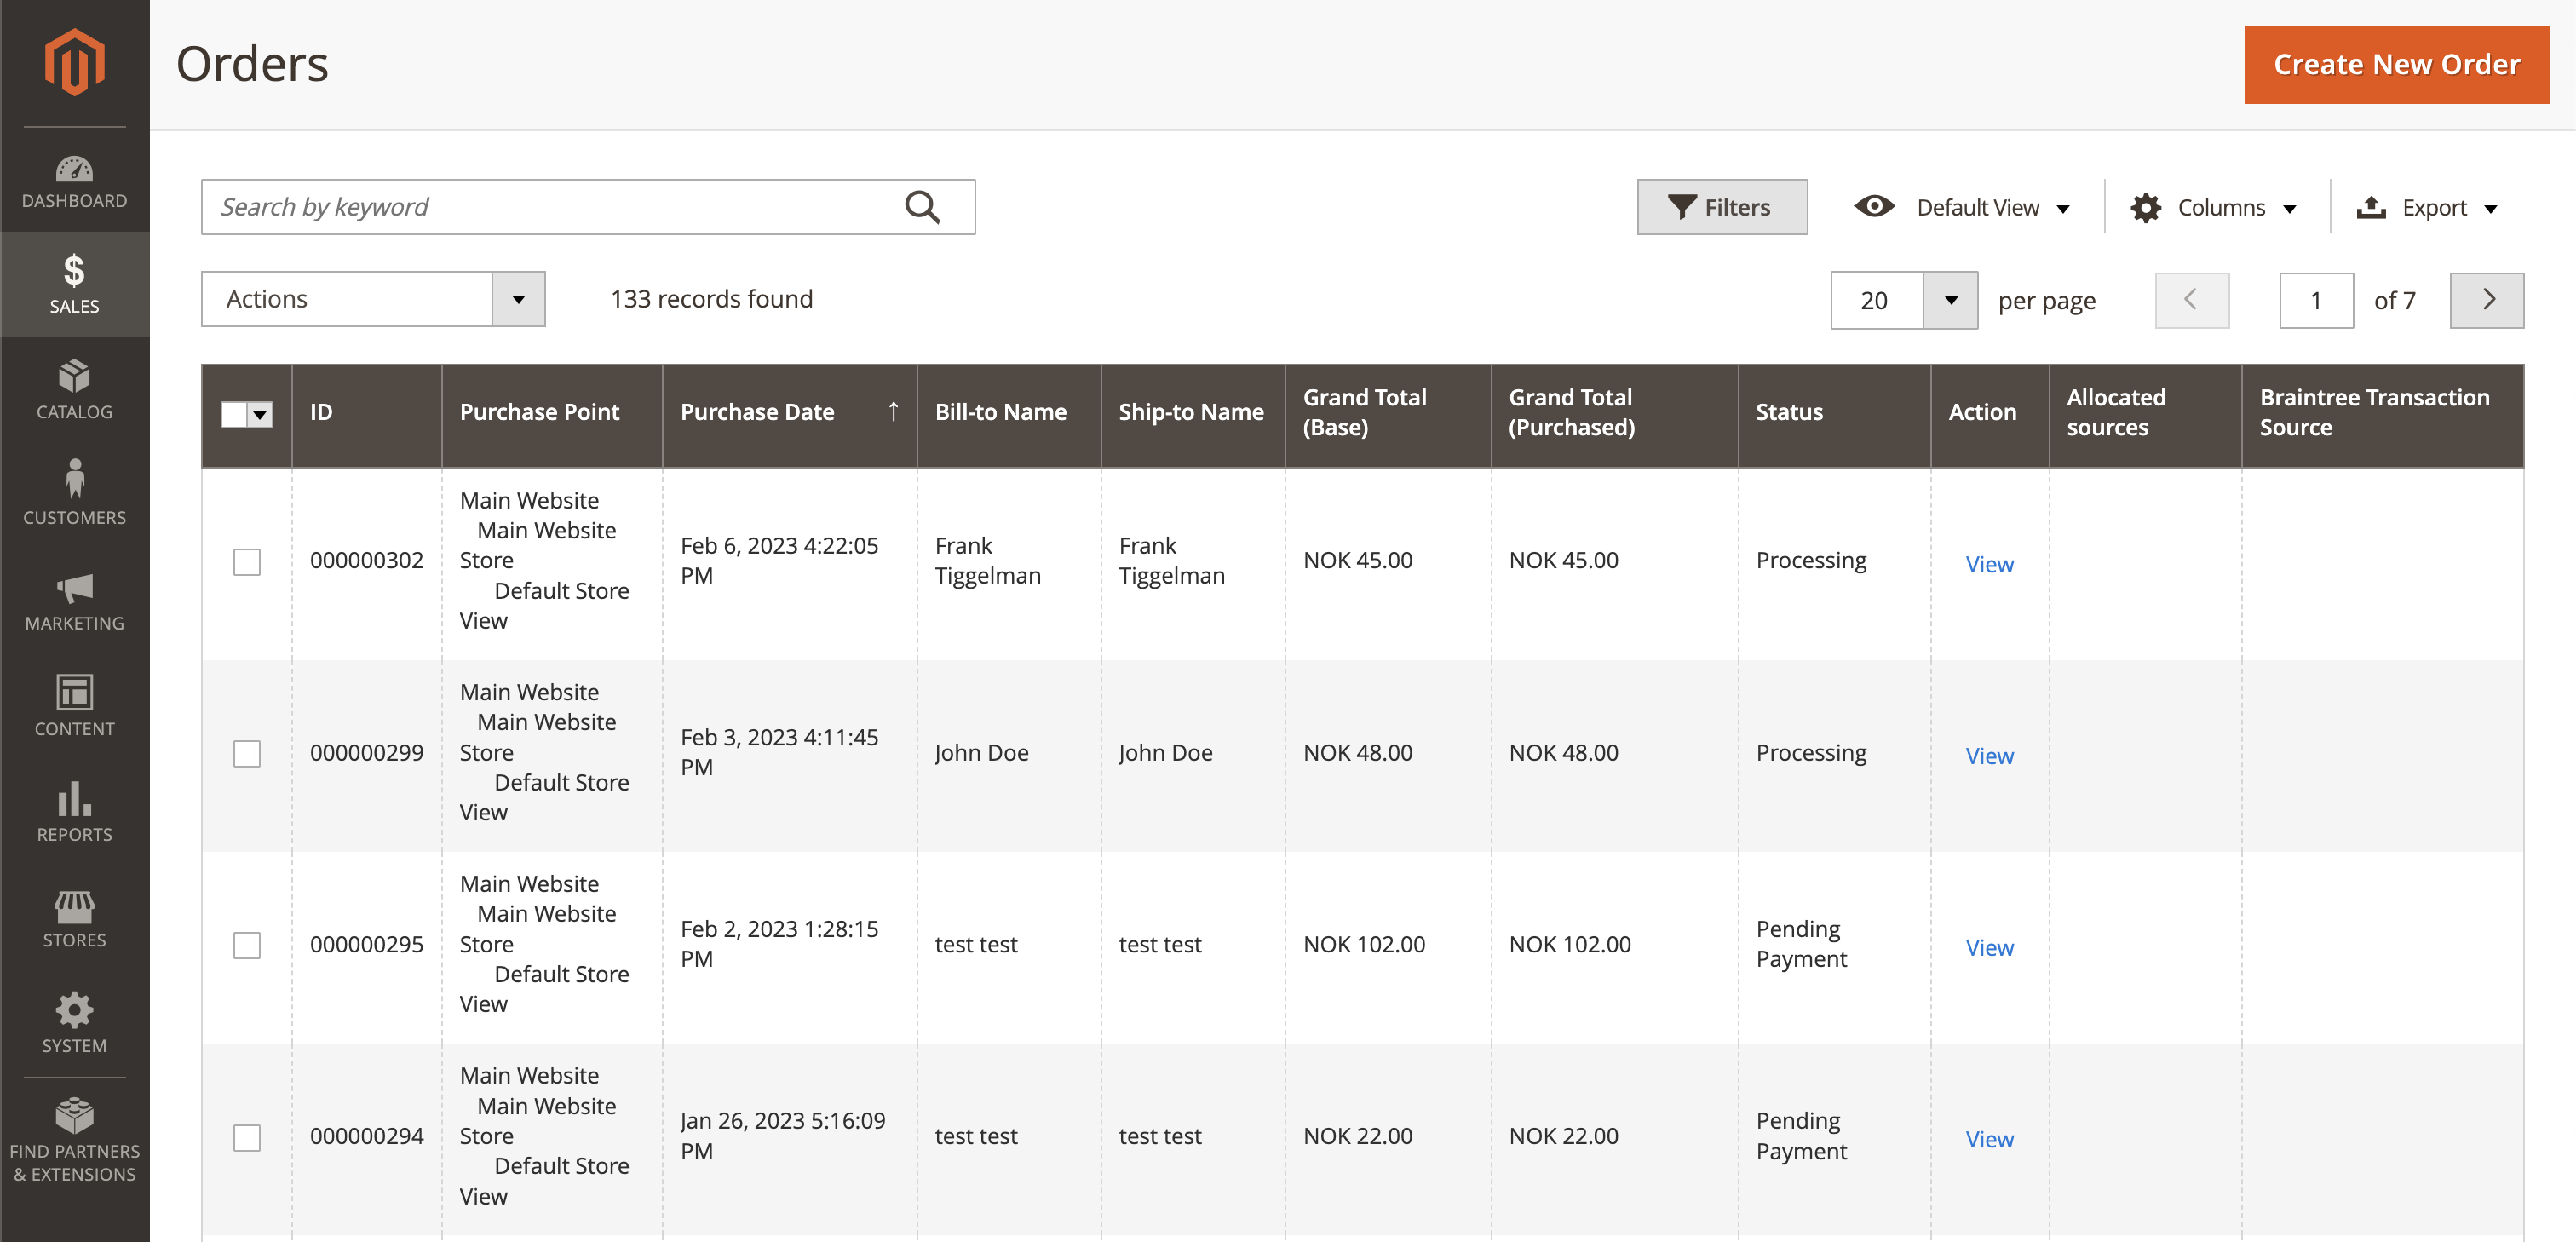
- Select an order with status Processing
- Click View to open the order details
- Go to the Invoices tab
- Click View on the invoice
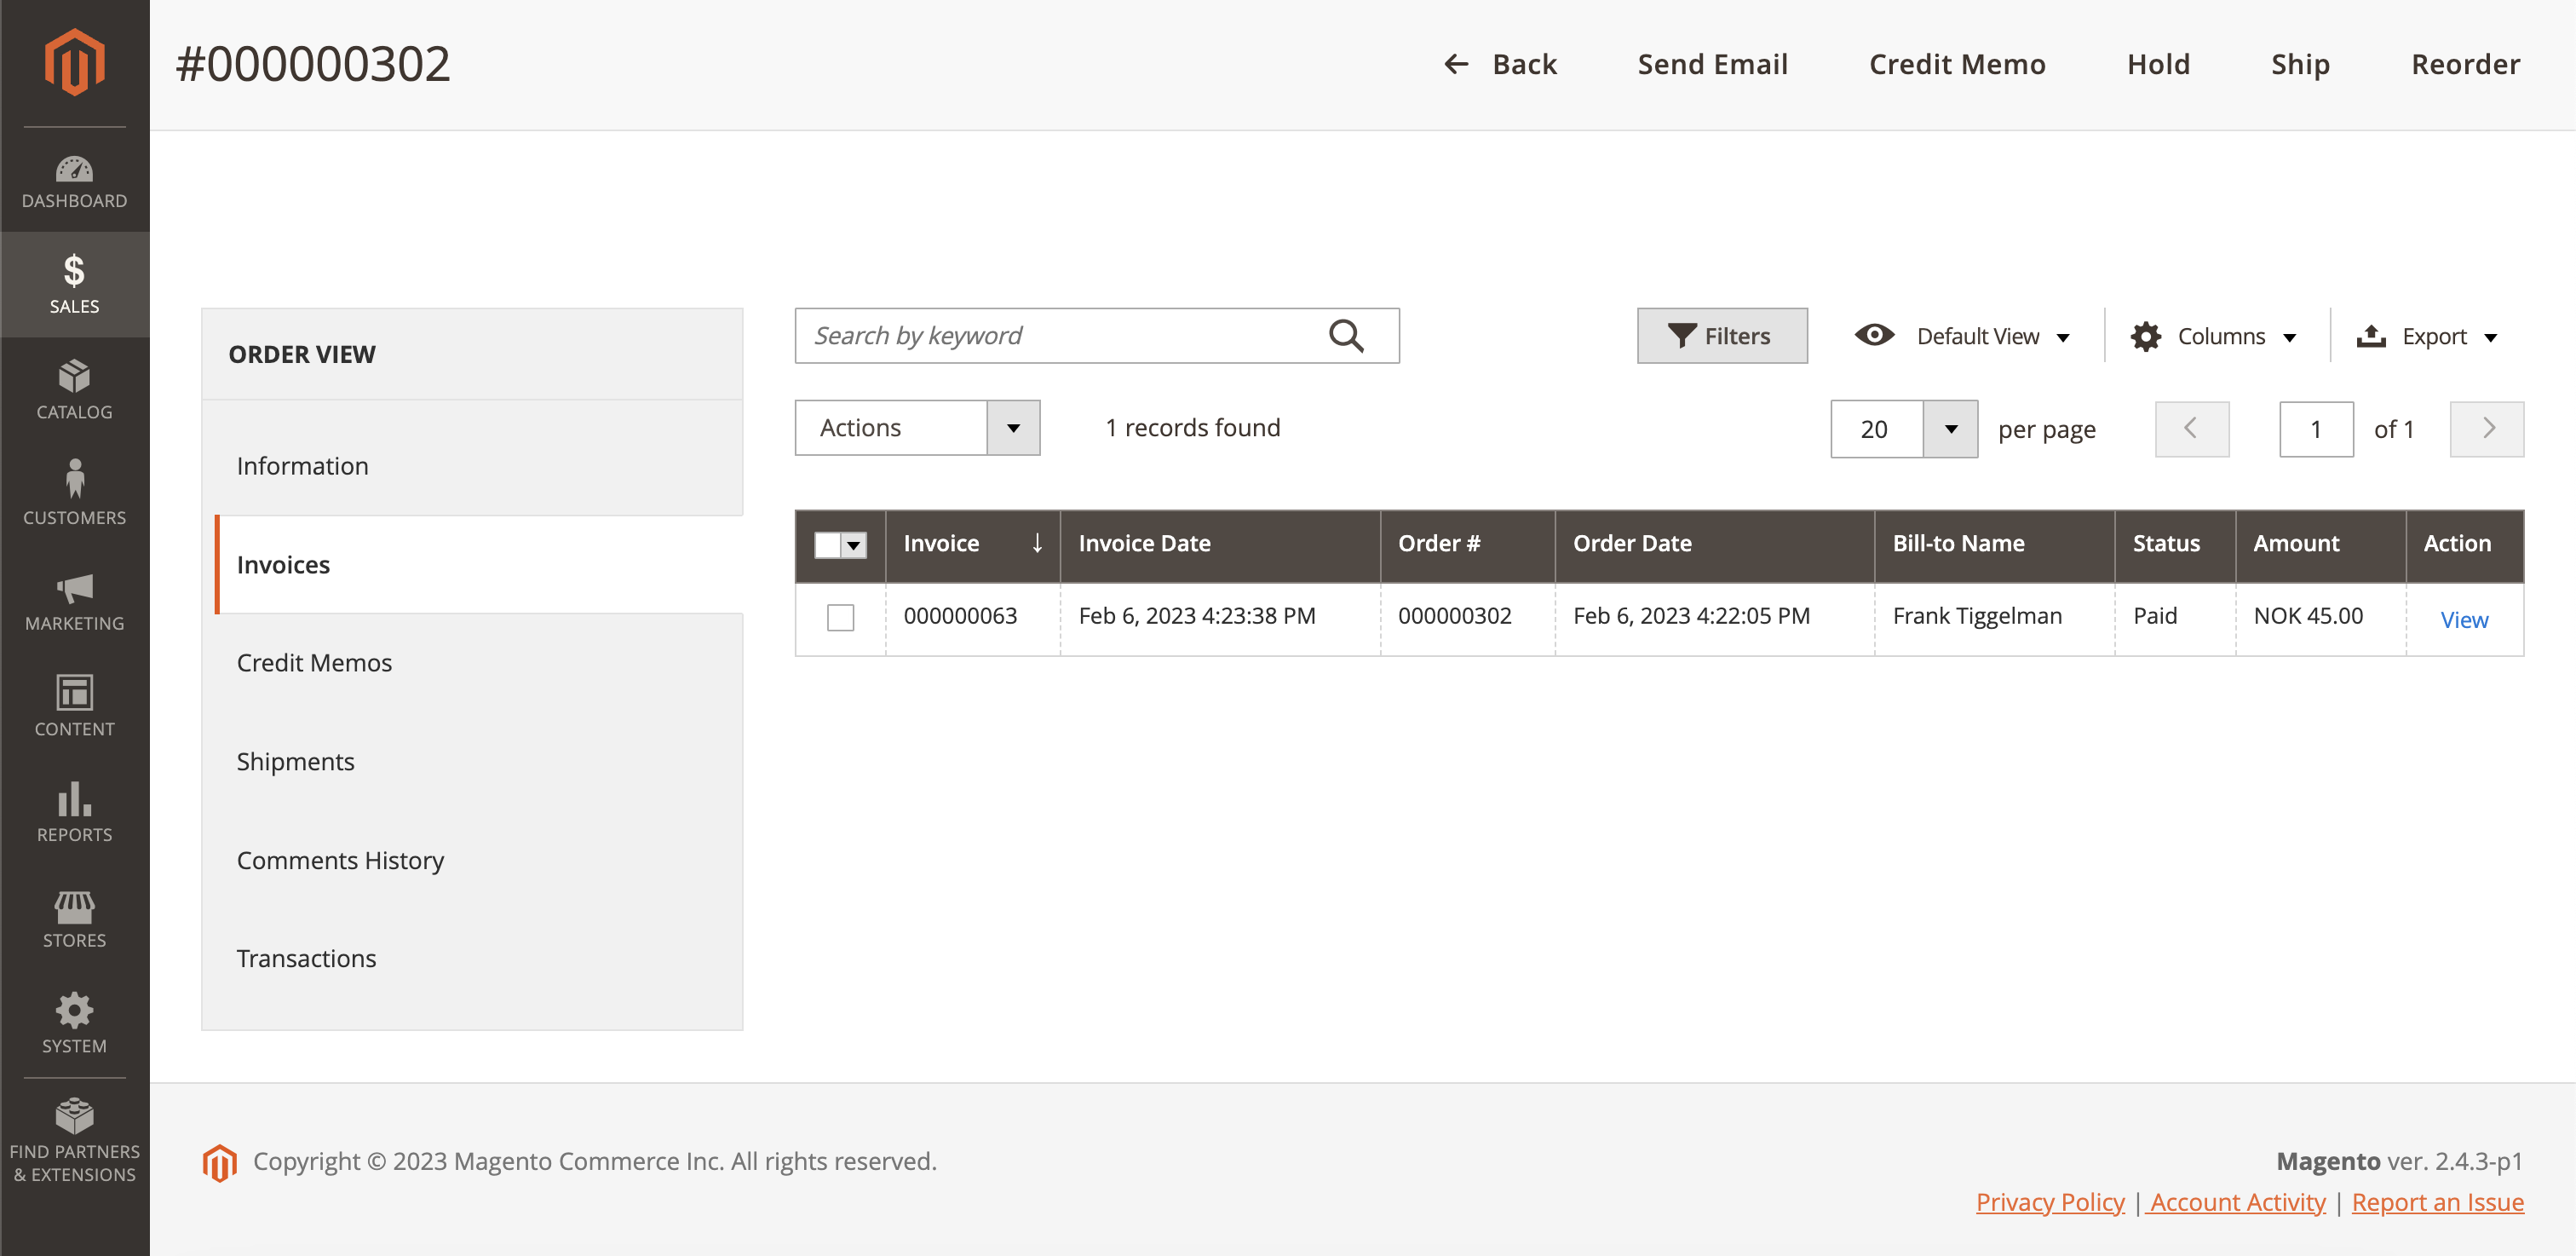
- Click Credit Memo to start the refund process
- Set the quantities for items you wish to refund
- Click Refund to issue the credit note
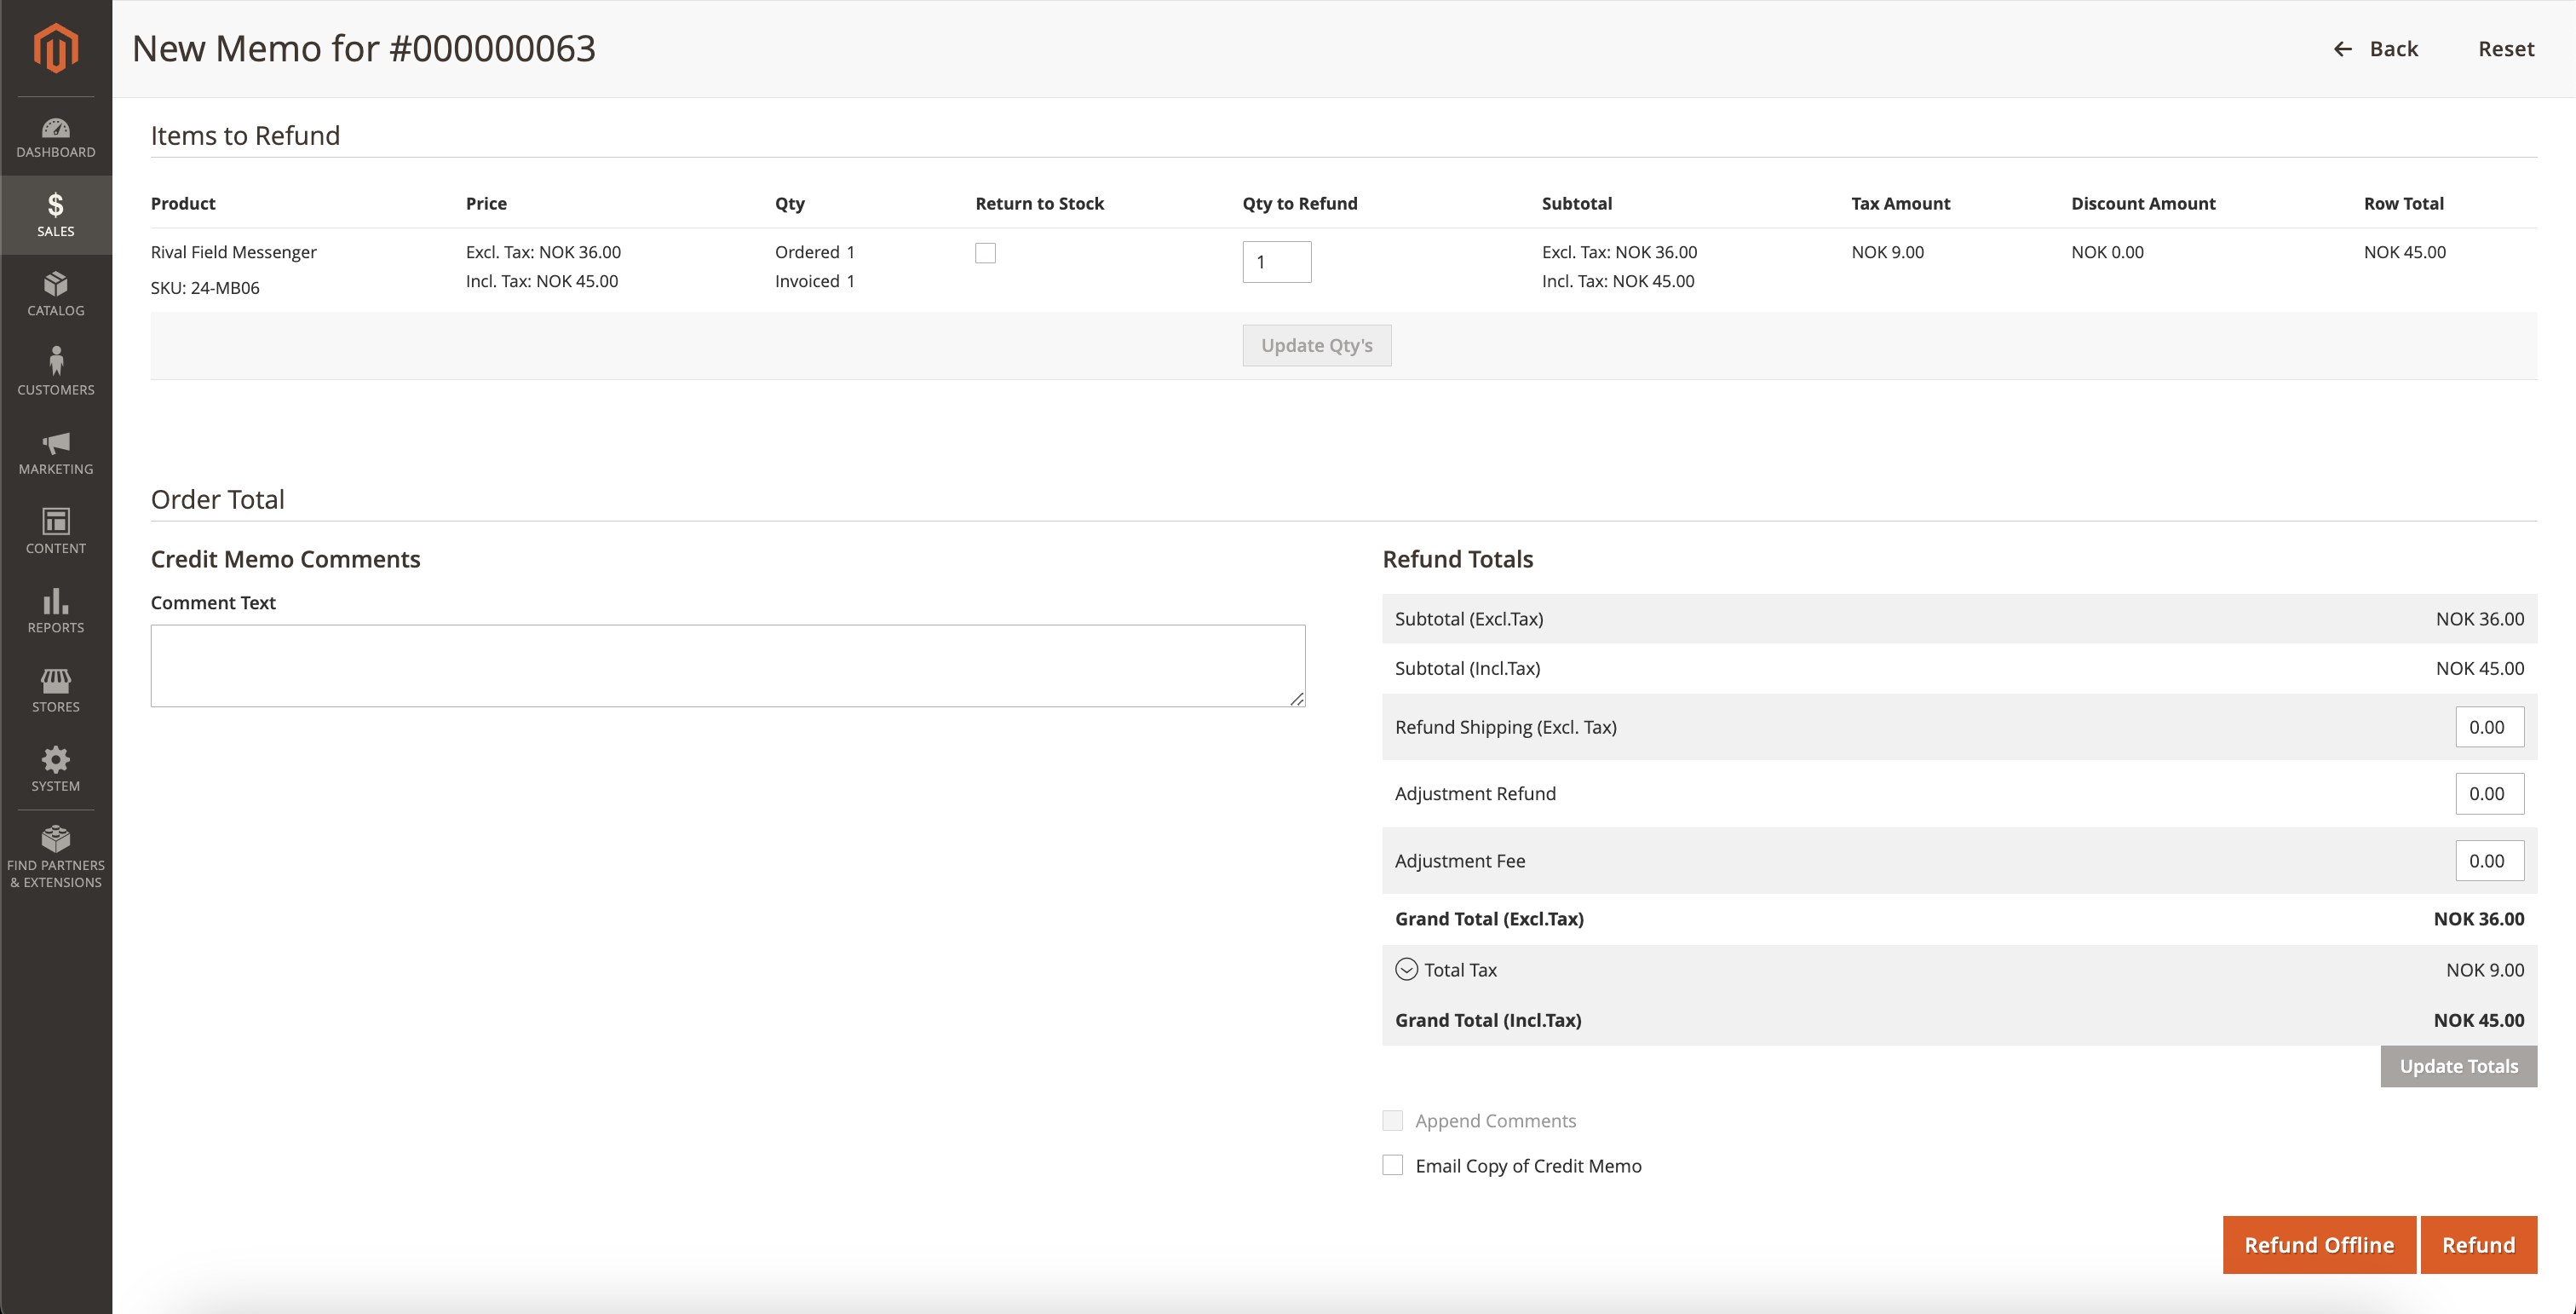
The buyer will automatically receive a credit note via email.
Need Help?
If you have questions or need assistance, please contact our support team.